Create a scheduled journey
This feature is available in Accelerator version 26.2.3. Contact your Customer Success Manager (CSM) for more information.
Overview
This article walks you through creating a journey in Accelerator from a blank canvas to activation. It covers every configuration step including entry setup, canvas tile configuration, scheduling, goal setting, preview and test, and managing the journey after it is live.
Before creating a journey, confirm all prerequisites are in place. For a complete checklist, see the Journeys prerequisites article.
Creating and editing journeys requires the Journey Author role with a Standard or Admin permission tier. For the full permissions breakdown, see Journey roles in the User roles documentation.
Step 1: Create a journey
Navigate to journeys
In the MessageGears navigation, select Campaigns → Journeys.
Create a new journey
Click Create journey
Journeys can also be duplicated to carry forwards existing journey configurations.
Enter journey details
In the creation form, provide the following:
- In the Name field, enter a name for the journey (required)
- In the Description field, enter a description (required)
- In the Brand field, select the brand workspace this journey belongs to (optional)
Click Create. The journey canvas opens.
Step 2: Configure the entry tile
The entry tile is the anchor of every journey. It defines which audience enters the journey, which user profile provides attributes to tiles, and how frequently Accelerator evaluates the journey.
Open the entry tile configuration
On the canvas, click the Entry tile to open the entry configuration panel.
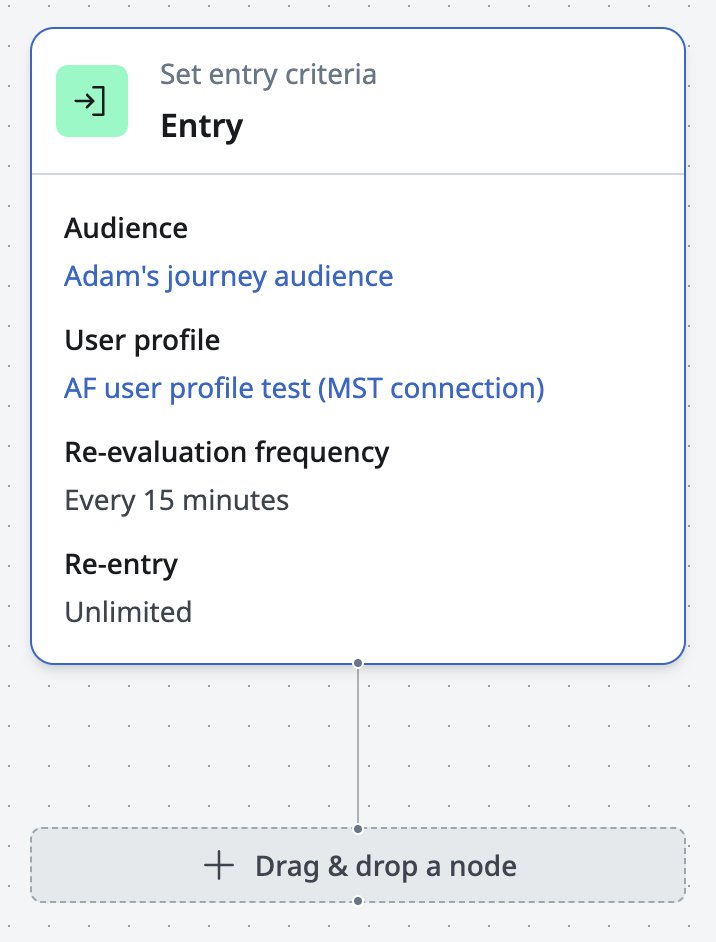
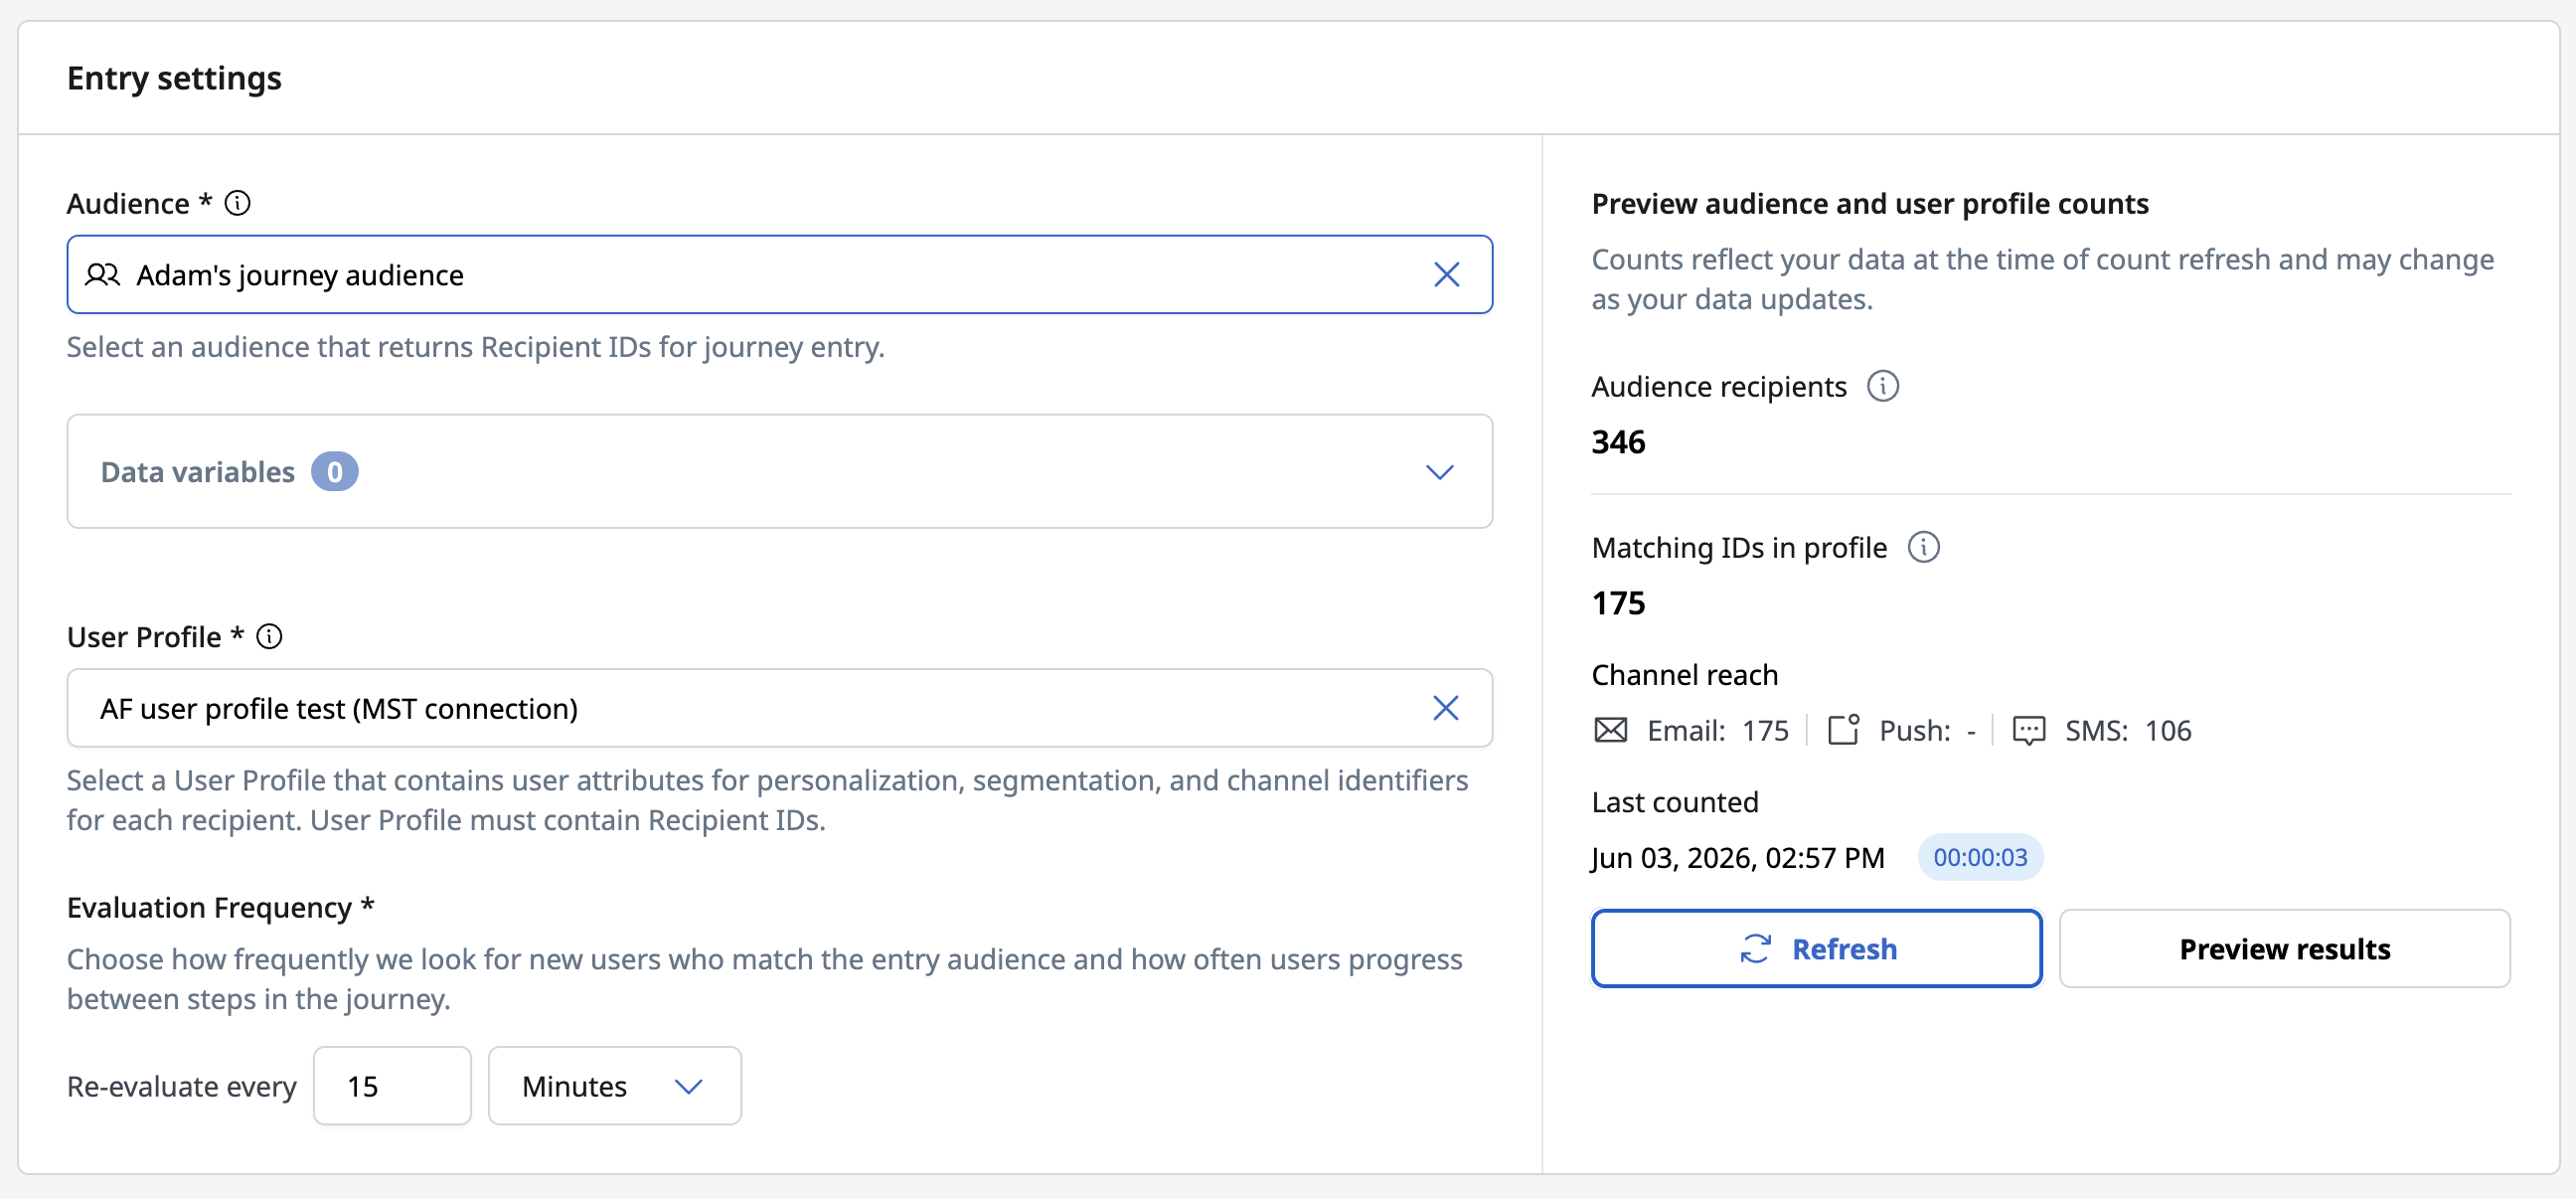
Select an audience and user profile
In the Audience field, select the audience that defines who enters this journey (required).
Only audiences that include a RecipientId column appear in this list. If your audience does not appear, confirm that it includes a RecipientId column in its *query and that it is using the same database connection as the *User Profile.
In the User profile field, select the user profile that provides attribute data to journey tiles (required).
The list is filtered to show only user profiles that share the same database connection as the selected audience. If the profile you need does not appear, confirm that it uses the same database connection as the audience.
The default user profile is selected automatically if one has been configured. You can change this selection.
Preview the eligible journey members
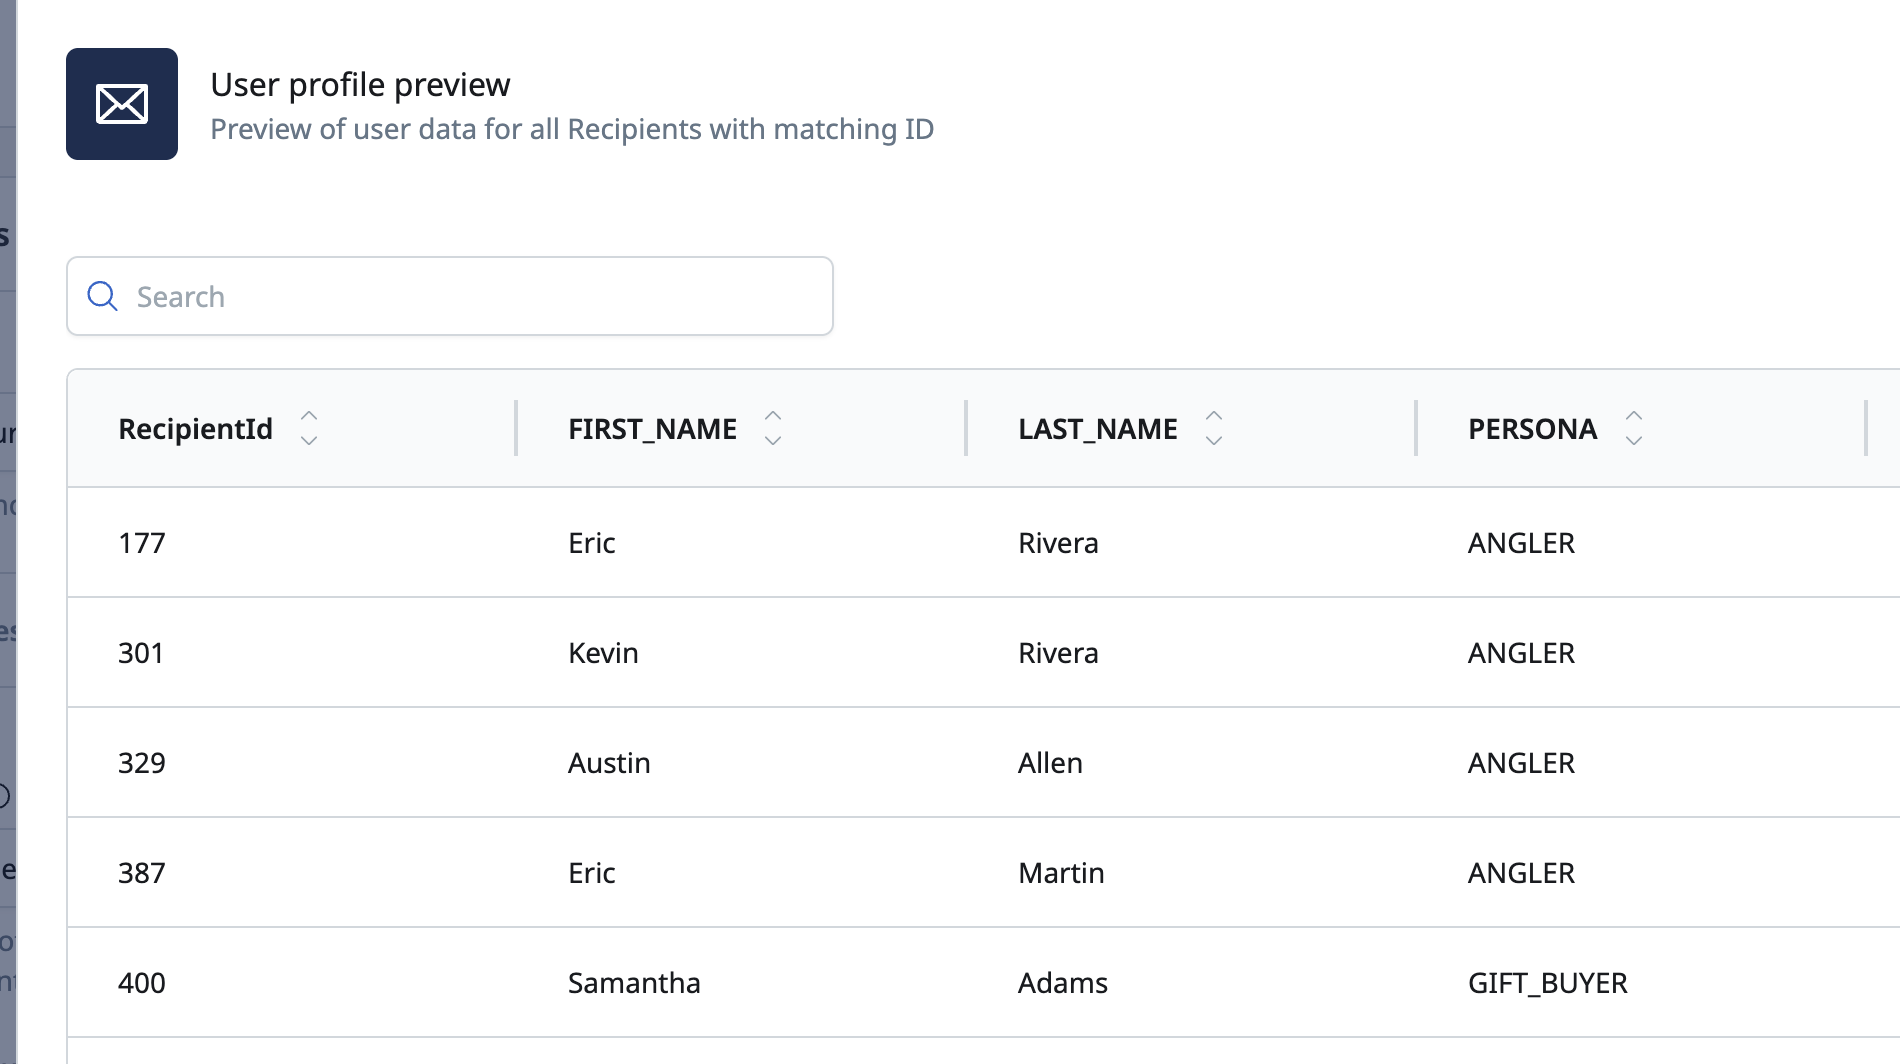
Click Preview to see a sample of how the audience and user profile join.
The preview shows:
- A sample of RecipientIds from the audience joined to their profile rows
- The count of audience members with no matching profile row (No profile count)
- The count of audience members missing channel identifiers (EmailAddress, SMSAddress, MobileUserId)
Review the No profile count before proceeding. A high count indicates a RecipientId mismatch between the audience and user profile queries.
Configure the evaluation frequency
In the Evaluation frequency section, configure how frequently Accelerator evaluates the journey:
| Option | Description |
|---|---|
| Minutes | Evaluates every X minute |
| Hours | Evaluates every X hours |
| Days | Evaluates every X days |
Configure re-entry rules (optional)
In the Re-entry section, define whether and how users can re-enter the journey after exiting:
| Option | Description |
|---|---|
| Unlimited | Users can re-enter the journey as many times as they qualify |
| No re-entry | Users who have previously entered and exited the journey cannot re-enter |
| Maximum of X re-entries | Users can re-enter up to a specified number of times total |
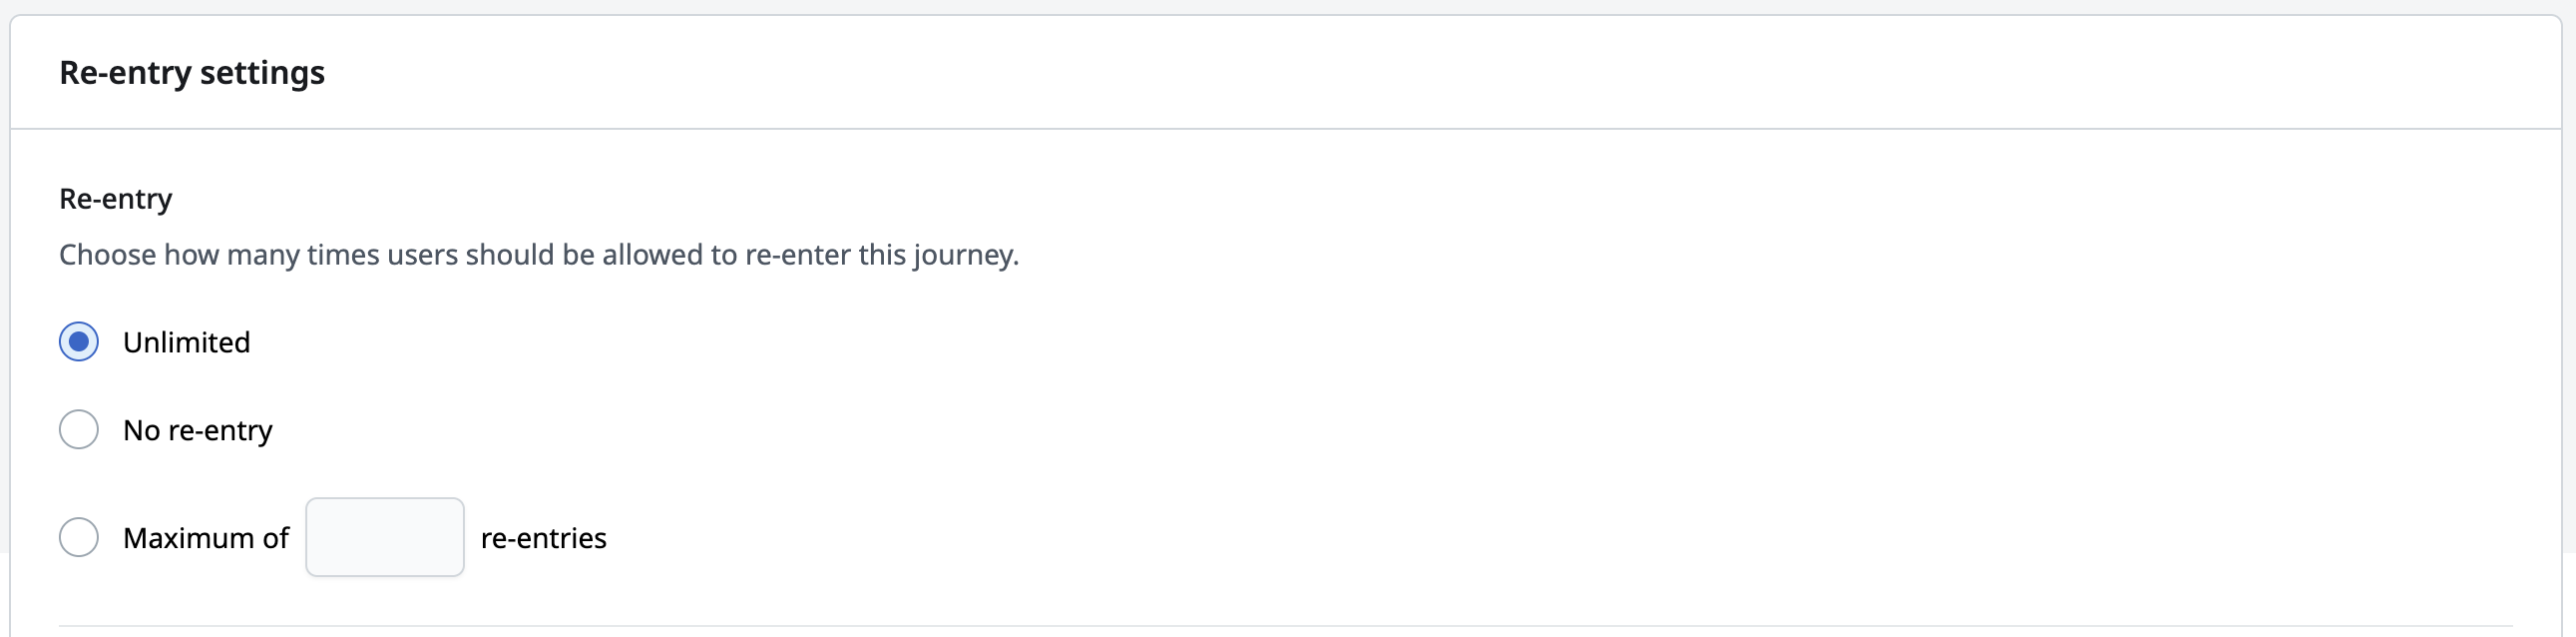
Minimum time between re-entries — enter the minimum time that must elapse between re-entries.

Click Save to close the entry configuration panel.
Step 3: Build the canvas
With the entry tile configured, you can add tiles to the canvas to build the journey flow.
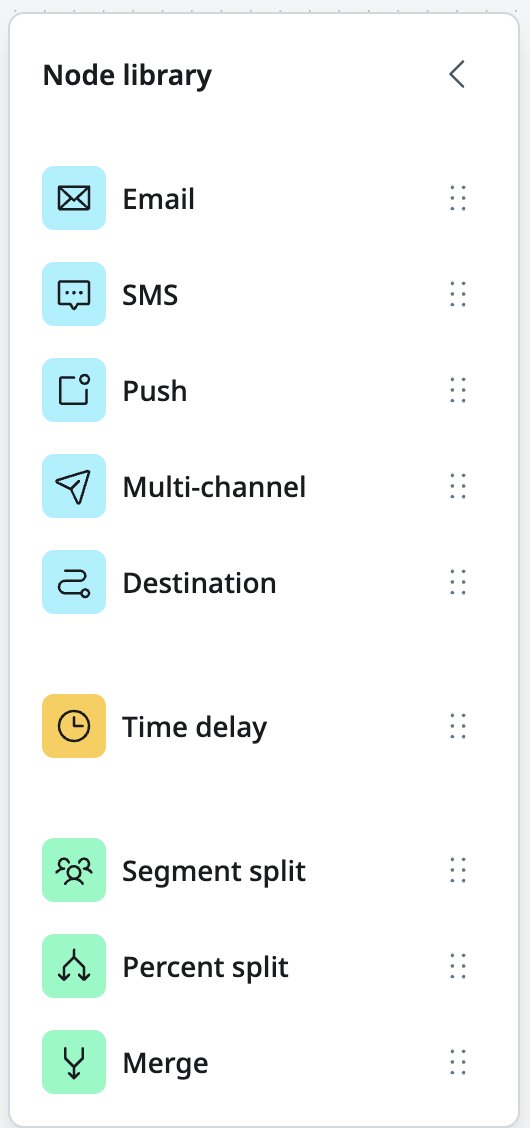
To add a tile, drag a tile type from the tile library onto the canvas.
| Tile | When to use |
|---|---|
| Send an email to users who reach this tile | |
| Push | Send a push notification to users who reach this tile |
| SMS | Send an SMS message to users who reach this tile |
| Multi-channel | Send a message across multiple channels simultaneously |
| Destination | Export users who reach this tile to one or more external destinations |
| Time delay | Pause users for a set amount of time before they advance |
| Segment split | Branch users into paths based on user profile attribute rules |
| Percent split | Branch users into paths by random percentage distribution |
| Merge | Rejoin multiple branches into a single downstream path |
For full configuration details for each tile type, see the Journey tiles article or click the links above for each tile type.
Step 4: Activate the journey
When you are ready to start evaluations, click Set live in the journey canvas header.
The Set journey live scheduling panel opens to configure the journey schedule. Populate the fields and click Set live to close the panel and activate the journey.
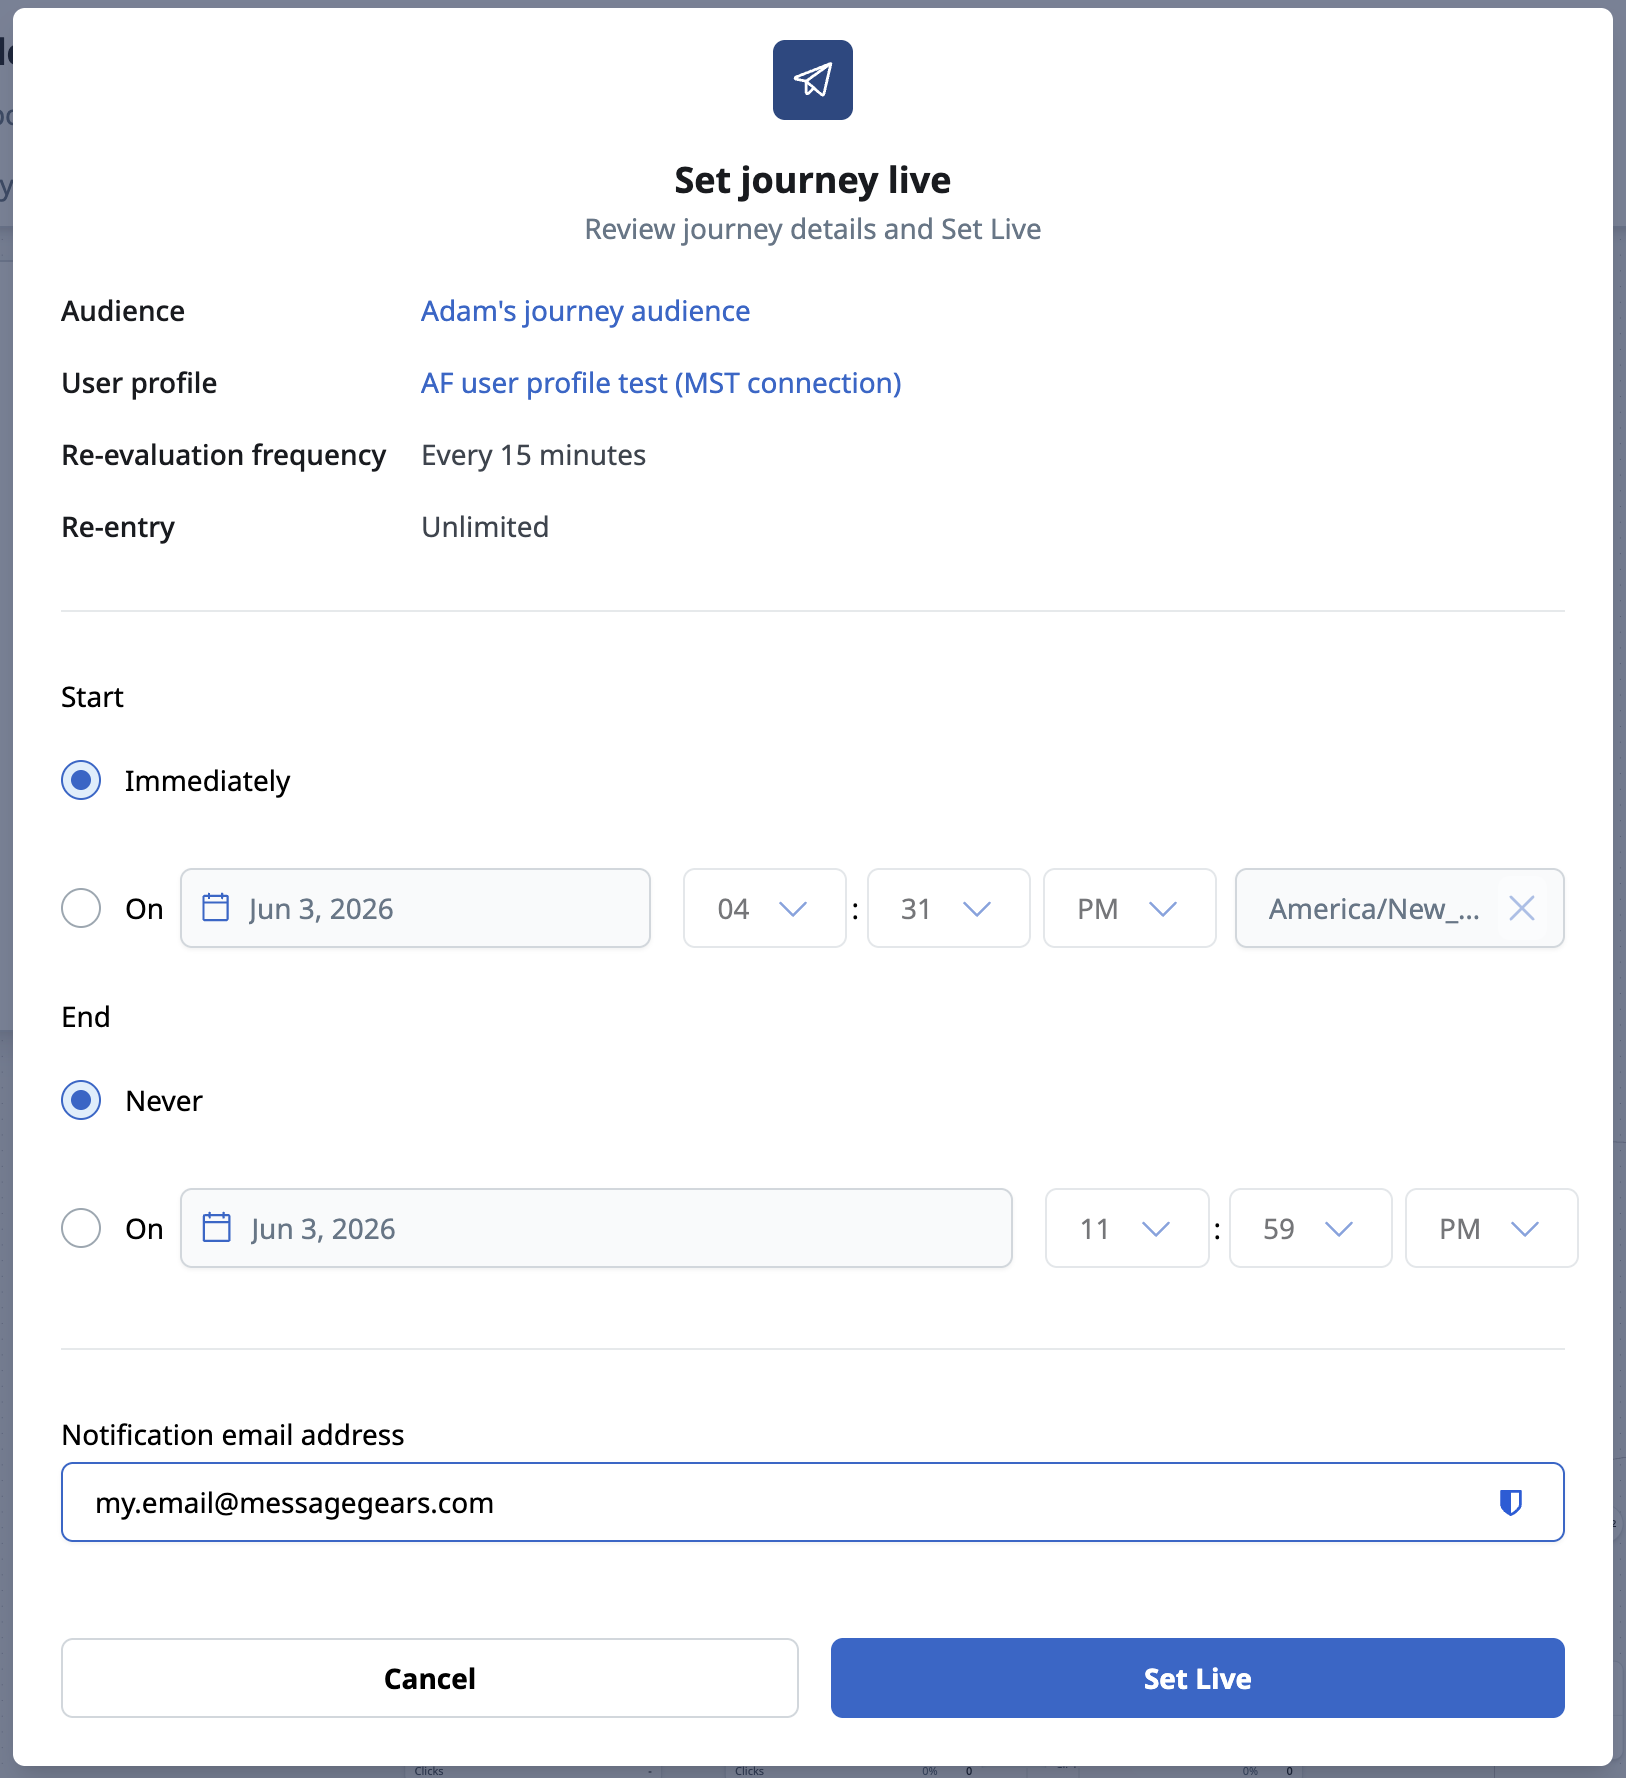
Accelerator validates the journey before activating:
- The entry tile must have an audience and user profile selected
- At least one tile must follow the entry tile
- All tile configurations must be complete (no required fields left empty)
If validation passes, the journey status changes to Live and the first evaluation runs at the next scheduled interval.

Other journey statuses
Edit a live journey
To change a live journey without pausing it, create a draft branch. You edit the draft while the live journey keeps running, then promote the draft to replace the live version. For more information, see Edit a live journey with a draft branch.
Pause a journey
To stop evaluations without ending the journey lifecycle, click Pause in the canvas header.
Pausing halts the evaluation cycle. Users currently in the journey remain in their tile positions — they do not exit. Evaluations resume when you reactivate the journey.

End a journey
Ending a journey moves the journey to the Finished status. This status is permanent and the journey cannot be restarted or rescheduled without creating a new journey.
To end the journey lifecycle, click End in the canvas header.
Ending the journey lifecycle will stop evaluations permanently.

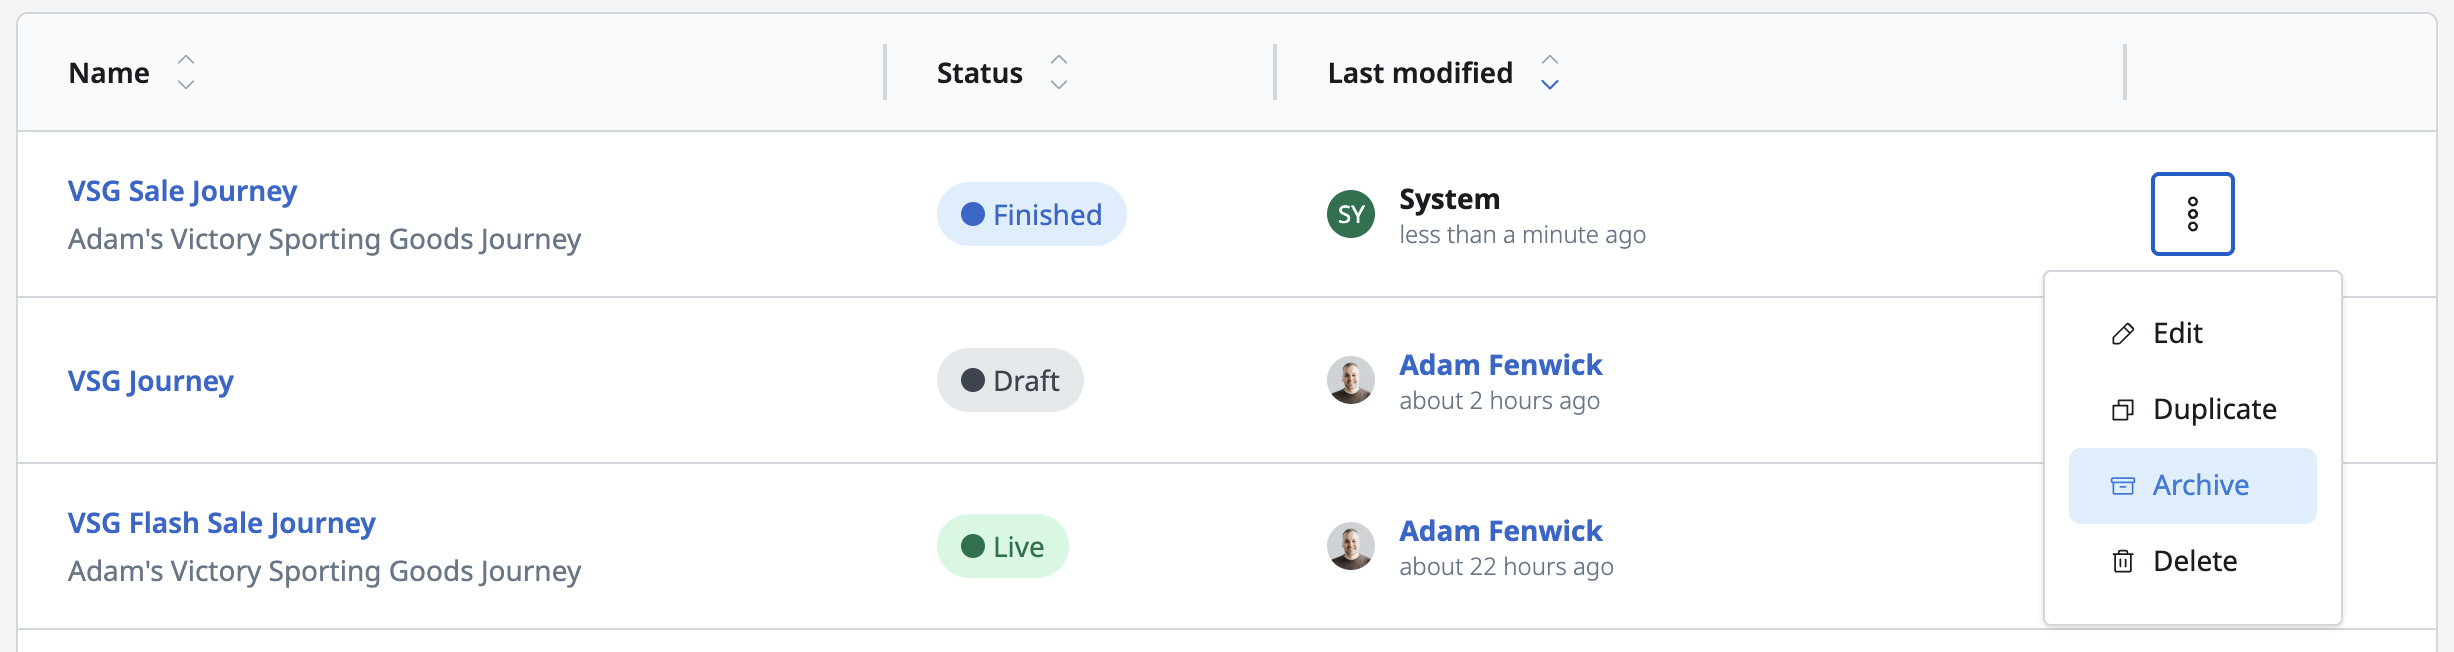
Archive a journey
To remove a journey from the default list view, select Archive from the overflow menu in the canvas header or in the journey list row.
Archived journeys are not deleted. They can be viewed by enabling the Show archived toggle on the journeys list page.
Only journeys in the Draft and Finished statuses can be archived.
Step 5: Assign conversion events (optional)
Managed Events and Event Syncs must be configured before you can assign conversion events to a journey. See the Event setup for conversion reporting documentation for more information.
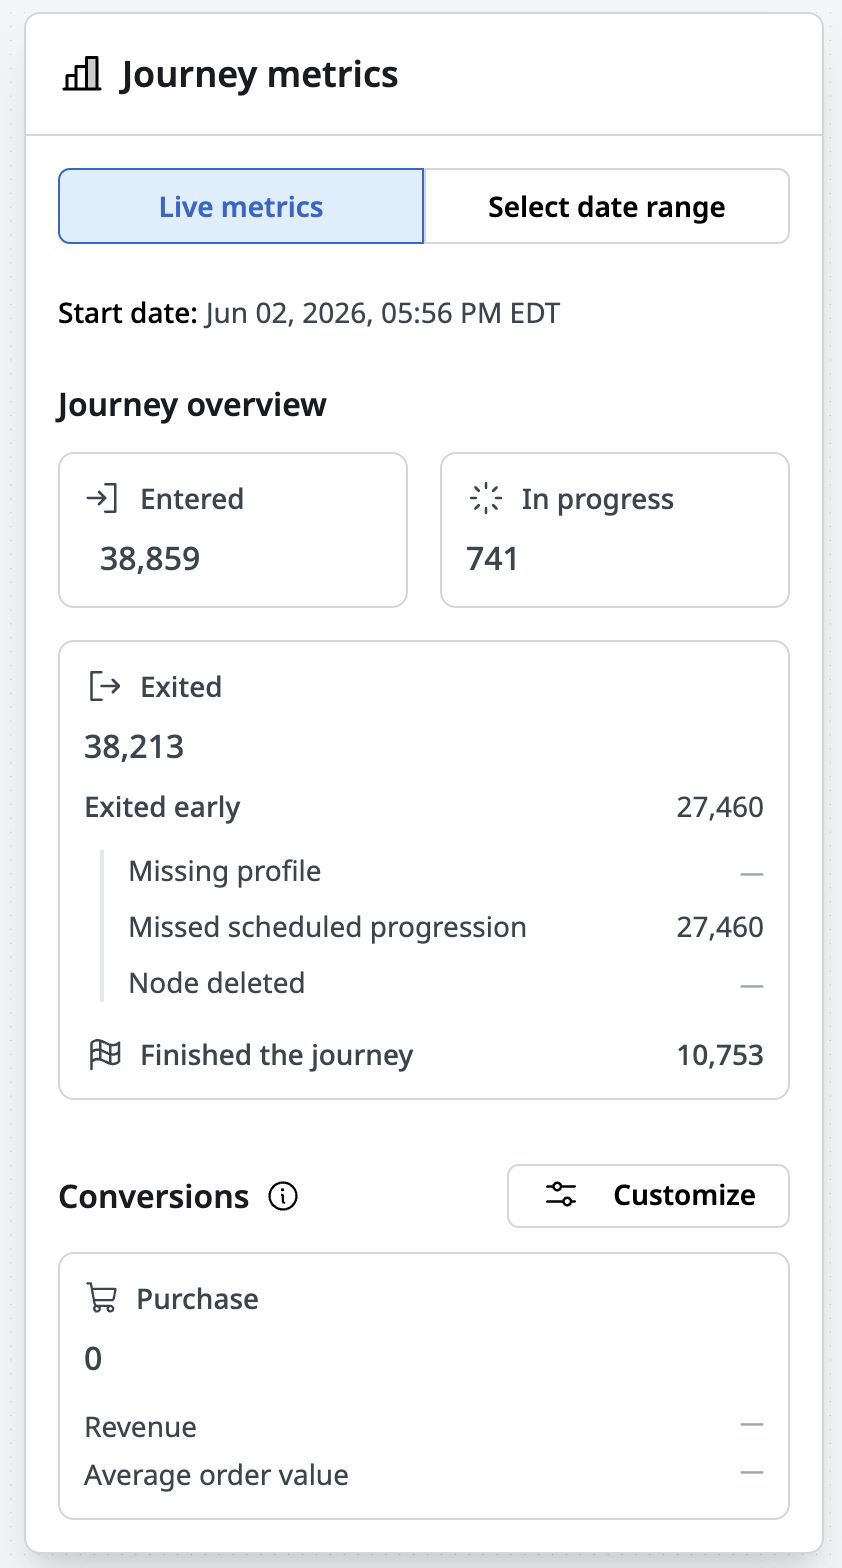
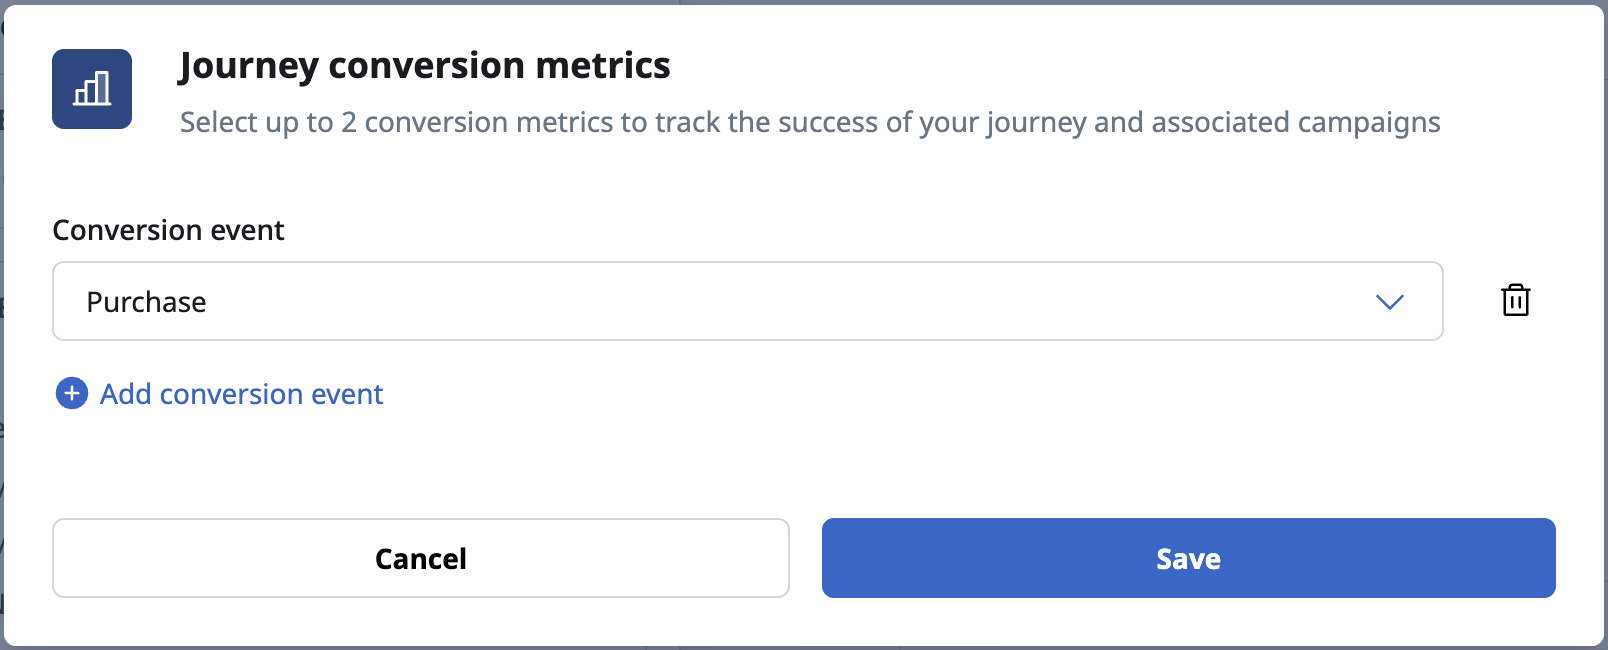
Conversion events let you measure how many times a specific event occurs for members of this journey. You can configure up to two conversion events per journey. Conversion metrics populate after the journey has been evaluated at least once and events have been recorded.
- Open the journey and navigate to the Journey Metrics panel on the active canvas.
- Click Customize under Conversions to open the conversion event selection panel.
- Select up to two events from the list.
- Click Save to close the panel and save the events.
To remove a conversion event, click the Trash icon next to the event name.
Step 6: View journey analytics
For more details, visit the Journey analytics article.
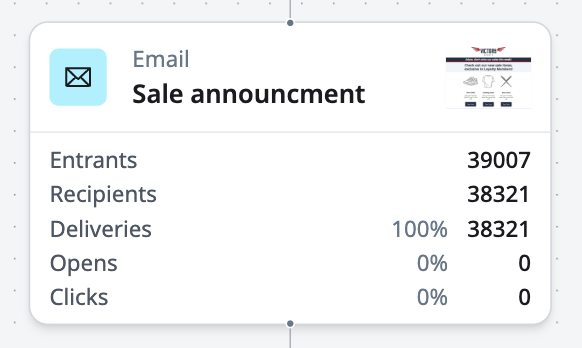
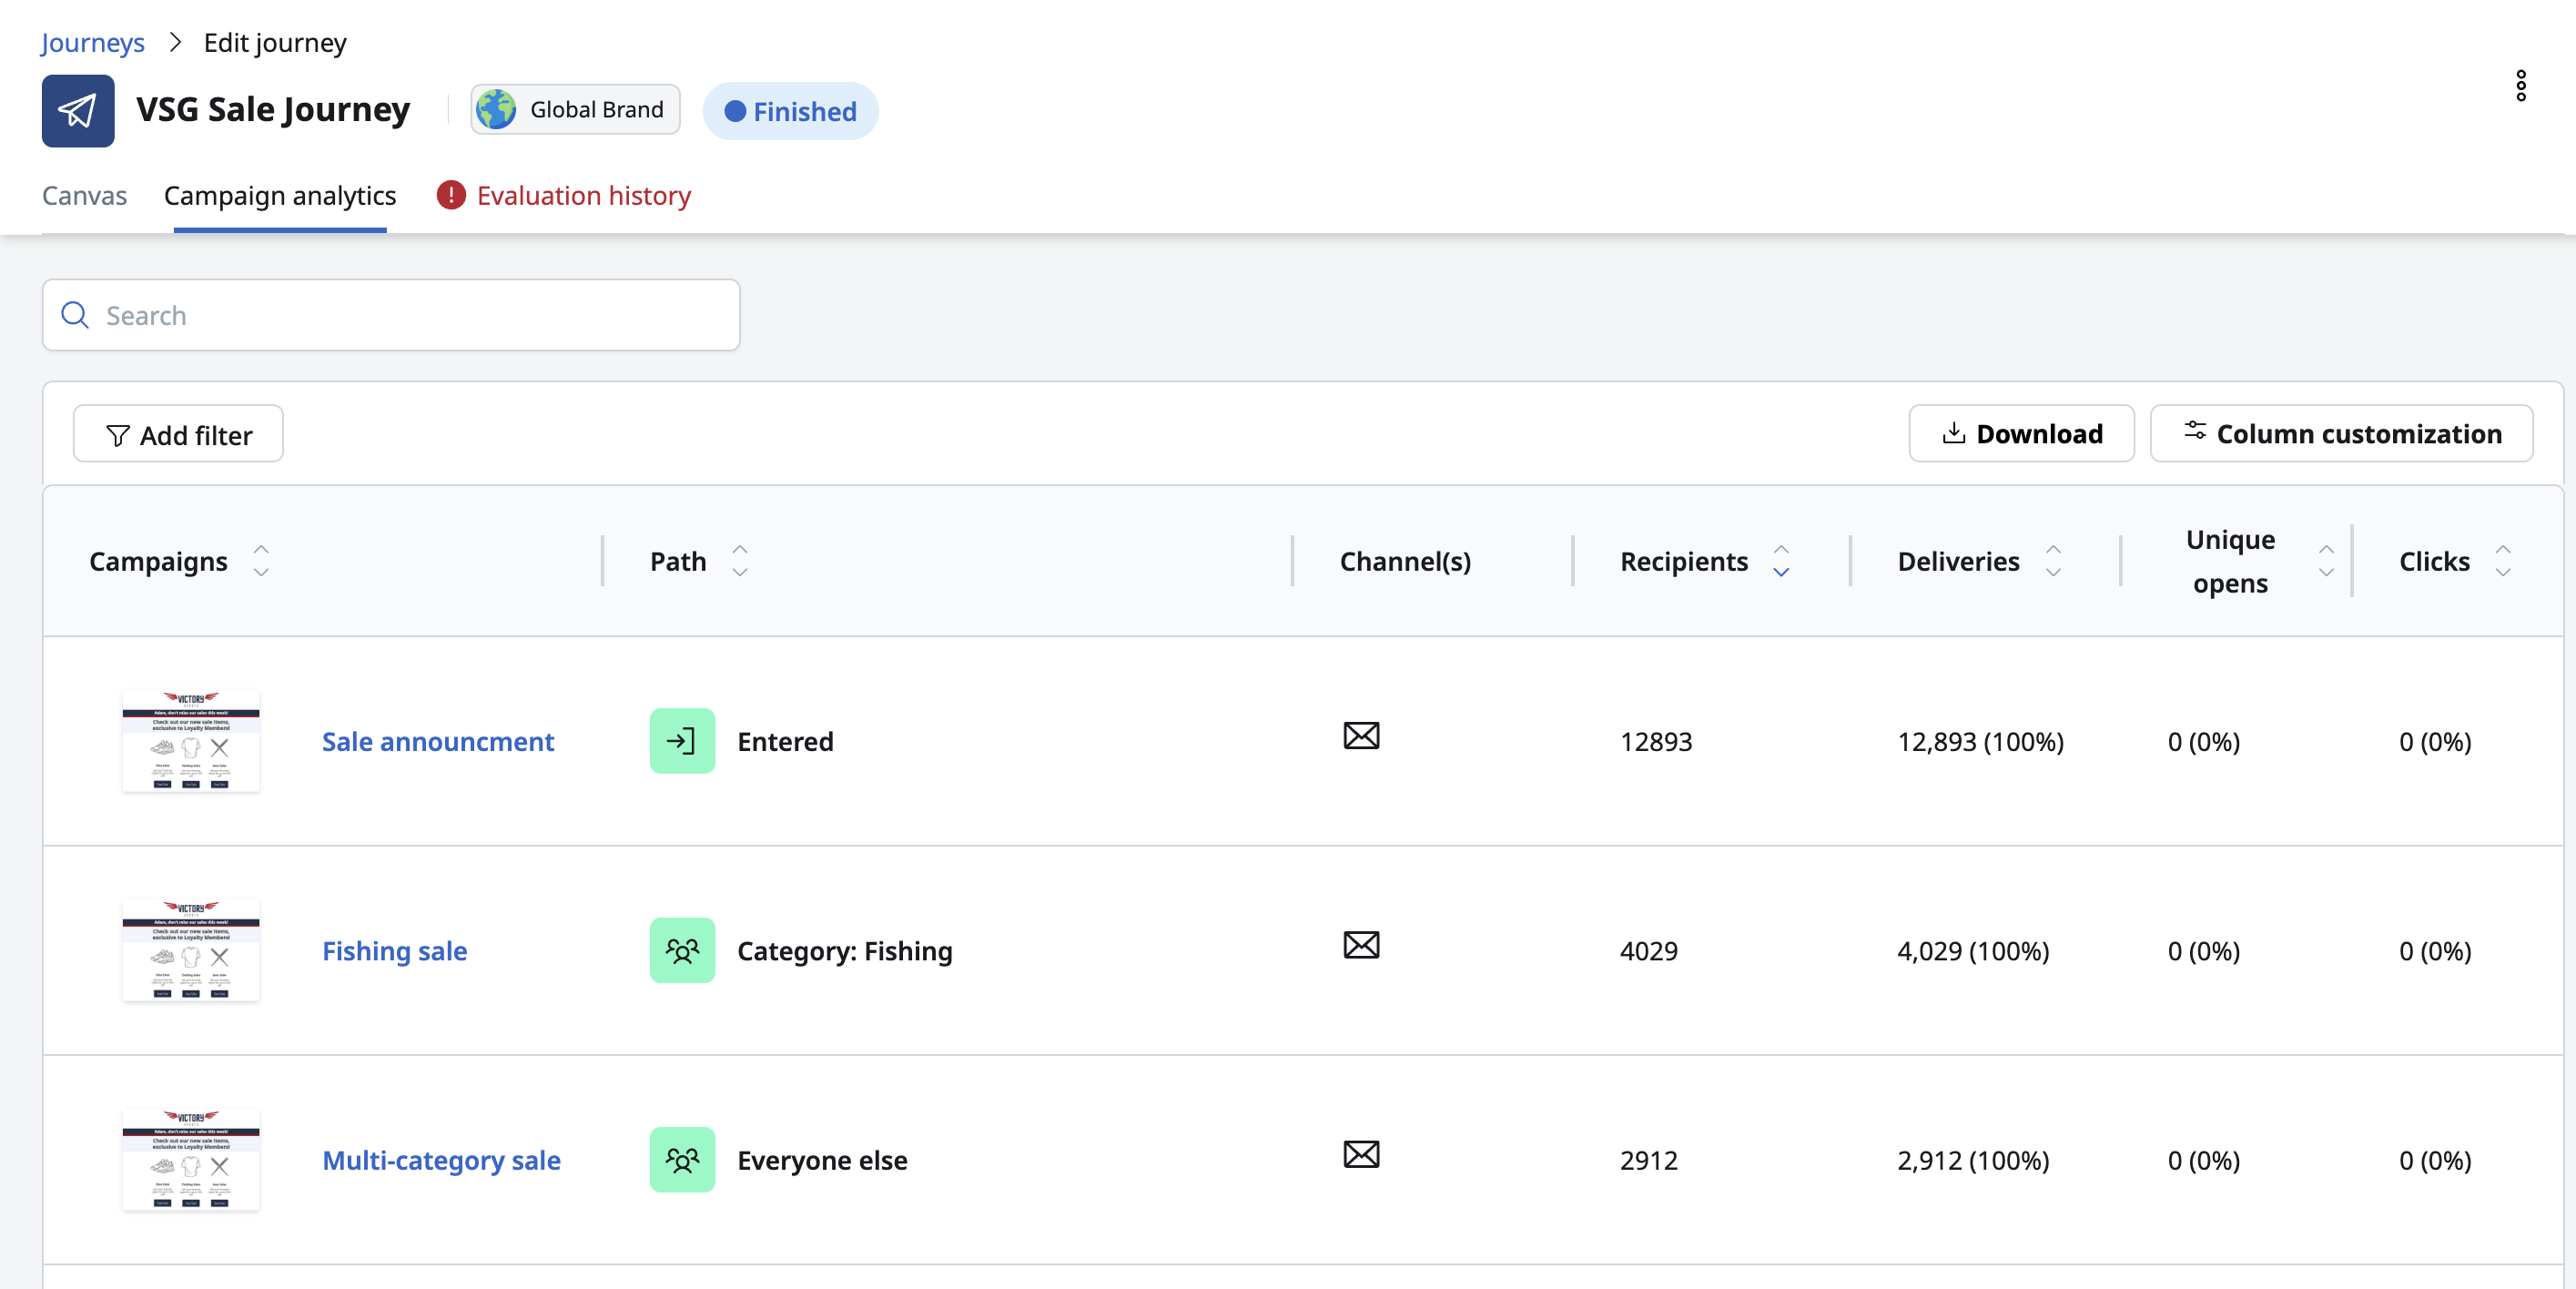
When a journey is Active or Finished, a journey metrics panel, tile metrics, and campaign analytics tab are available.
The journey metrics panel displays metrics for the full journey. The tile metrics panel displays metrics for each individual tile. The campaign analytics tab provides a detailed breakdown of messaging performance across all activation tiles.