Journey tiles
This feature is available in Accelerator version 26.2.3. Contact your Customer Success Manager (CSM) for more information.
Overview
This article describes each journey tile type and how to configure it. For the full walkthrough of building a journey from scratch, see Create a scheduled journey.
To add a tile, drag a tile type from the tile library onto the canvas.
| Tile | When to use |
|---|---|
| Send an email to users who reach this tile | |
| Push | Send a push notification to users who reach this tile |
| SMS | Send an SMS message to users who reach this tile |
| Multi-channel | Send messages across multiple channels in a single step |
| Destination | Export users who reach this tile to one or more external destinations |
| Time delay | Pause users for a set amount of time before they advance |
| Segment split | Branch users into paths based on user profile attribute rules |
| Percent split | Branch users into paths based on randomized percentage splits |
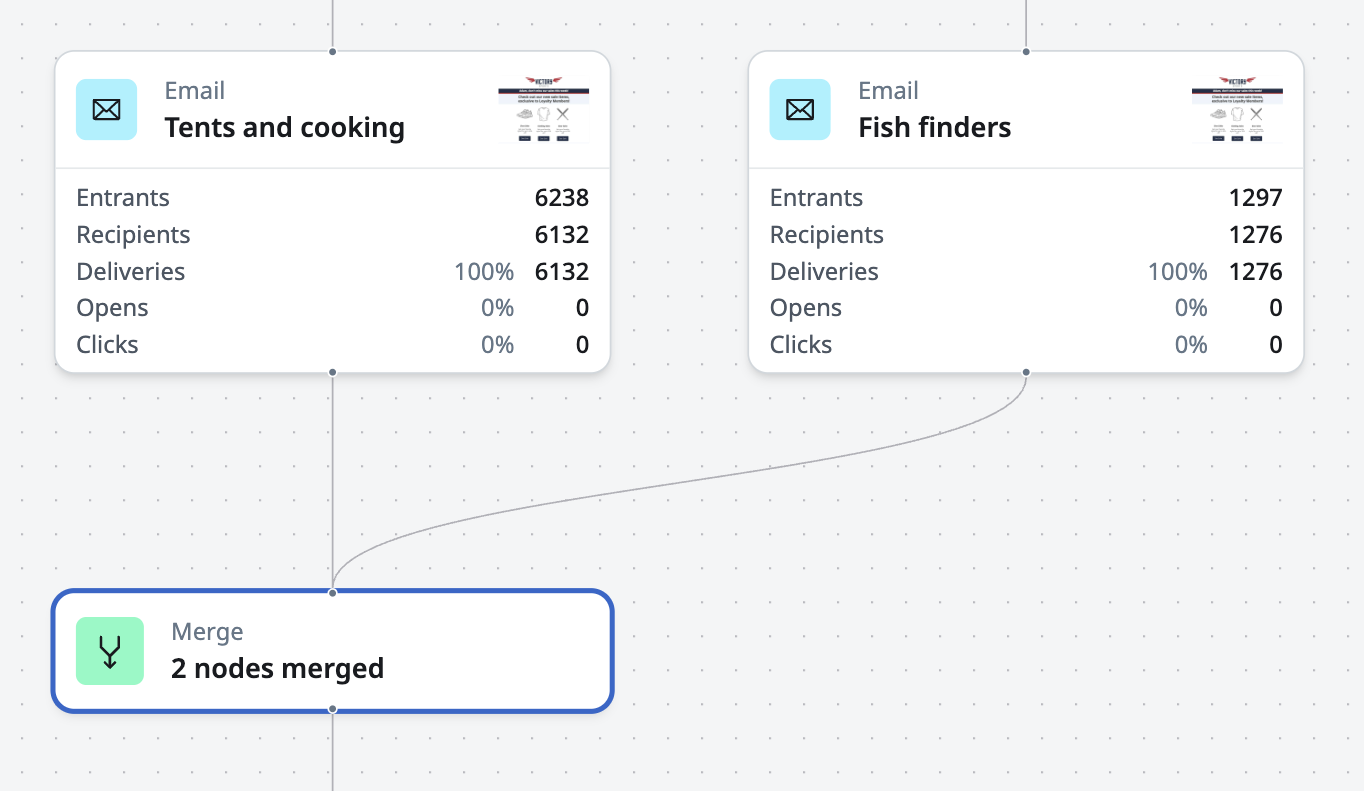
| Merge | Rejoin multiple branches into a single downstream path |
Email tile
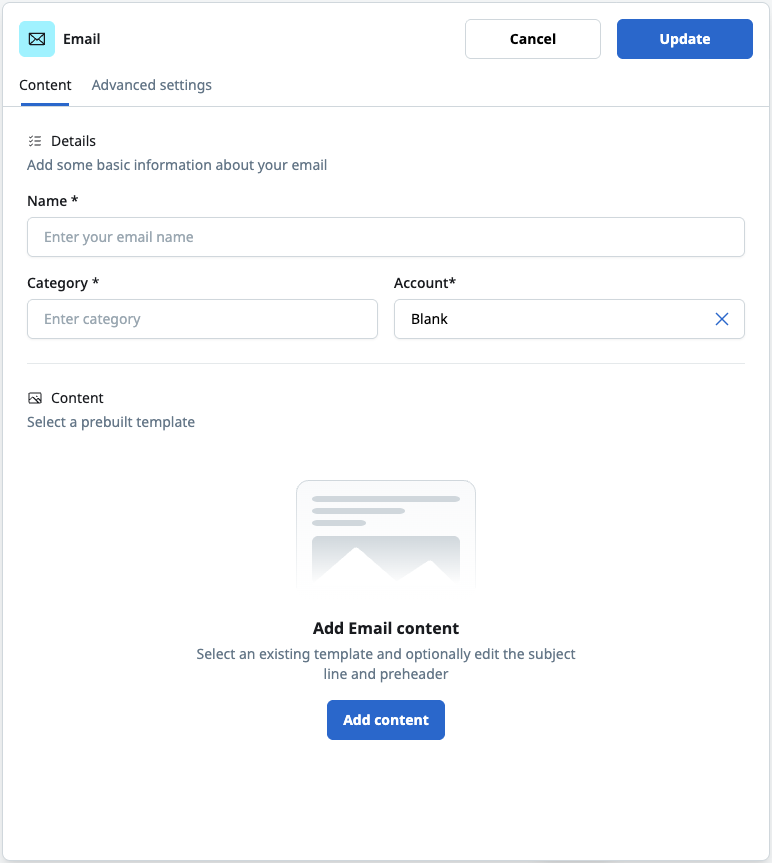
Click an Email tile to open its configuration panel.
Tile settings
- In the Tile name field, enter a name for this tile (required). The tile name appears in the canvas and in the activation analytics modal path column.
- In the Category field, enter a category string to append to message events.
- In the Account field, select the sending account to send from. If the selected template has a sending profile, the account is overridden by the template's sending profile and this field becomes read-only.
- In the Content field, select an email template.
Content template
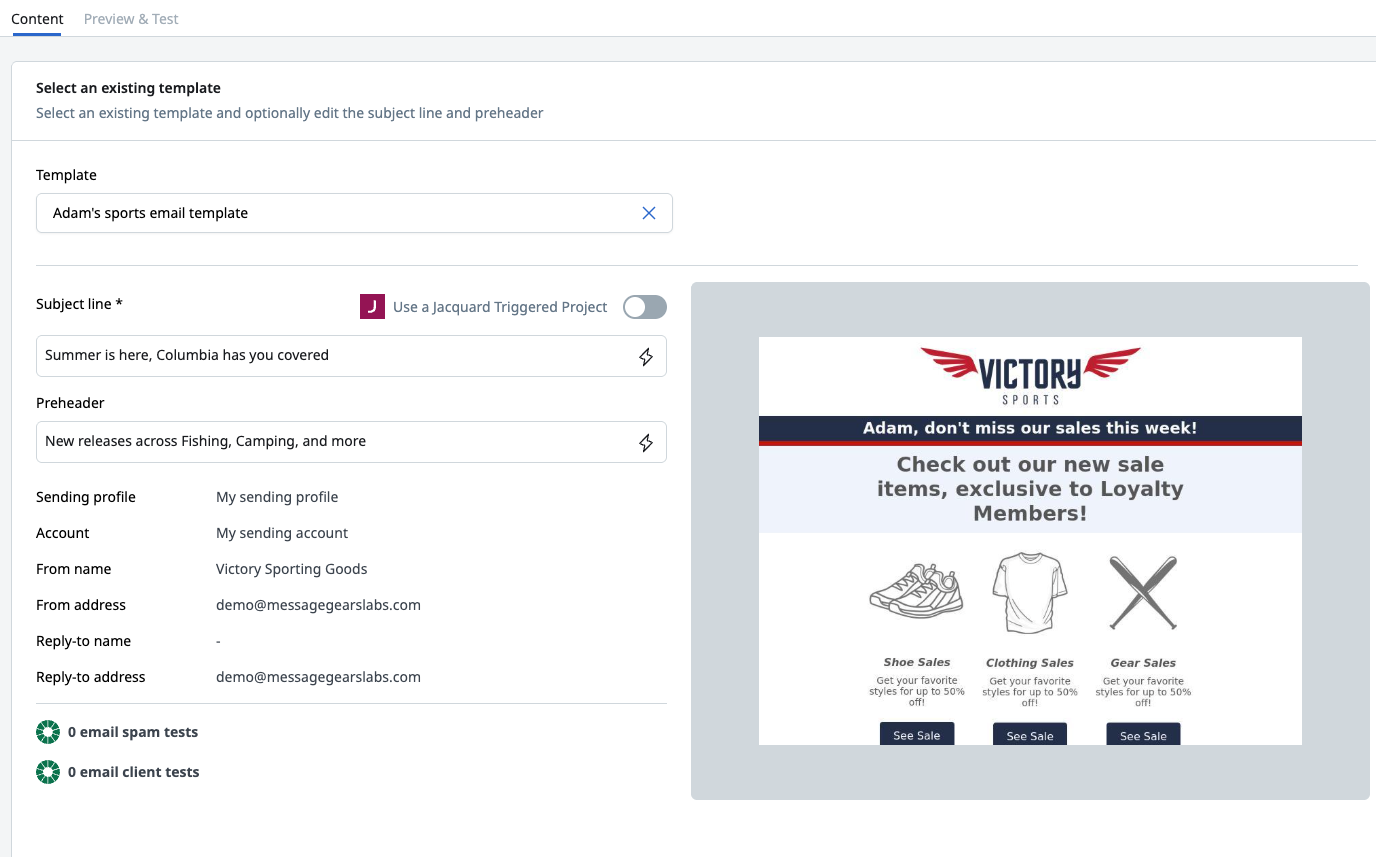
The Content tab displays an unrendered preview of the selected template. This preview shows the template structure and layout without substituting recipient data.
Subject line override (optional)
If you want to override the template's default subject line for this tile:
- Expand the Subject line section
- Enter a custom subject line
- Use the personalization helper to inject user profile attributes into the subject line
Preheader override (optional)
Expand the Preheader section to override the template's default preheader text. The personalization helper is available here as well.
Preview & Test tab
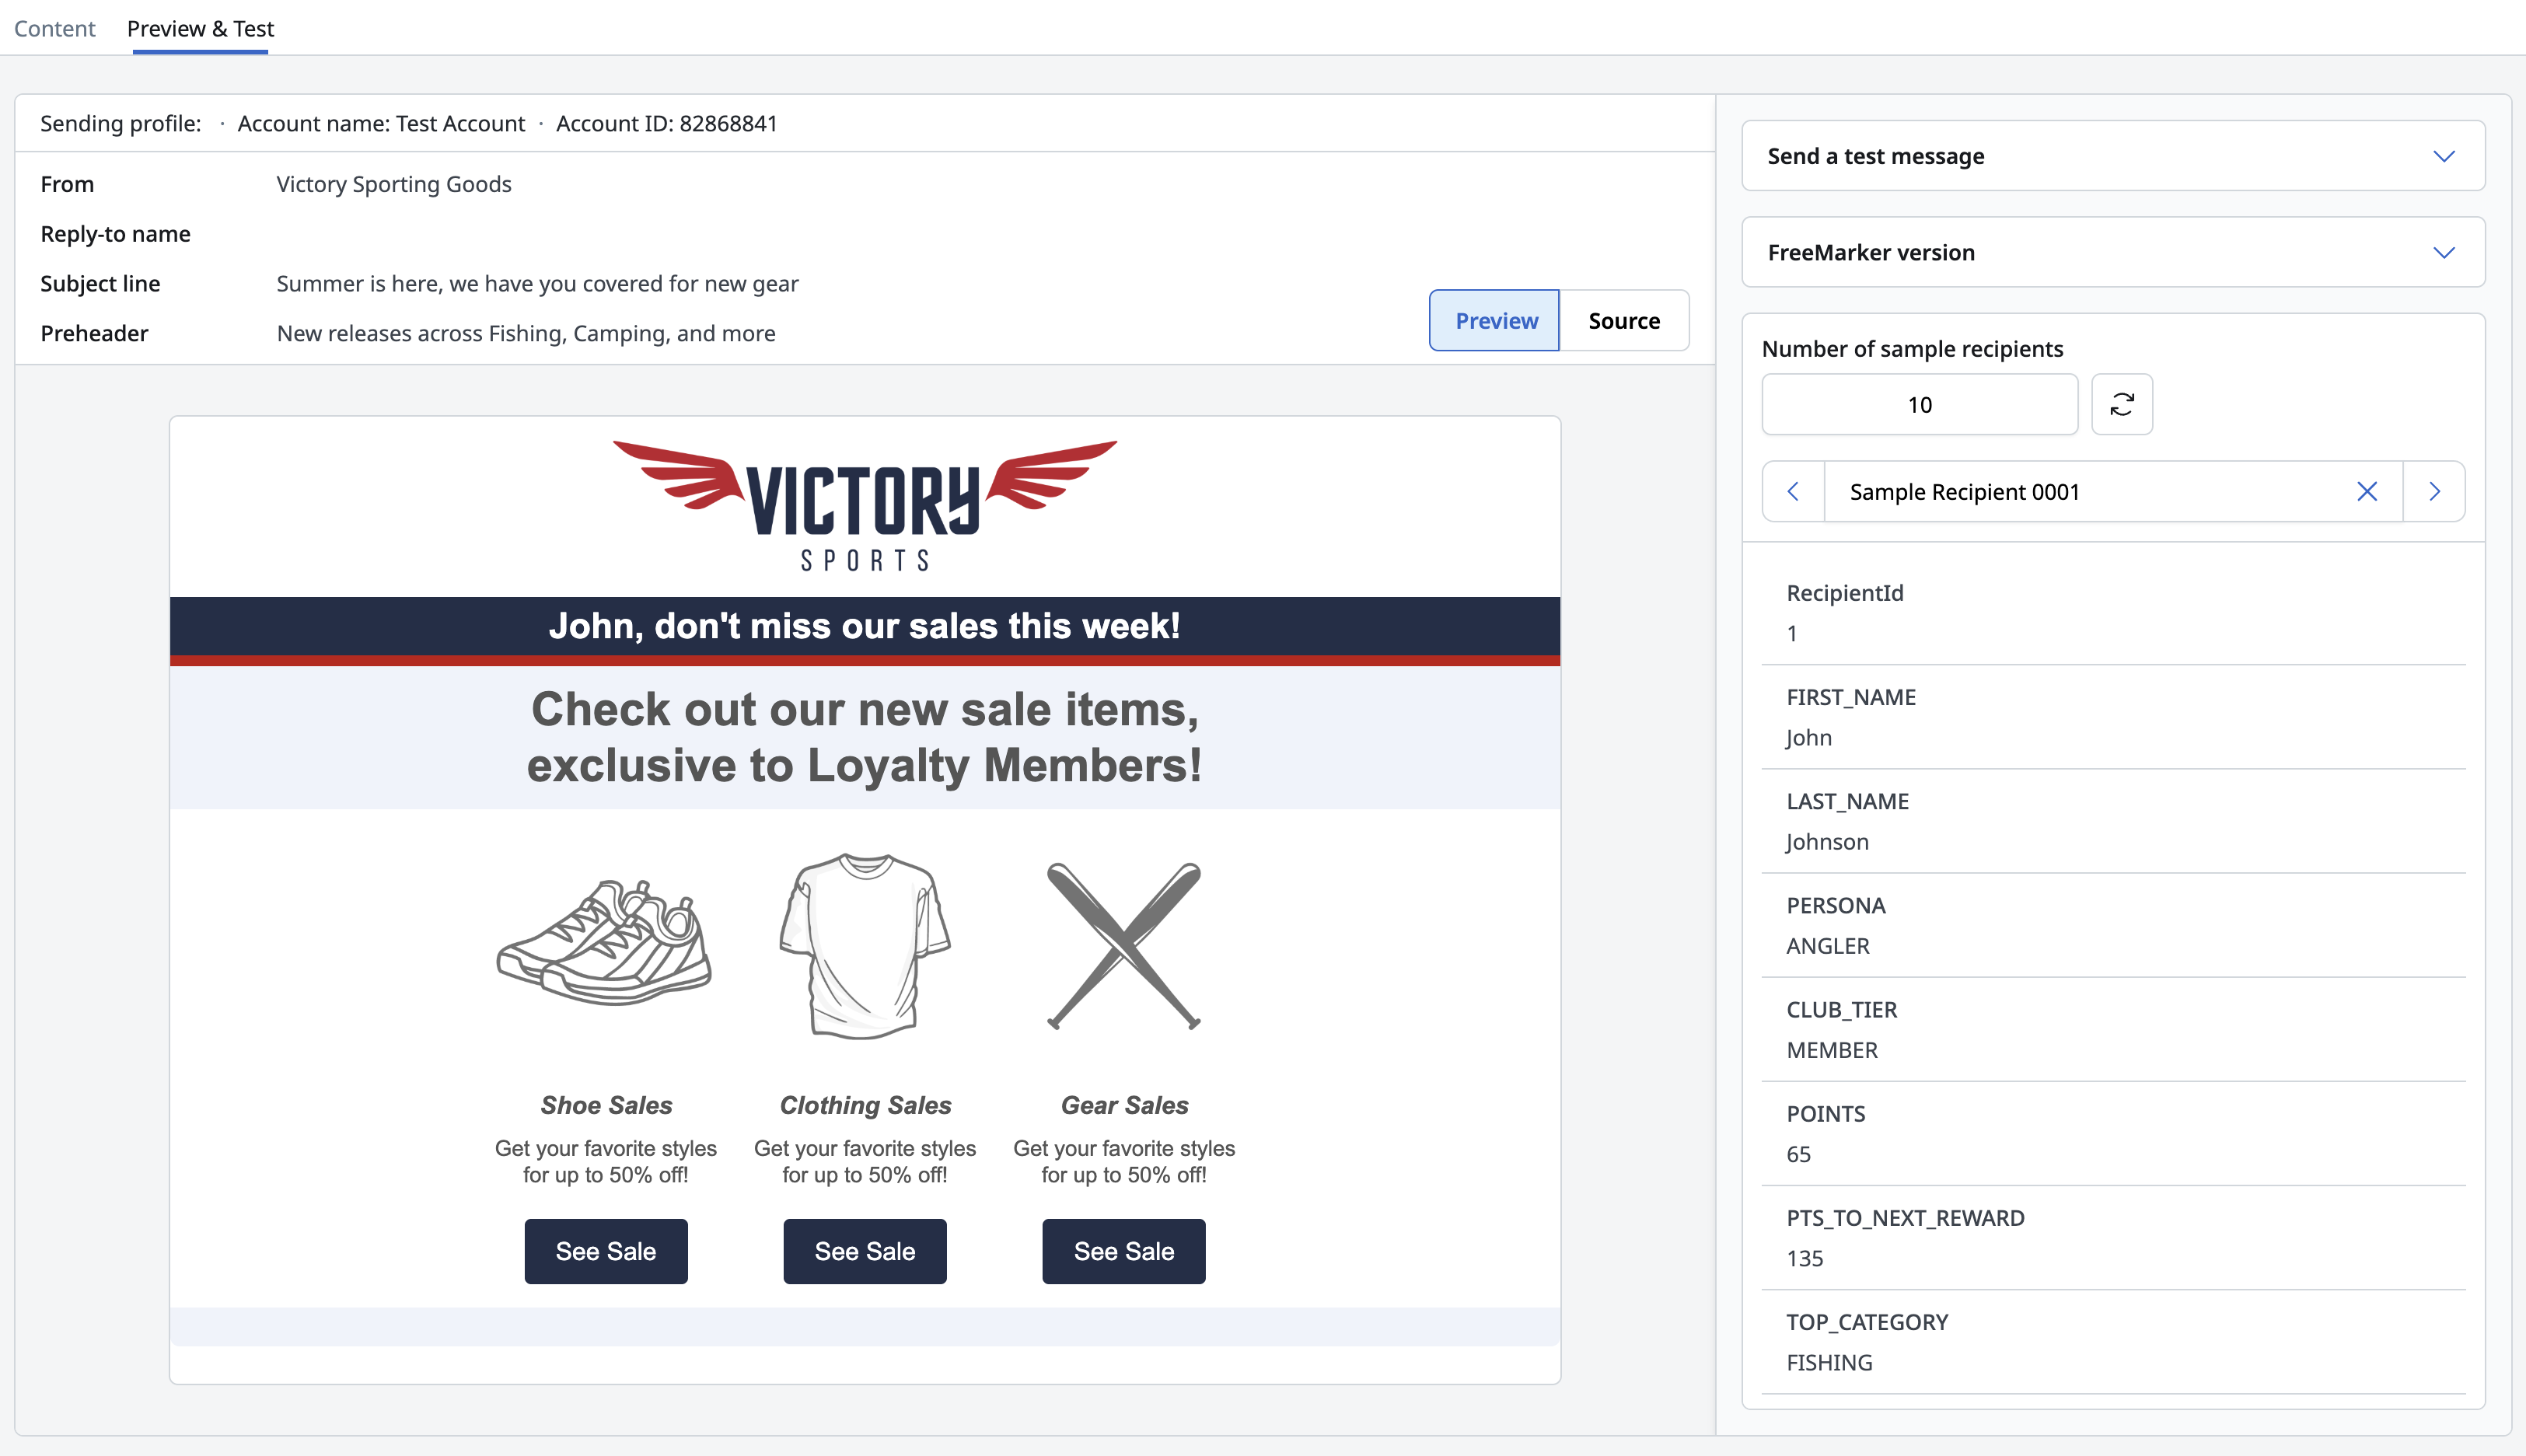
- Click Preview & Test
- The preview renders the template using up to 100 recipients sampled from the journey's user profile
- To send a test message:
- In the Email address field, enter the address to send the test to
- Click Send
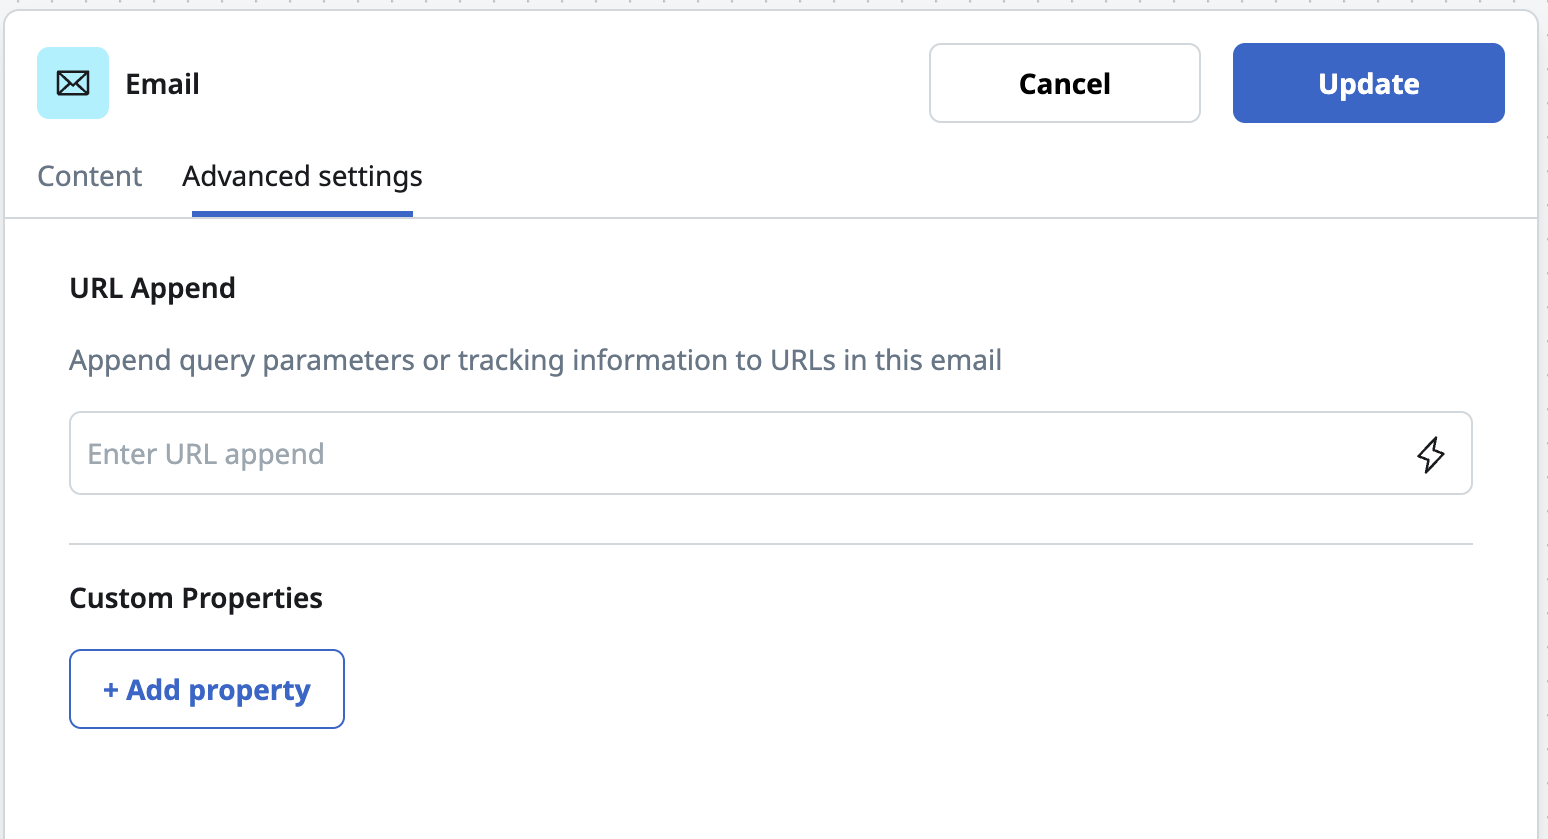
Advanced tab
URL Append — Enter tracking parameters to append to all links in the email.
Custom properties — Add key-value pairs to be included in message events (delivery, open, click, etc.) for this tile.
Push tile
Click a Push tile to open its configuration panel.
Tile settings
- In the Name field, enter a name for this push tile (required)
- In the Category field, enter a category string to append to message events.
- In the Account field, select the sending account to send from. If the selected template has a sending profile, the account is overridden by the template's sending profile and this field becomes read-only.
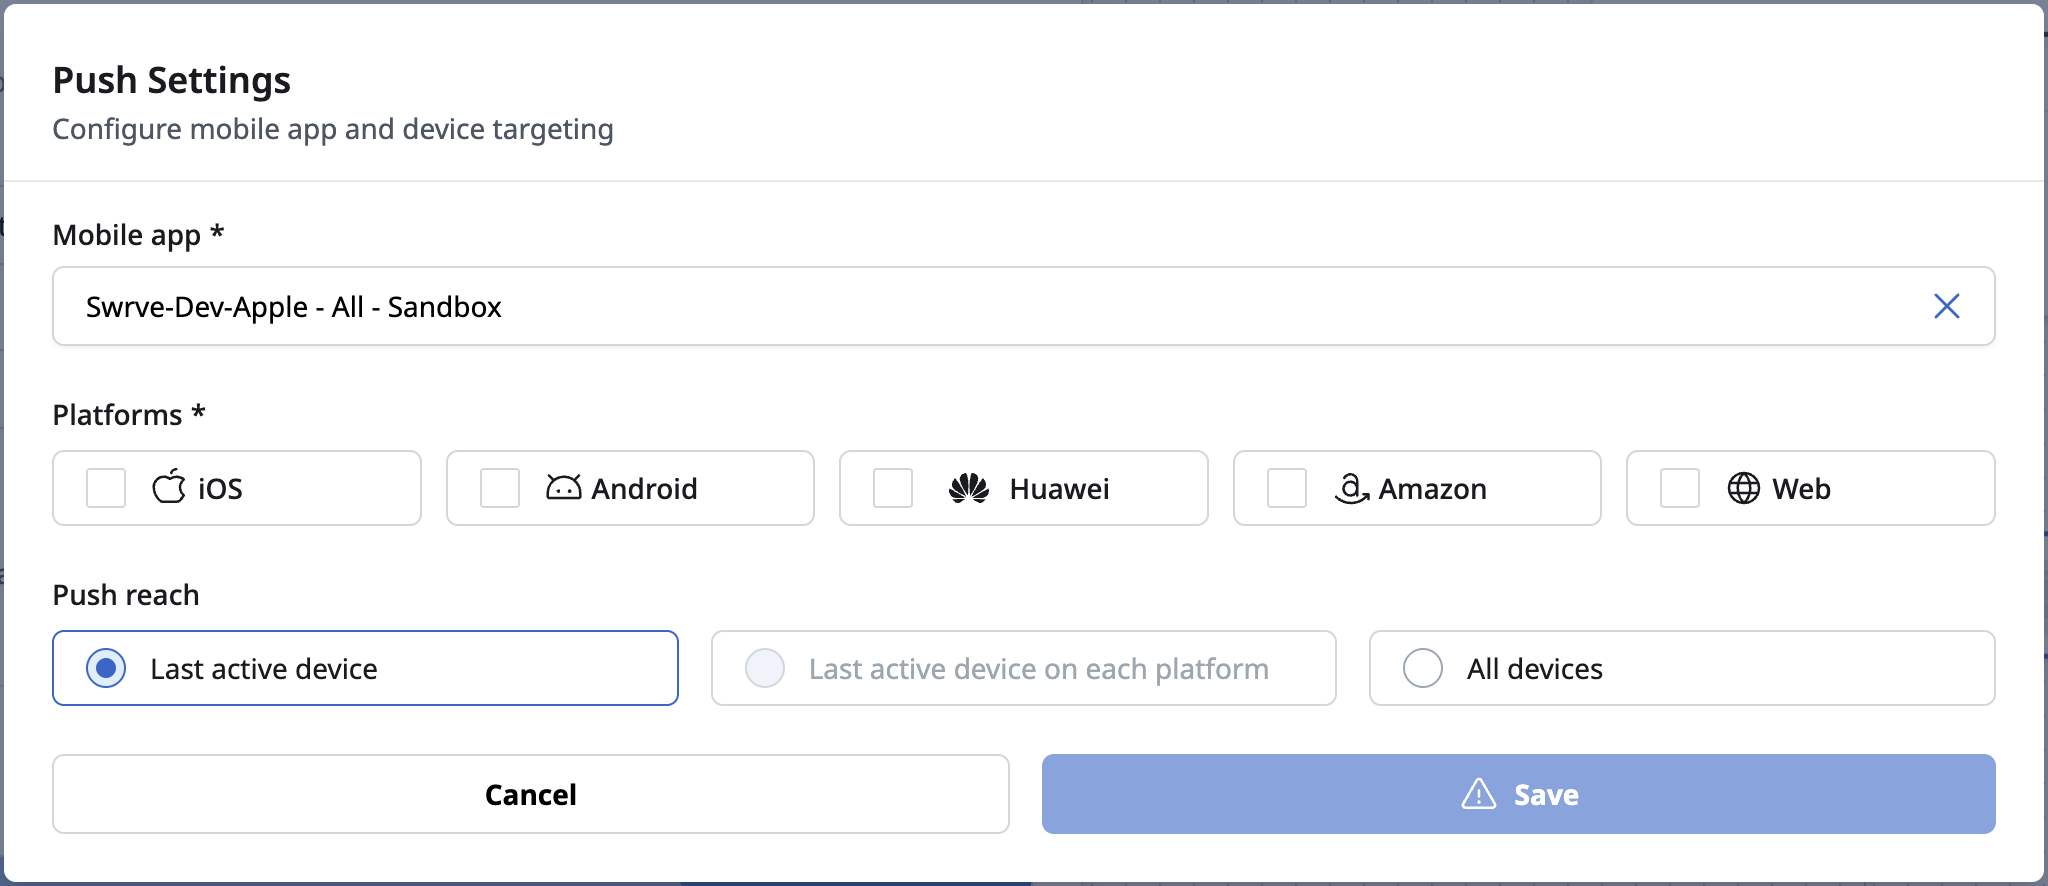
Push settings
- In the Mobile app field, select the mobile app to send to
- In the Platform field, select the platforms to target. The available platforms are determined by the selected mobile app.
- In the Push reach field, select the device targeting rule:
| Option | Description |
|---|---|
| Last active device (default) | Sends to the most recently active device for each recipient |
| Last active device on each platform | Sends to the most recently active device per platform. Only available when two or more platforms are selected. |
| All devices | Sends to all devices registered for each recipient |
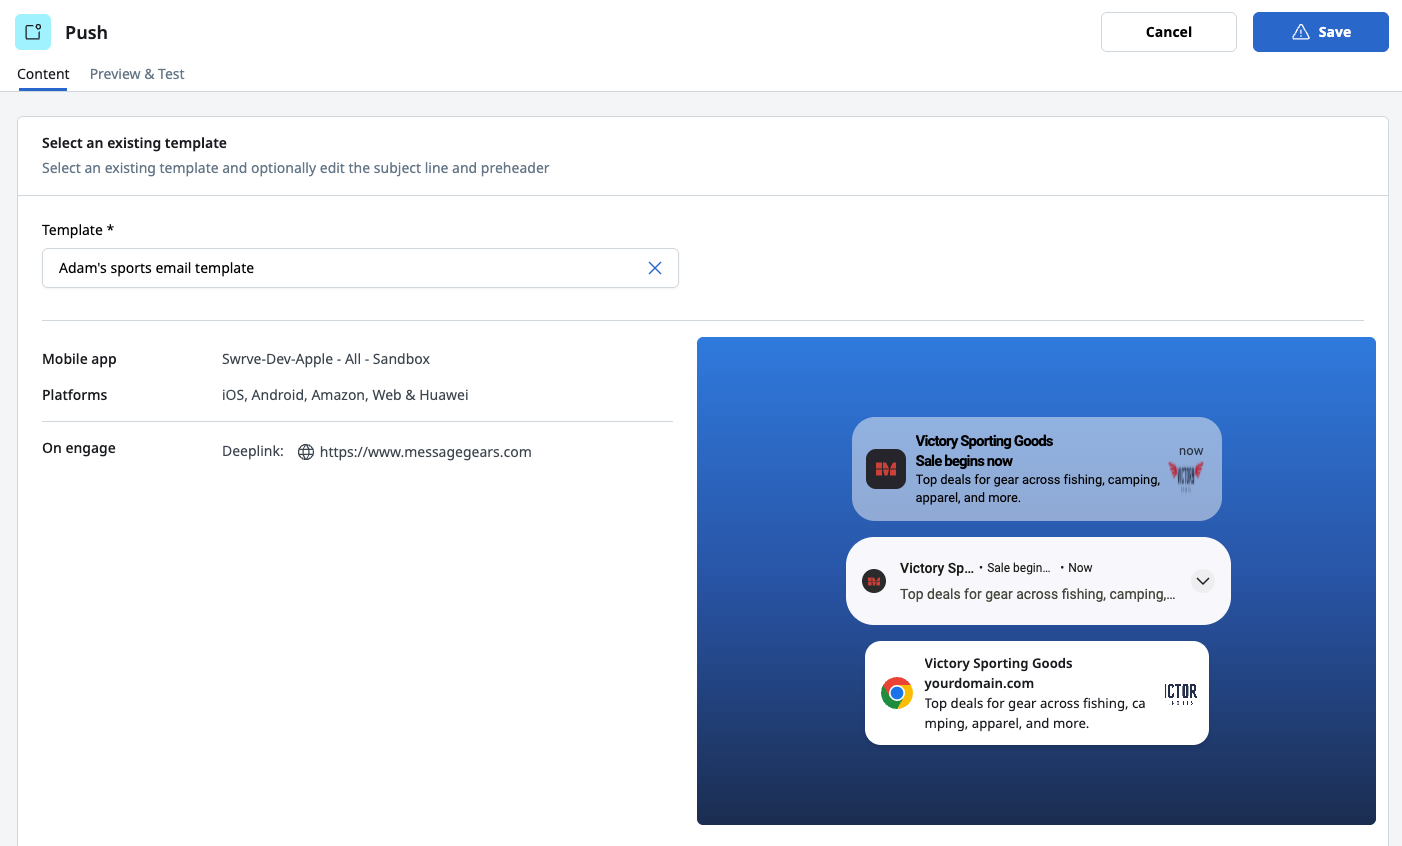
Content template
- In the Template field, select a push template.
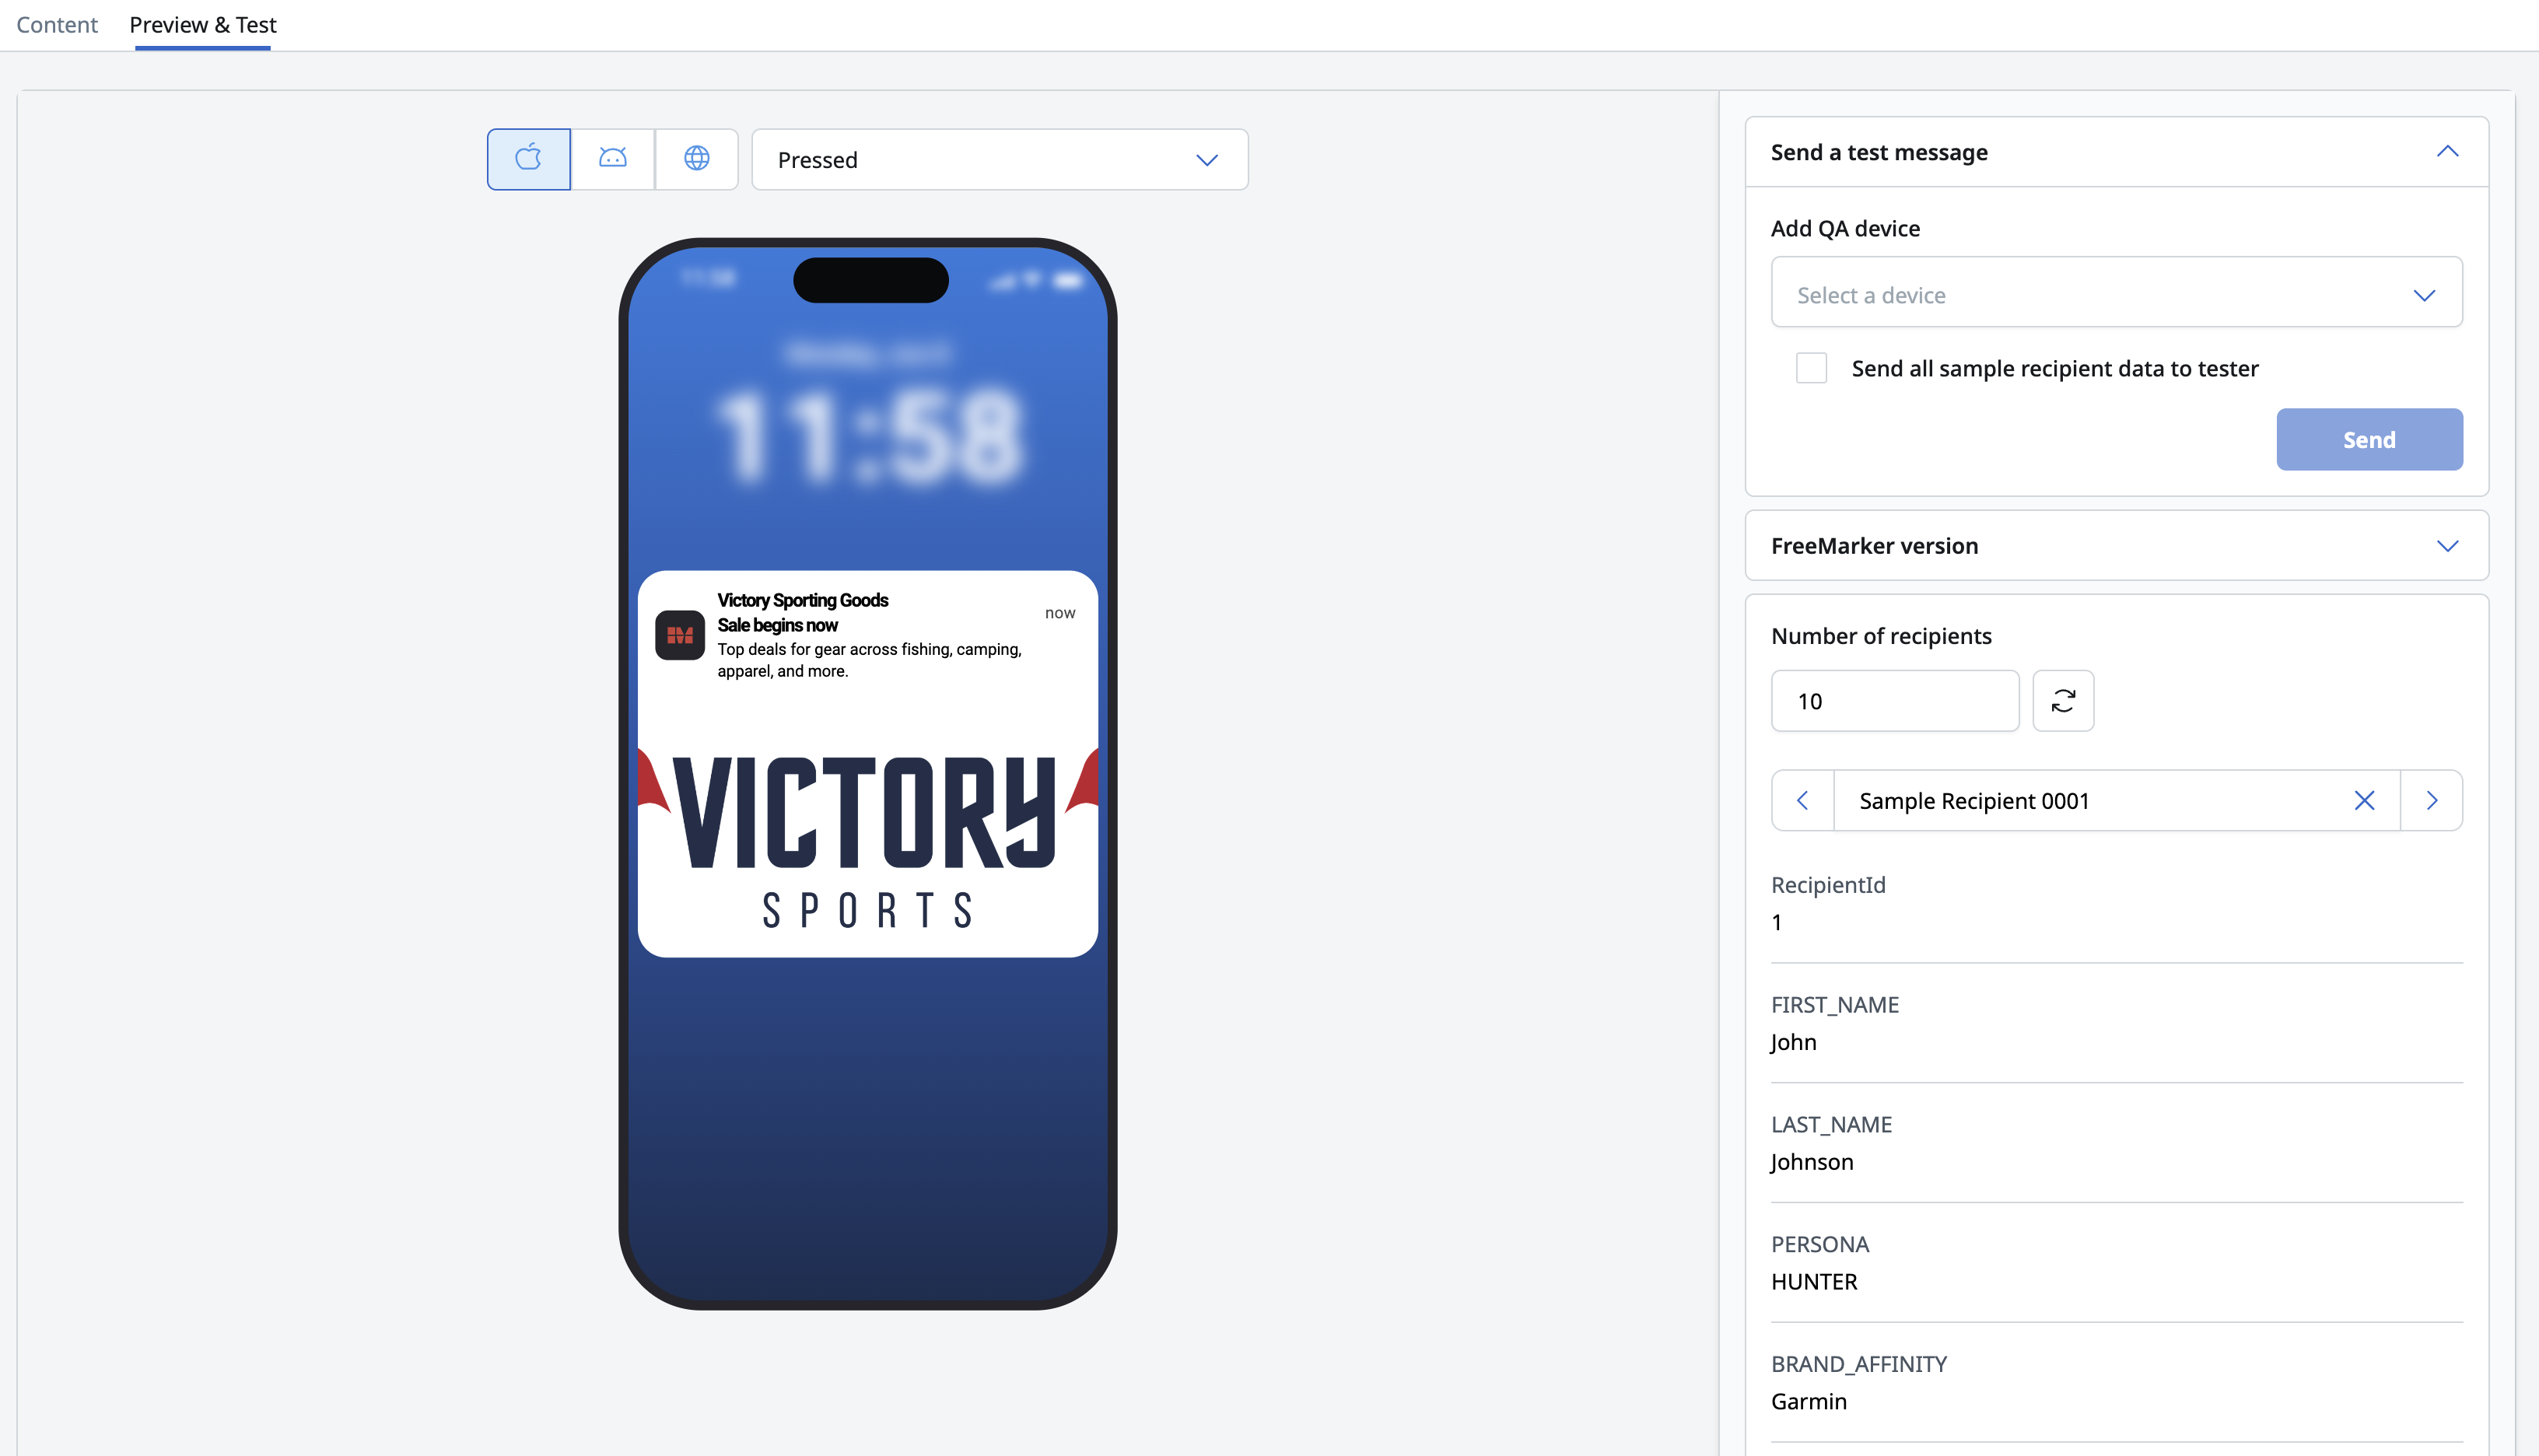
Preview & Test tab
- Click Preview & Test
- To send a test push:
- In the Add QA device field, select a pre-configured QA device from the dropdown
- Click Send
SMS tile
Click an SMS tile to open its configuration panel.
Tile settings
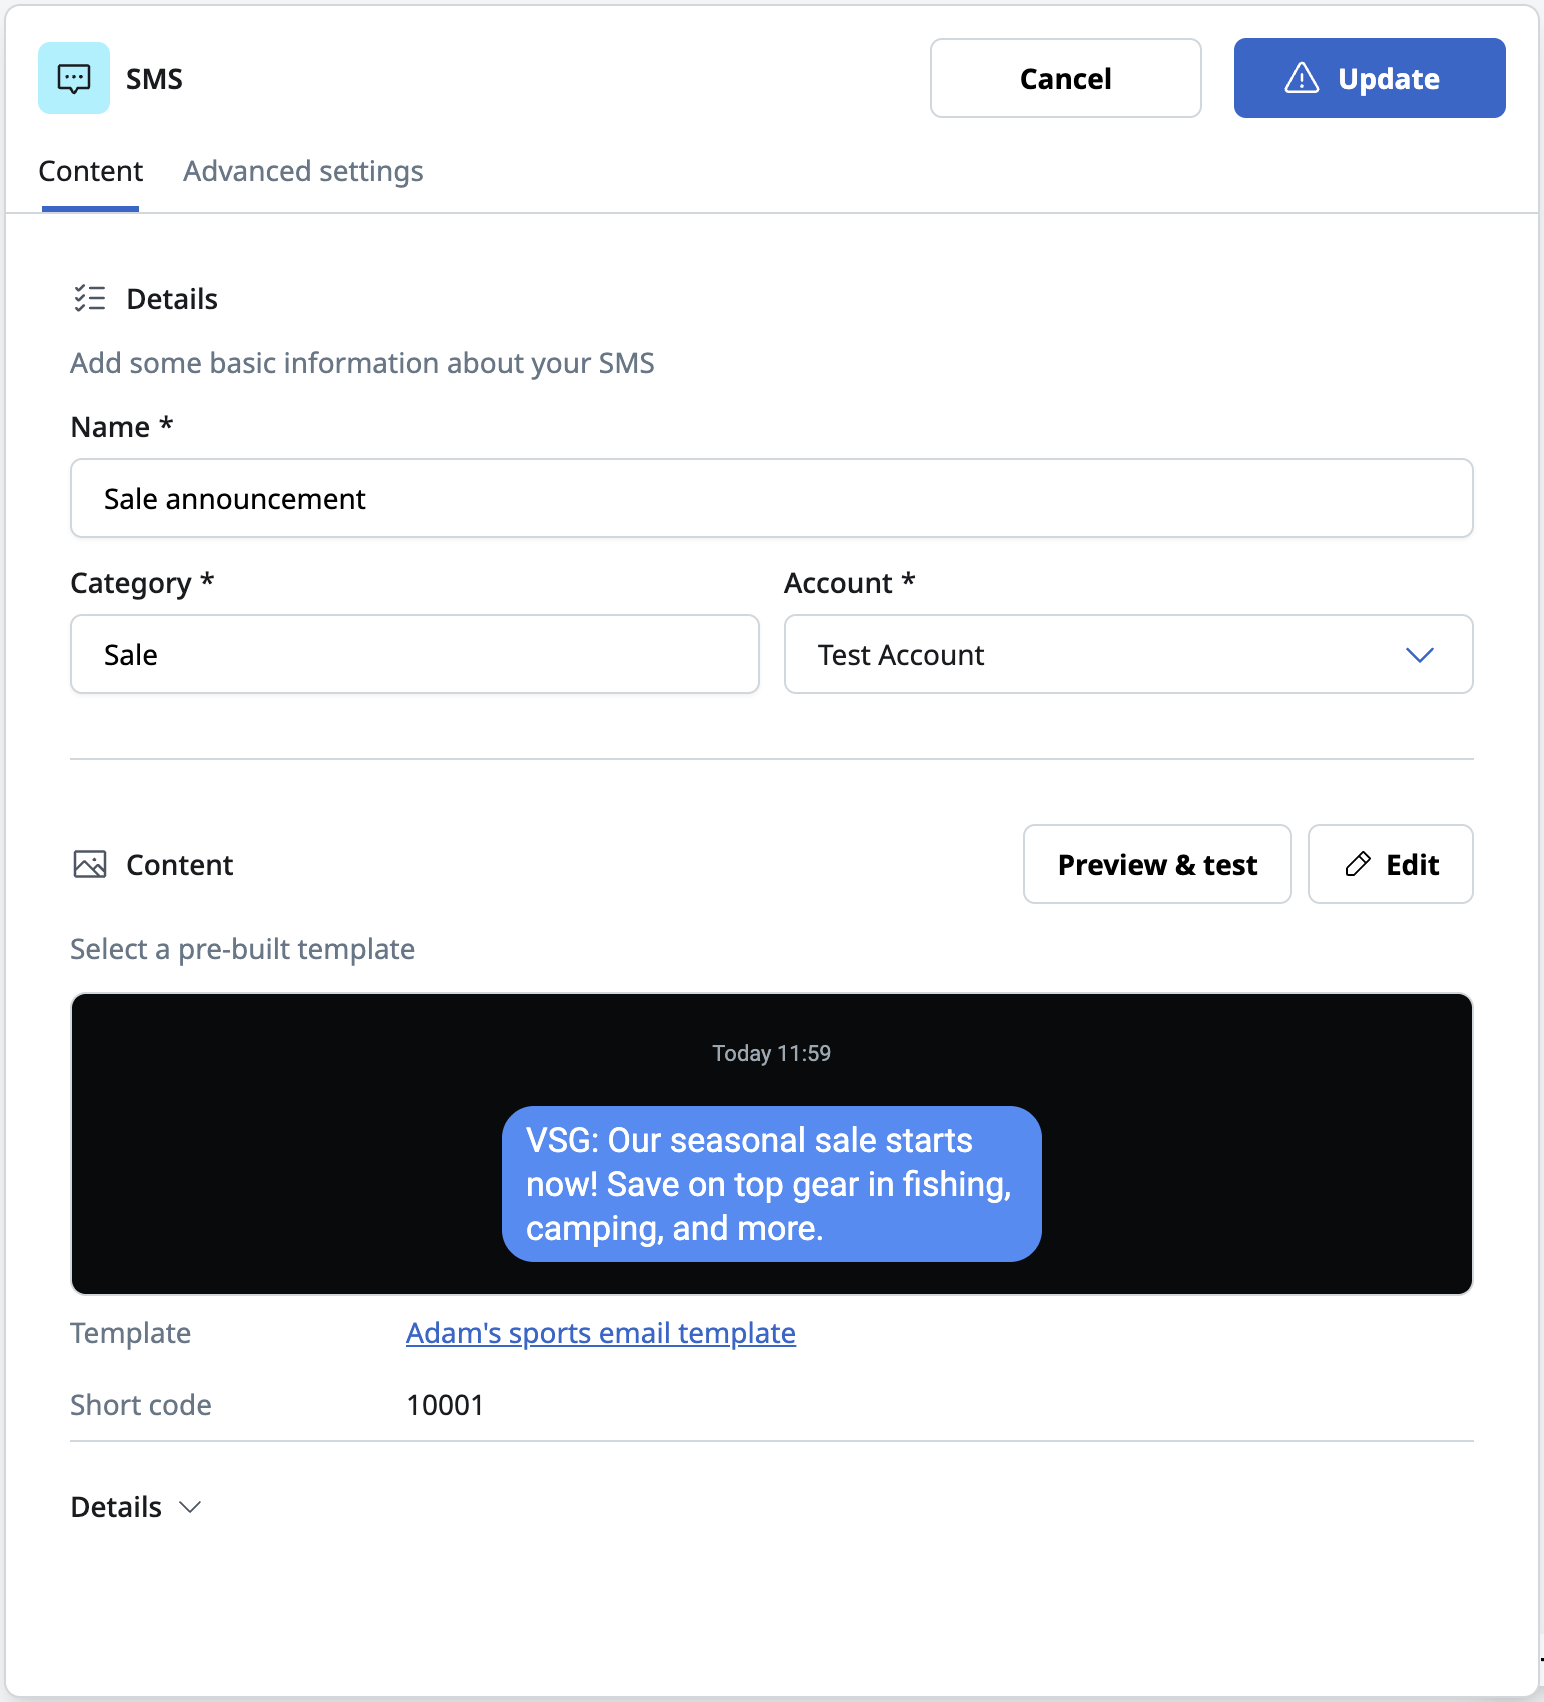
- In the Name field, enter a name for this SMS tile
- In the Category field, enter a category string to append to message events.
- In the Account field, select the sending account to send from. If the selected template has a sending profile, the account is overridden by the template's sending profile and this field becomes read-only.
Content template
- In the Content field, select an SMS template.
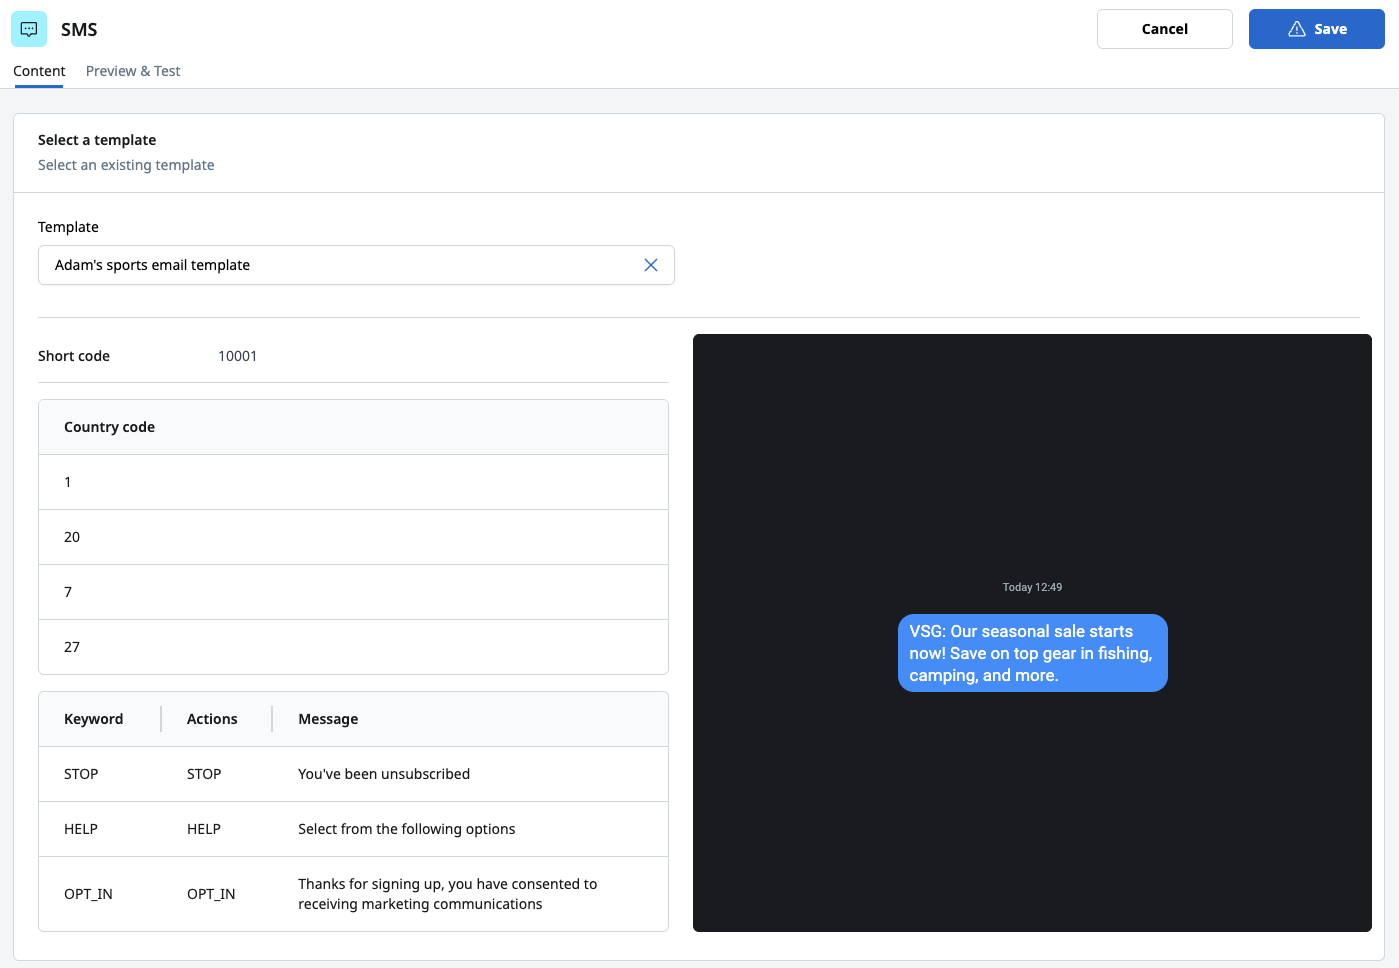
The following fields are read-only and inherited from the selected template:
- Short code
- Country codes
- Keywords
Preview & Test tab
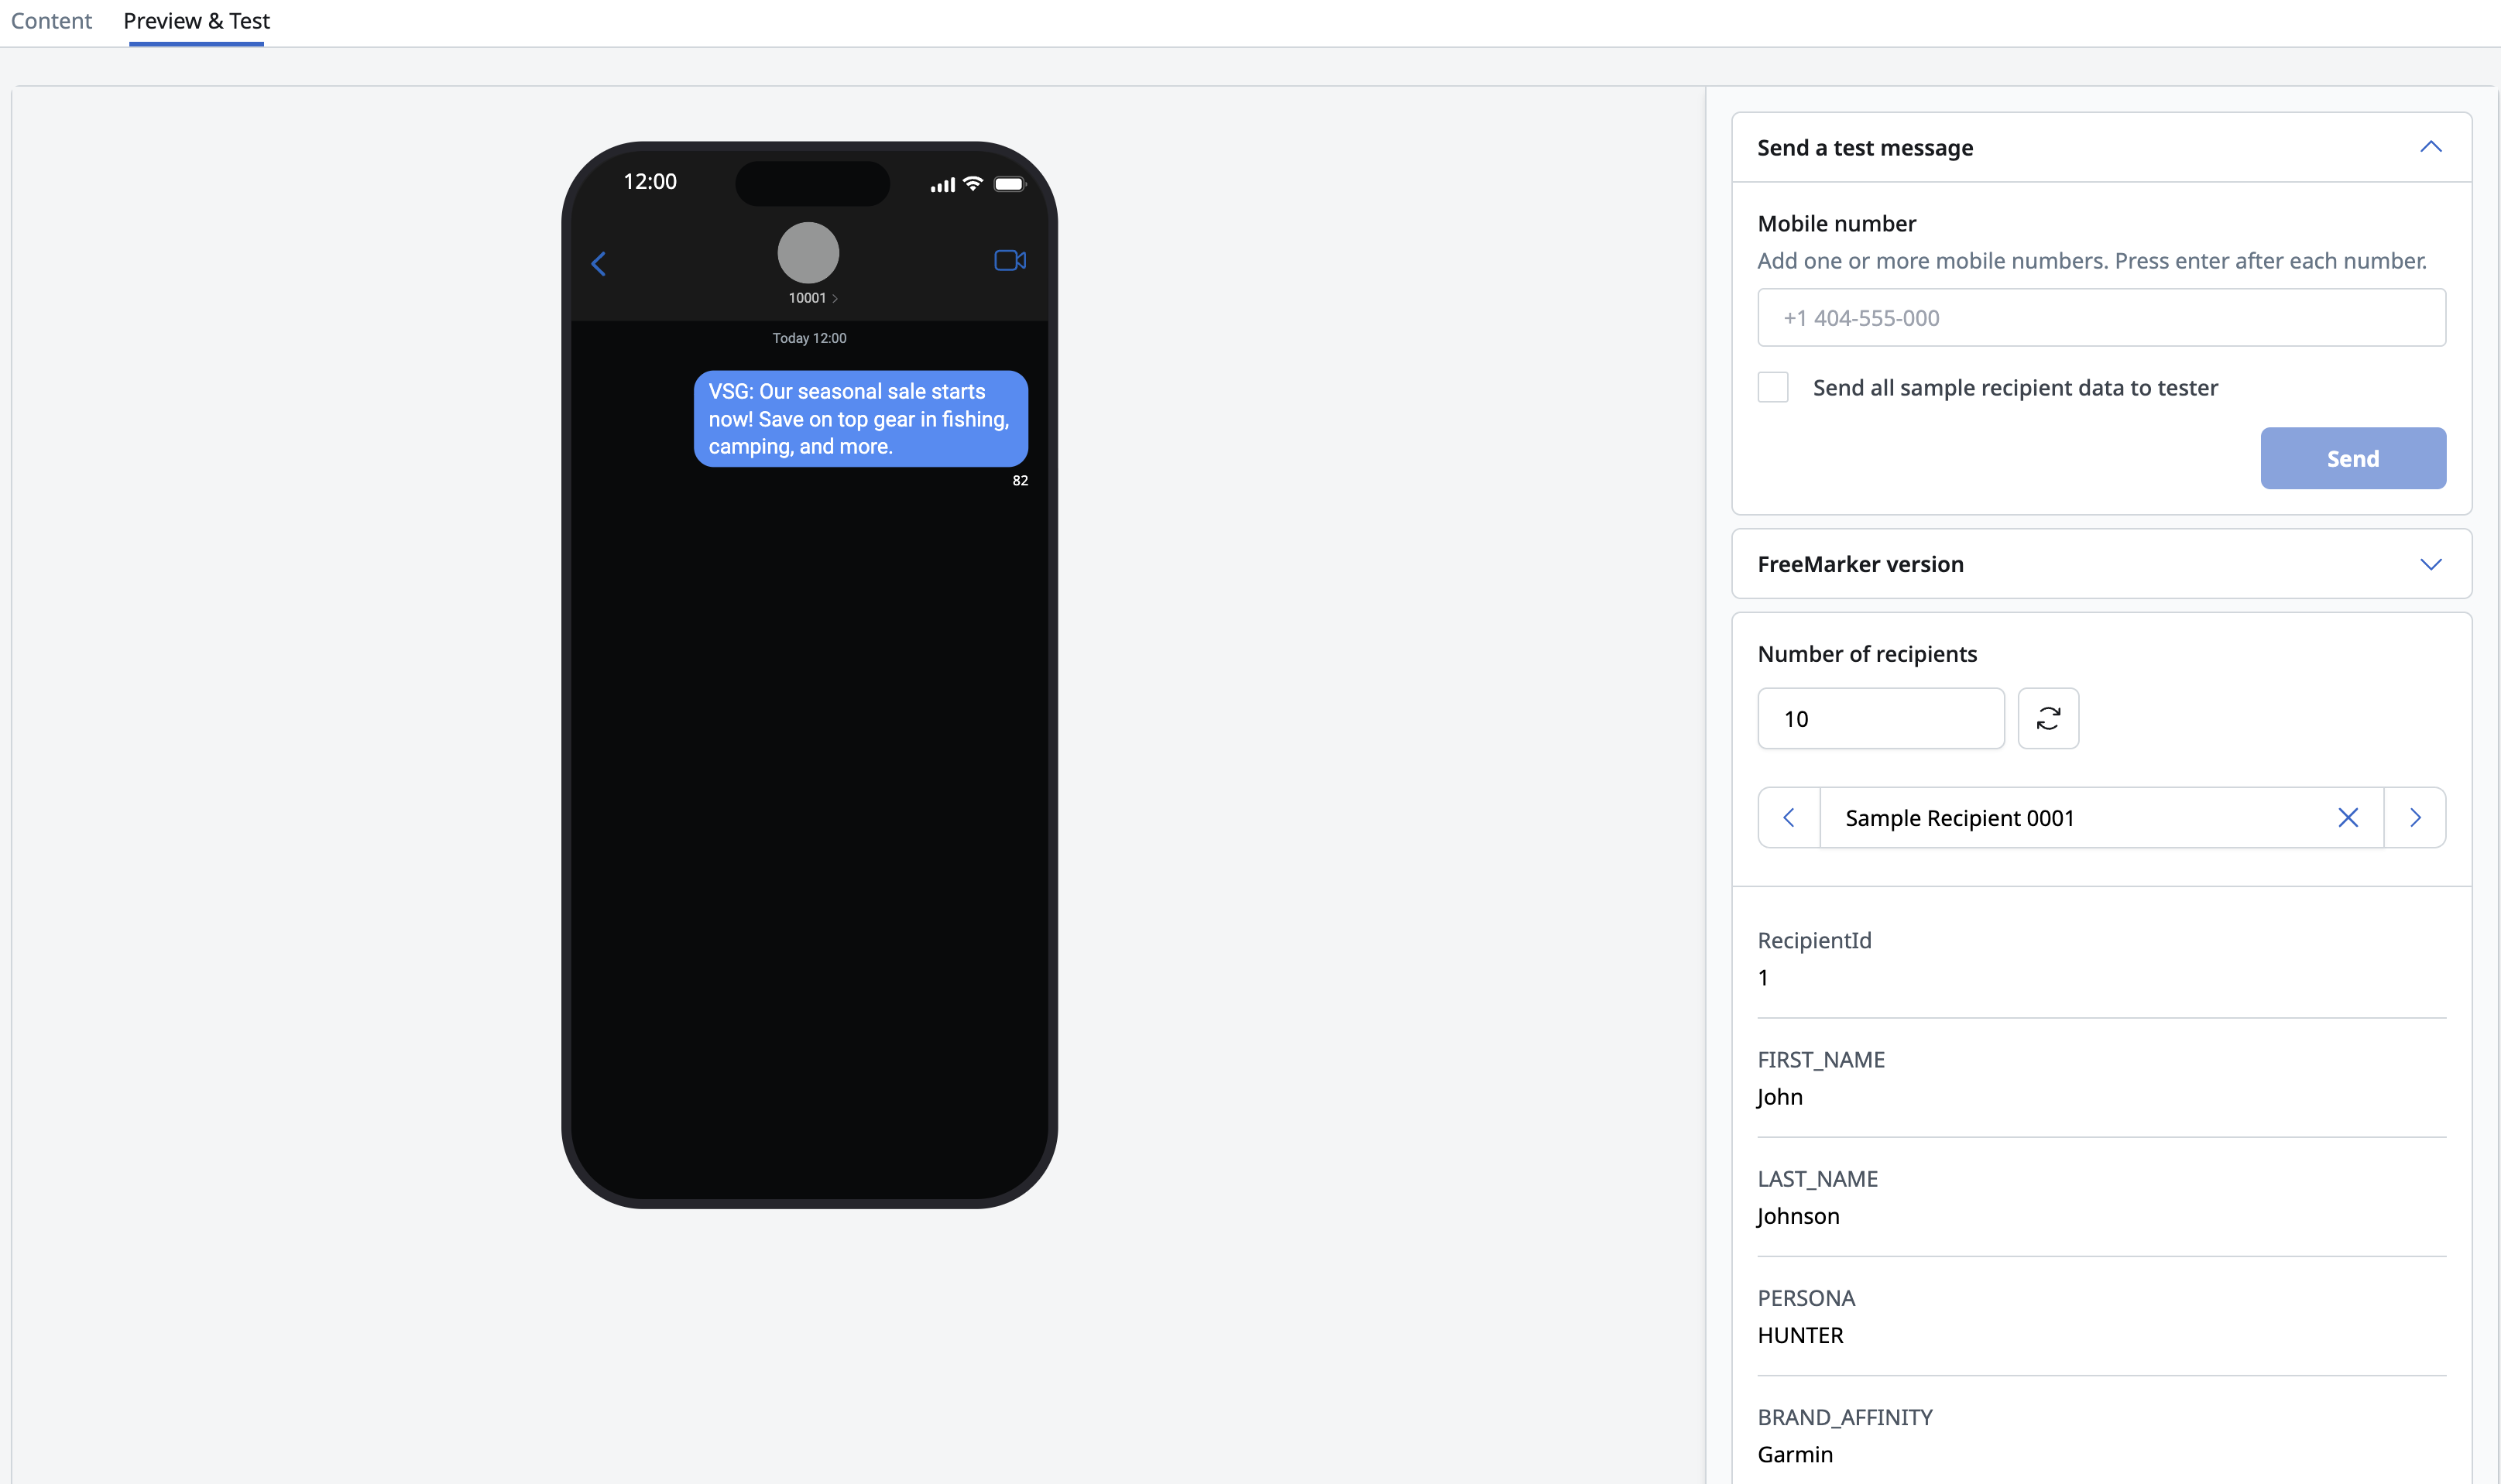
- Click the Preview & Test
- To send a test SMS:
- In the Mobile number field, enter the phone number to send the test to
- Click Send
Multi-channel tile
The multi-channel tile enables sending across email, push, and SMS channels in a single journey step. Similar to a multi-channel campaign, a template's content must be configured for each selected channel to appear in content selection.
Click an Multi-channel tile to open its configuration panel.
Tile settings
- In the Name field, enter a name for this SMS tile
- In the Category field, enter a category string to append to message events.
- In the Account field, select the sending account to send from. If the selected template has a sending profile, the account is overridden by the template's sending profile and this field becomes read-only.
Channels
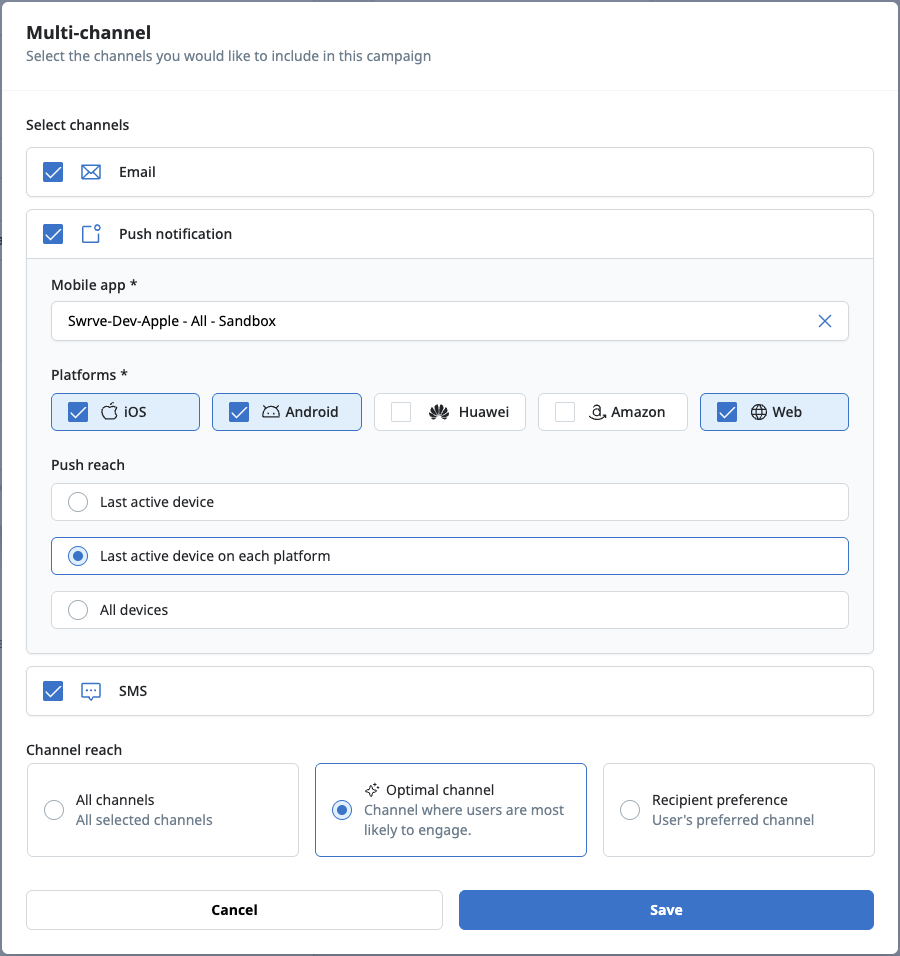
- Select the channels to send. At least 2 channels must be selected. For single-channel sends, choose an individual channel tile instead.
- Push notification
- SMS
- Optimal Channel
Once at least 2 channels are selected, Optimal Channel becomes available. Selecting it routes each recipient to the single best channel among the selected channels, based on that recipient's MLOptChan predictive model score, and displays a model pill on the tile and in the tile overview. For details, see Using predictive models in campaigns and journeys.
Content template
- In the Content field, select a multi-channel template. The list will filter to only display templates configured for the selected channels.
Each channel's details will be displayed.
- Push
- SMS
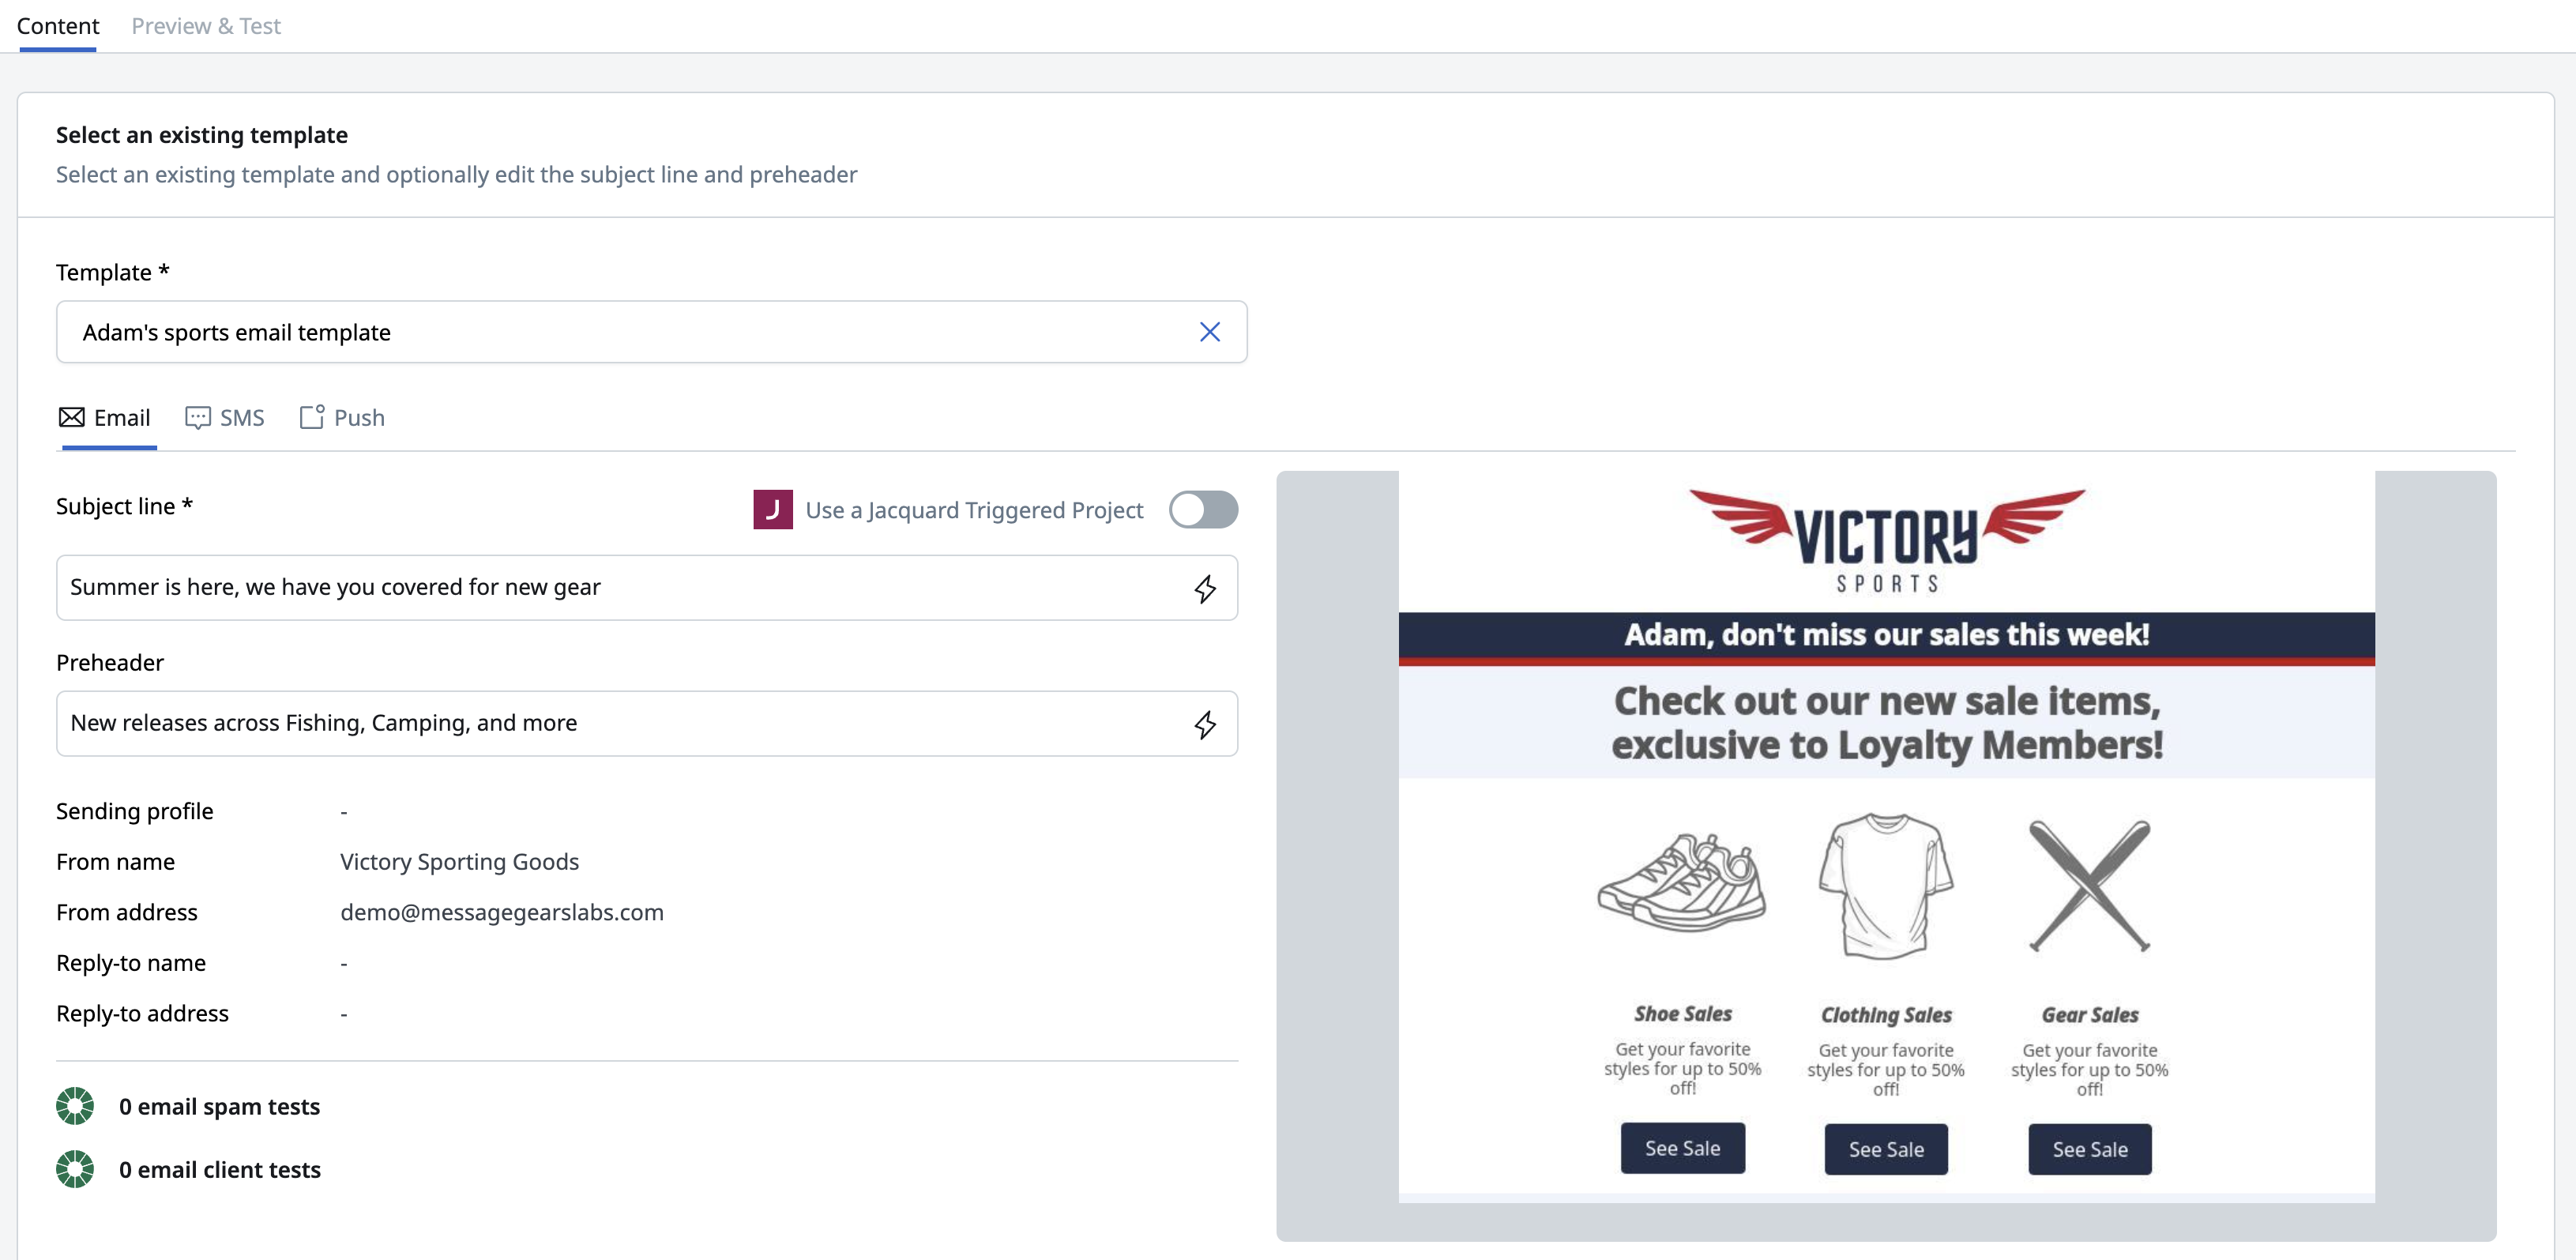
Preview & Test tab
Preview and test works the same as other individual channel tiles
- Click the Preview & Test
- To send a test, enter the required email address, mobile number, or select a push QA device.
- Click Send
Destination tile
The Destination tile is available in Accelerator version 26.3.3.
To keep your ad audiences, mobile lists, and cloud storage files in step with the journey, add a Destination tile. It works like an external campaign inside the journey: each evaluation cycle, Accelerator exports the users who reach the tile to every destination configured on it. For more information, see External campaigns.
A destination must be set up in Accelerator before you can add it to a tile. For more information, see External destinations.
Only API destinations are available in a Destination tile. SFTP destinations aren't supported.
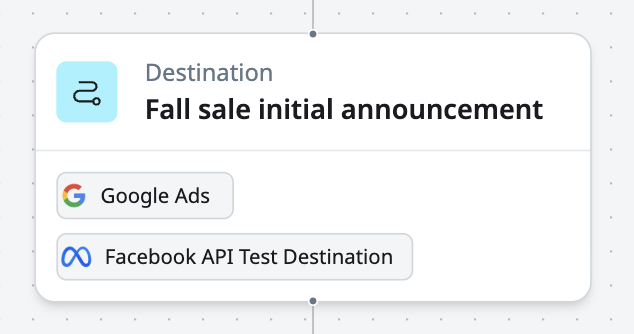
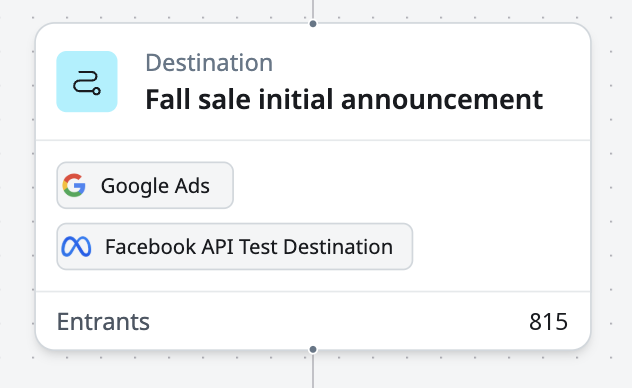
On the canvas, the tile shows its name and lists each configured destination by name, with its vendor icon.
Tile settings
Select a Destination tile to open its configuration panel.
- In the Name field, enter a name for the tile (required). The name appears on the canvas and in export history.
- In the Account field, select the account to export from. If you don't select an account, Accelerator uses your default account.
The Destination tile has no Category field.
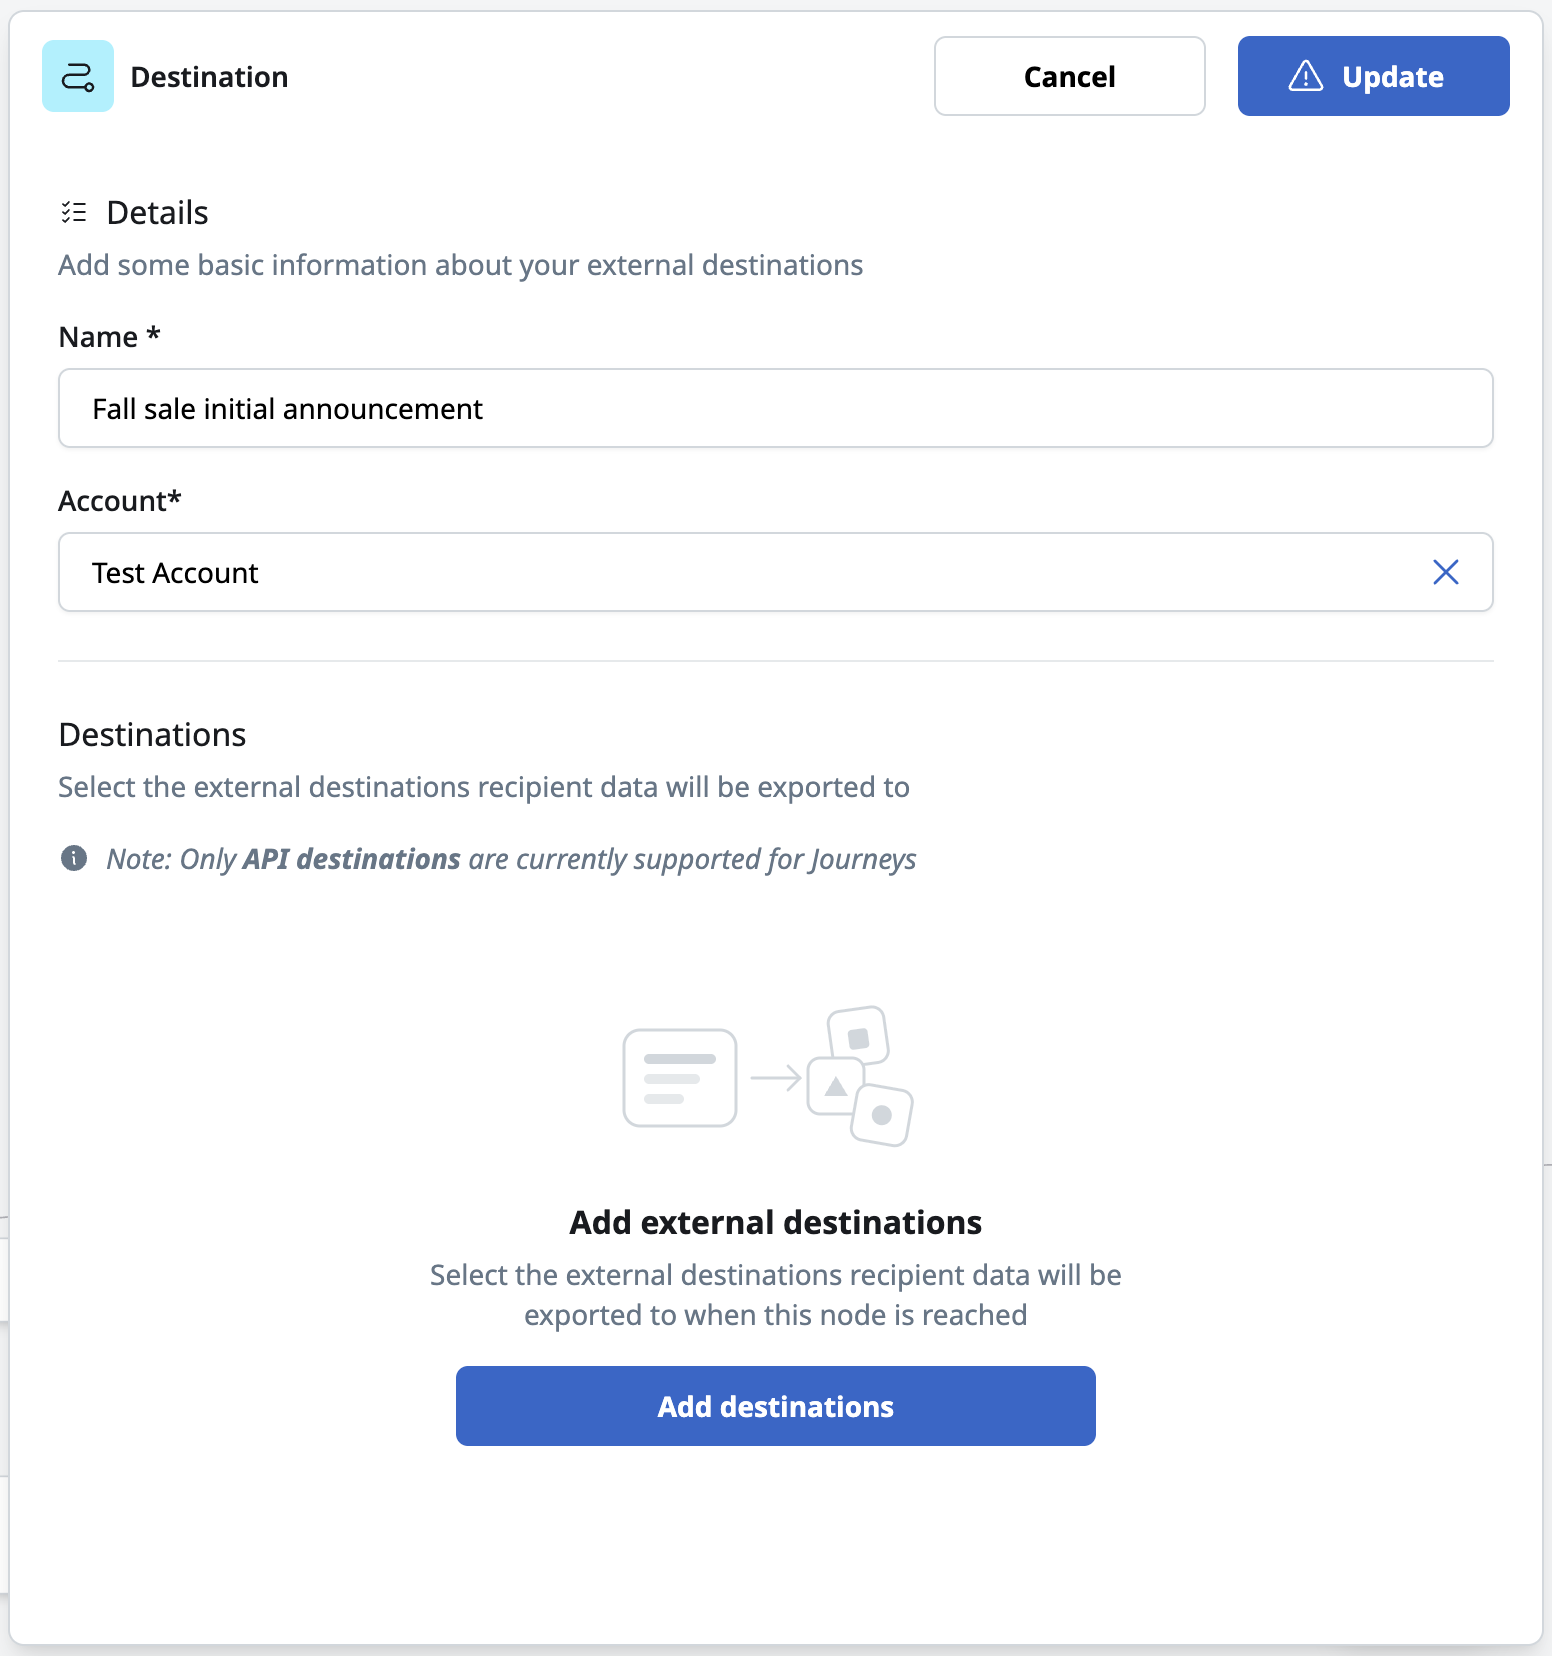
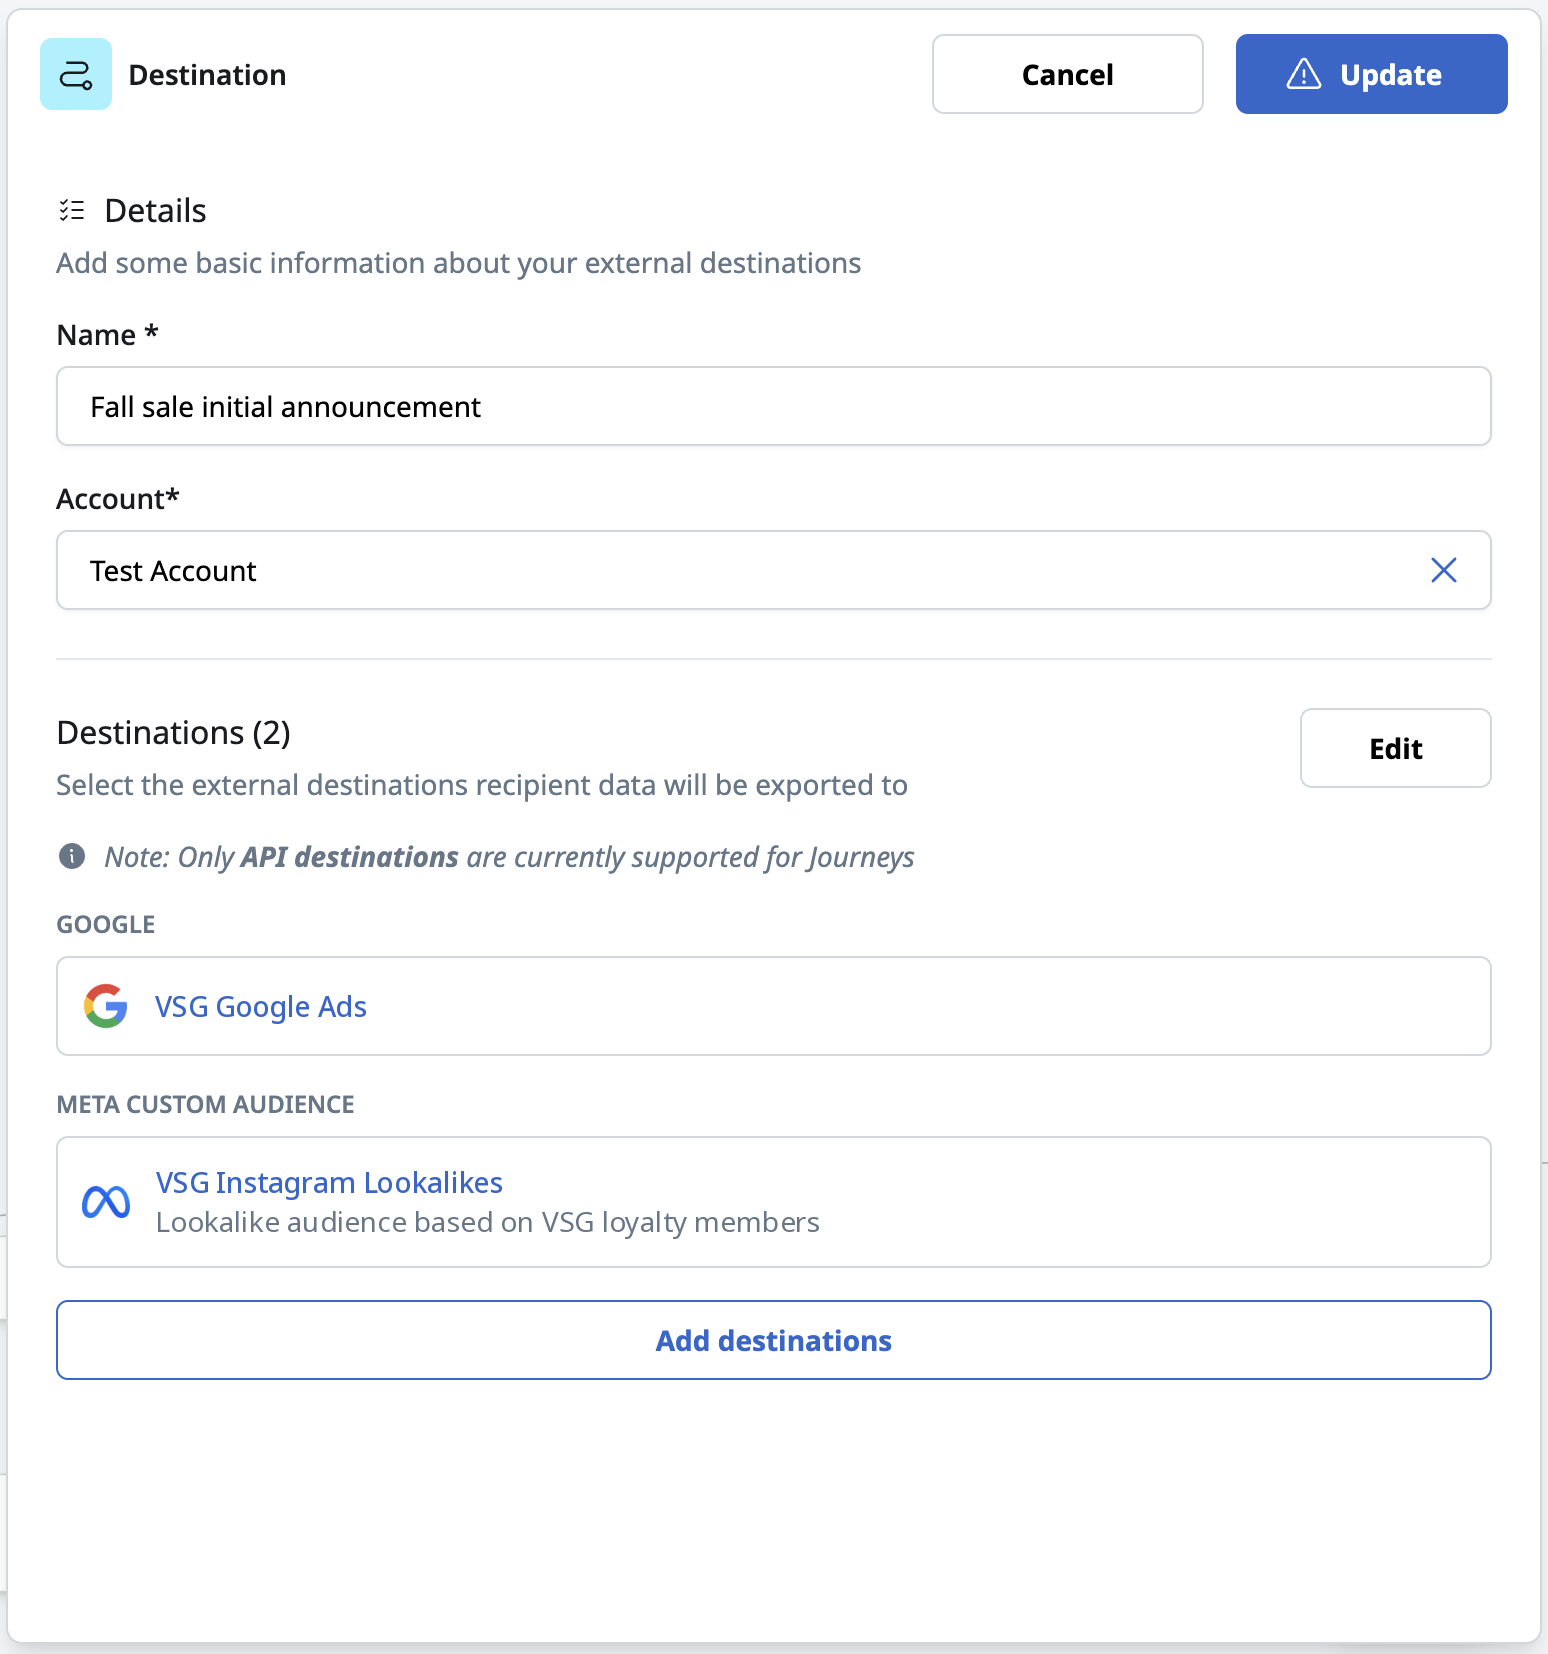
Add destinations
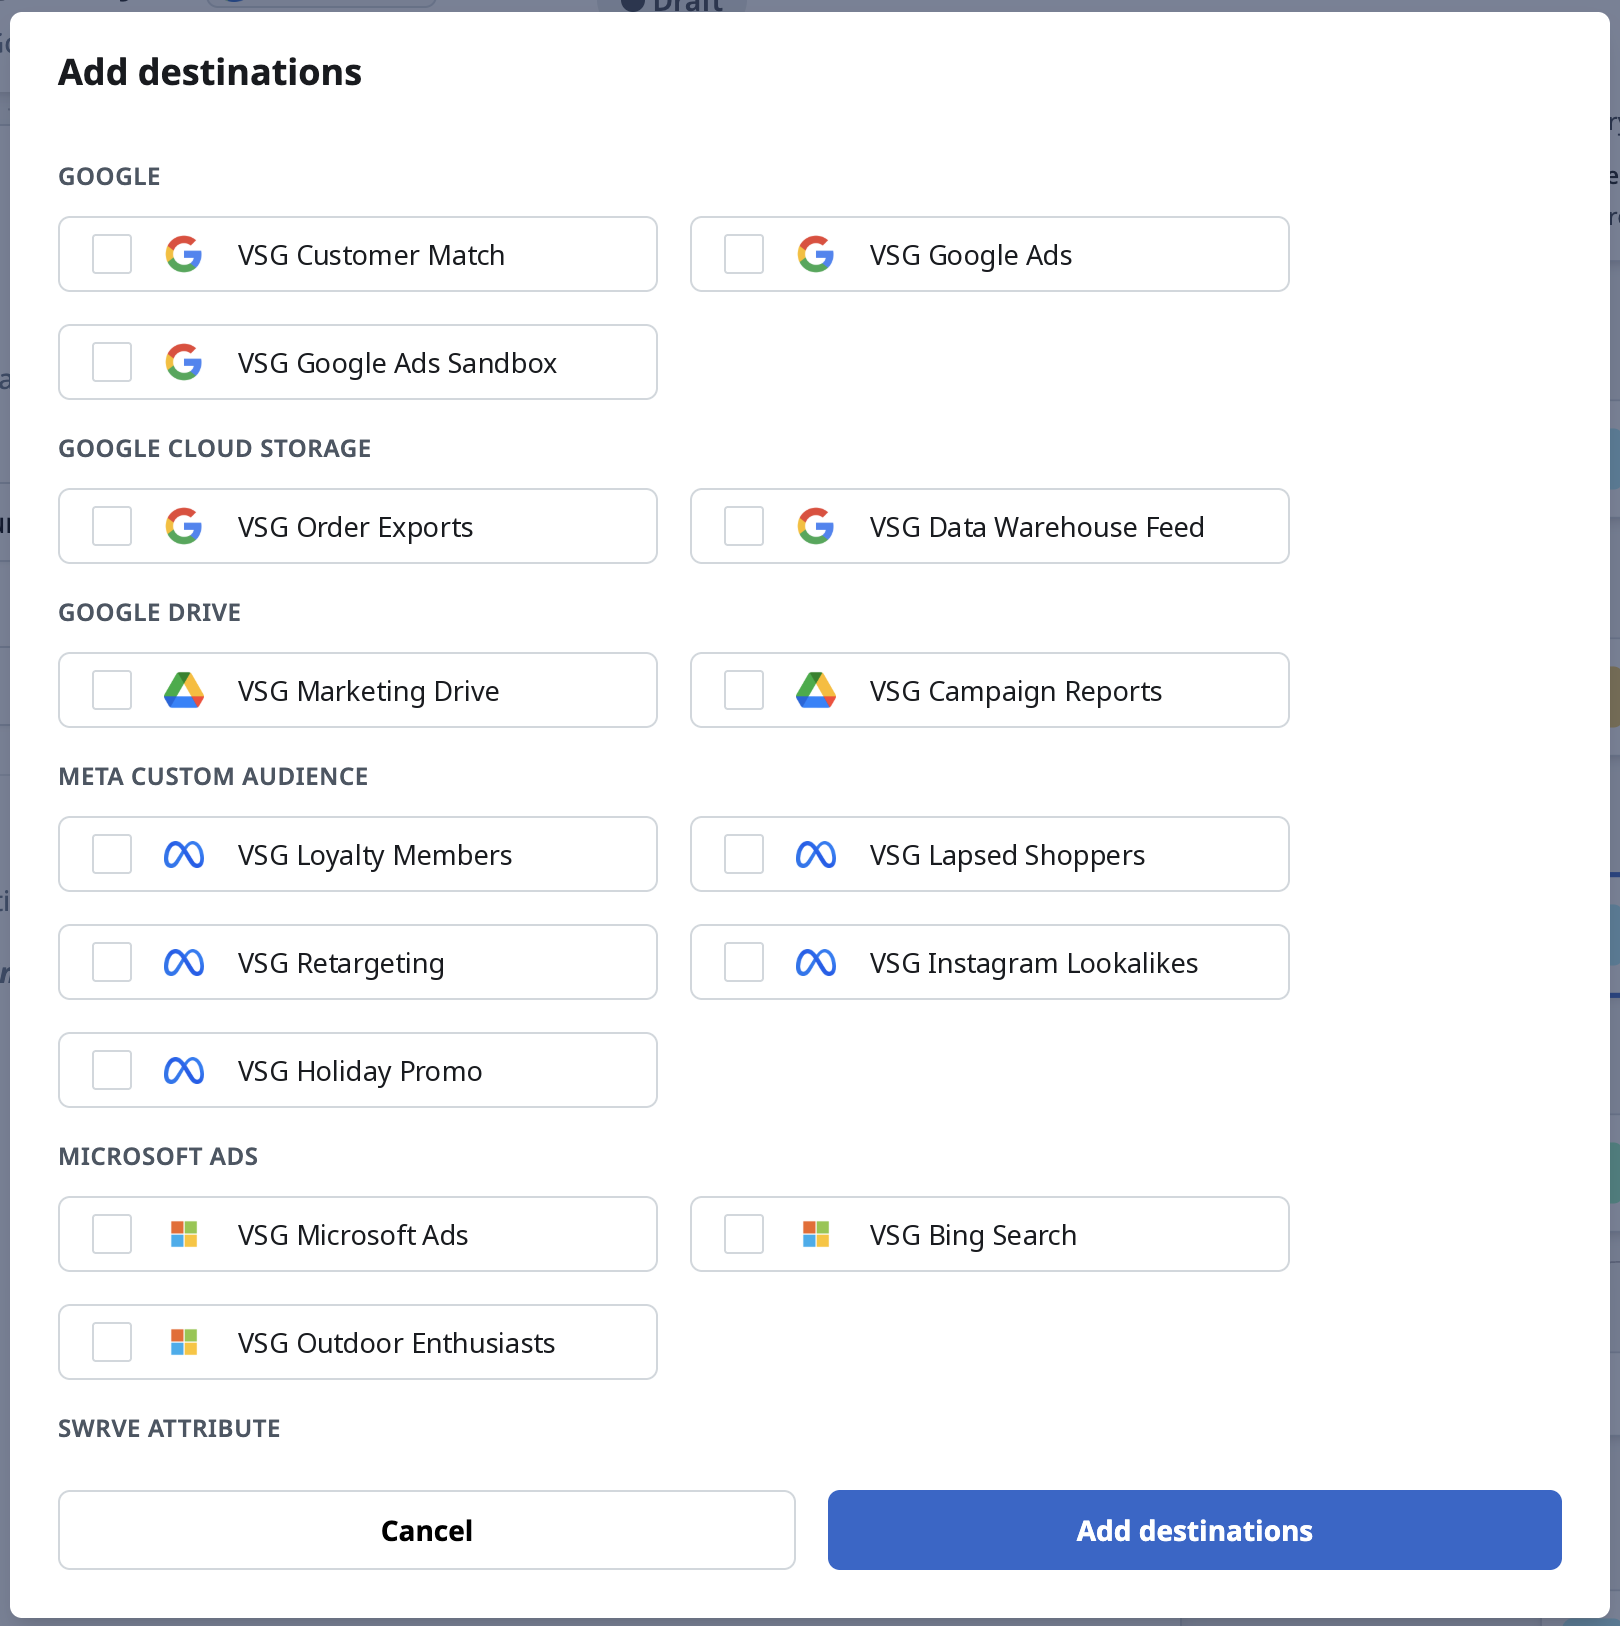
- Select Add destinations. The destination selector lists the destinations configured for your account, grouped by vendor.
- To find a destination, enter its name in the search field.
- Select each destination to add. A tile holds up to 10 destinations.
- Confirm your selection.
If your account has no configured destinations, Add destinations is unavailable.
To add more destinations later, select Add destinations again. Destinations already on the tile appear selected and can't be selected twice.
Configure each destination
After you add destinations, the destination panel opens. The left side lists the tile's destinations, and the right side shows the settings for the selected destination. Each destination's fields come from its vendor and its settings in Accelerator.
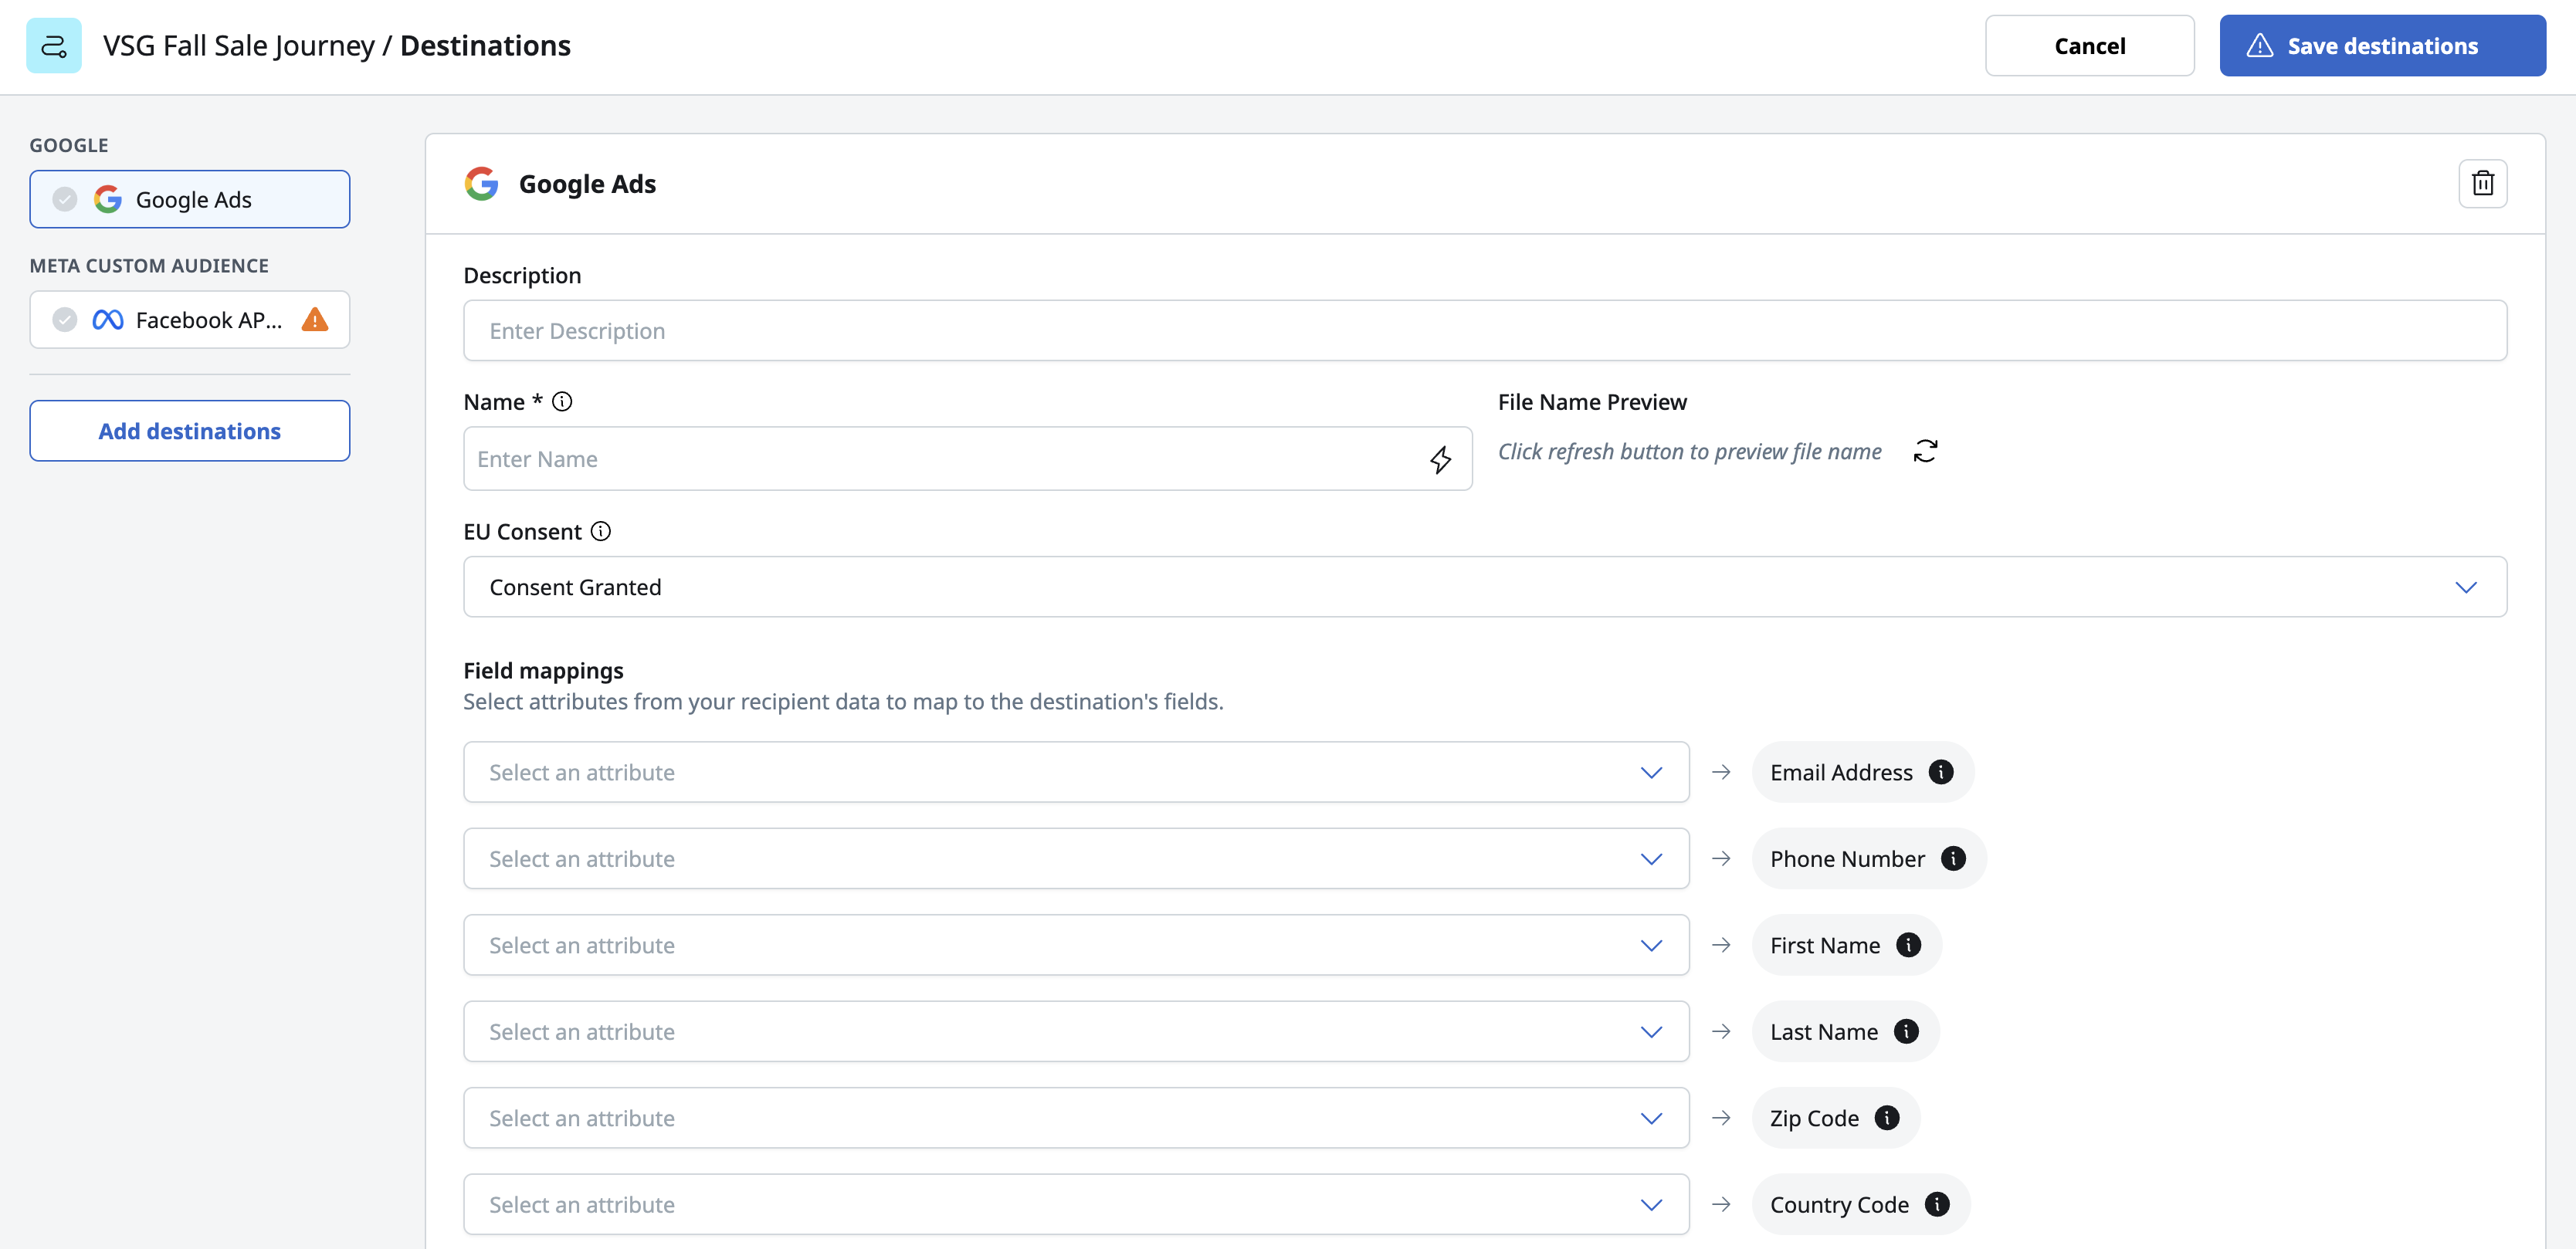
A validation icon next to each destination shows whether its settings are complete. You can move between destinations while one has errors, but you can save only when every destination is valid.
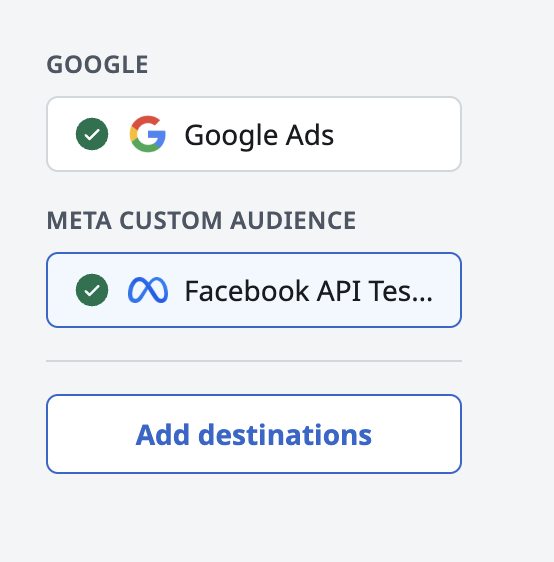
To remove a destination from the tile, select it, then select the delete icon and confirm.
Field mappings
Certain destinations, such as Meta Custom Audience, Airship, and Microsoft Ads destinations, map user profile attributes to the vendor's fields. Each attribute can be mapped to only one field. If you map an attribute twice, a warning appears.
If the destination has default field mappings and the journey's user profile includes those columns, Accelerator fills in the mappings for you. If a default column is missing from the user profile, a warning appears so you can choose another attribute.
If the destination requires a Do not share field, the Do not share mapping is required and you can't save the destination until it's mapped. Users flagged as do not share are not exported to that destination.
Field mapping requires a user profile on the entry tile. Until you select one, the mapping fields are unavailable.
Vendor settings
Some vendors have additional settings. Destinations can also have an optional Description.
| Vendor | Settings |
|---|---|
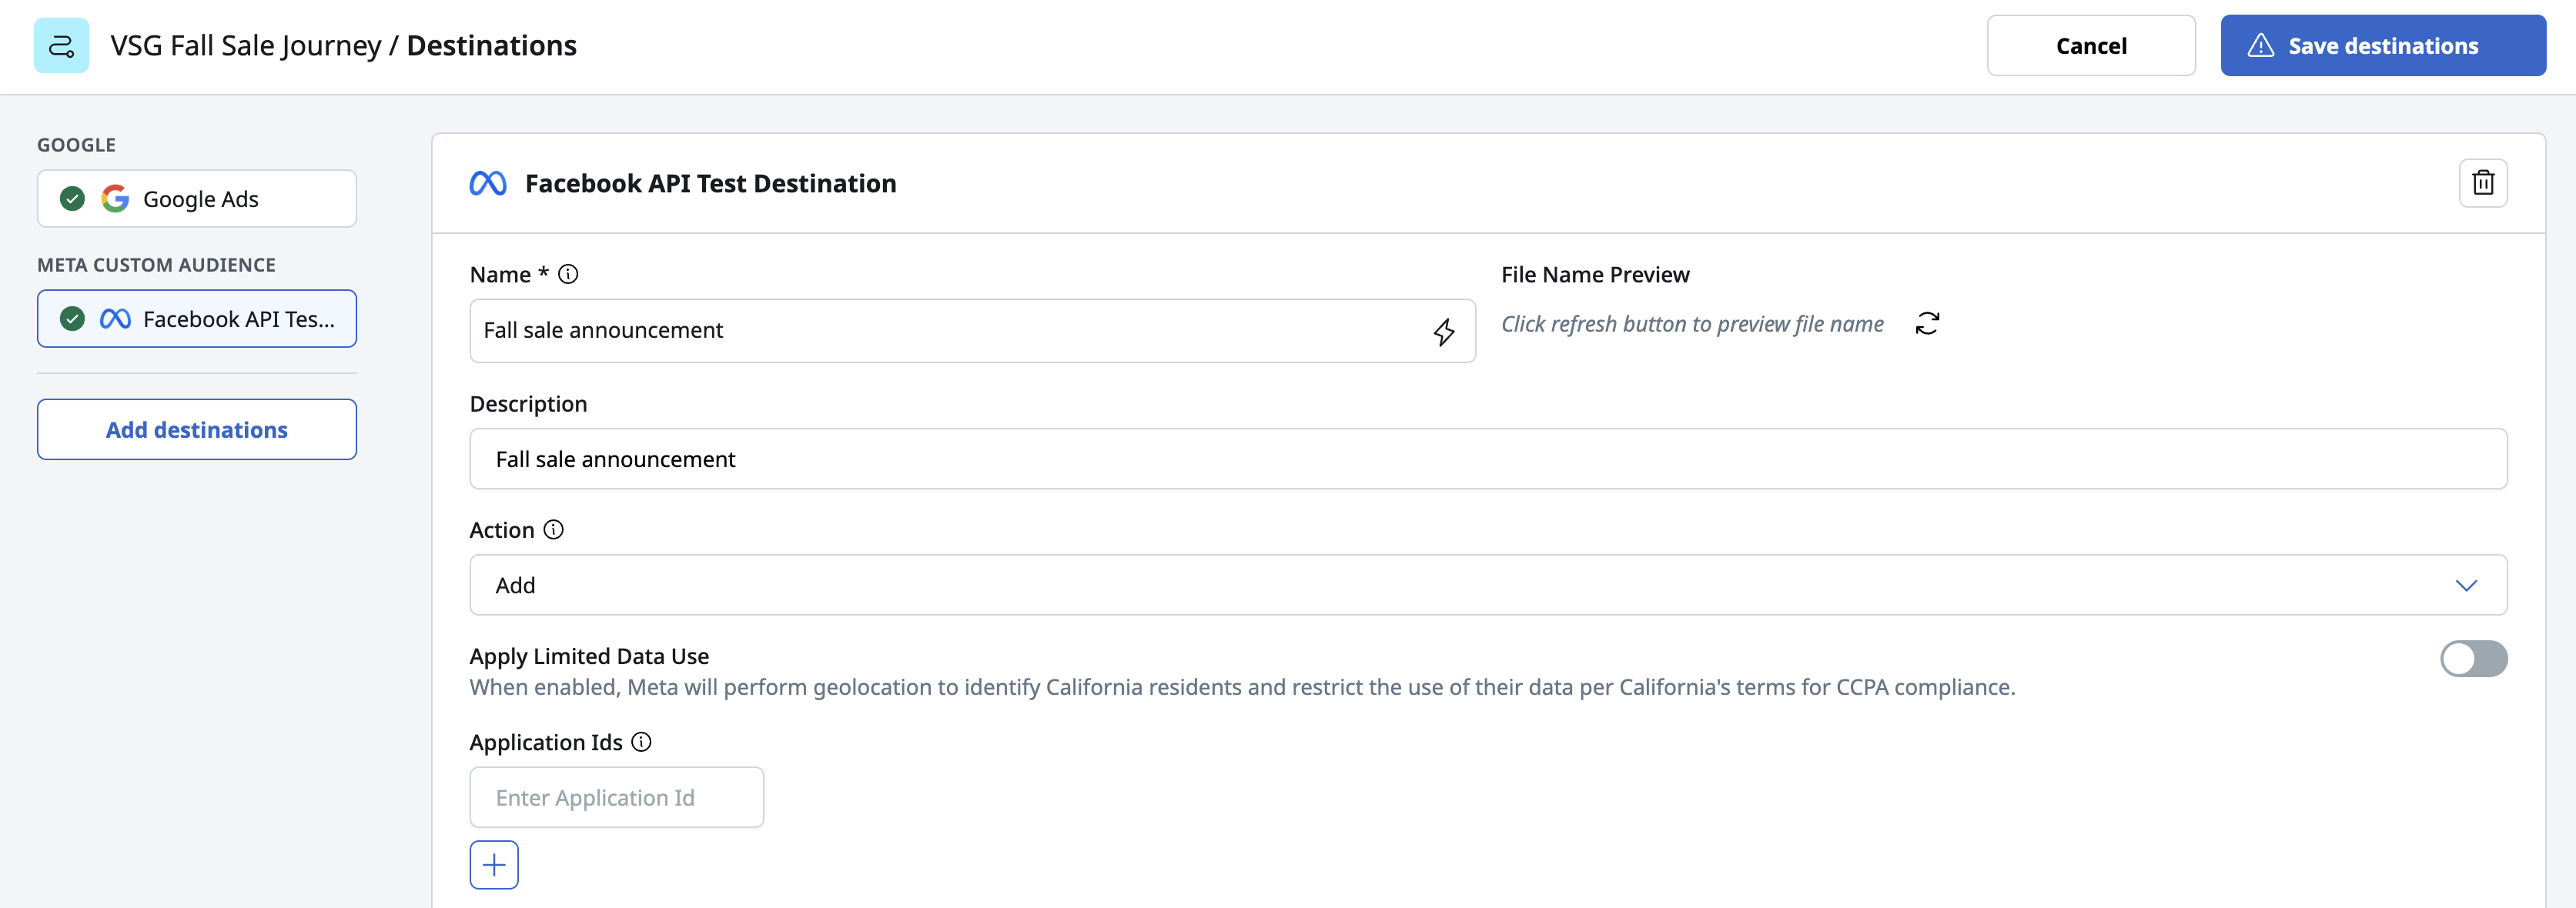
| Meta Custom Audience | Action (add users to or remove users from the audience), Apply Limited Data Use, and Application Ids. When Apply Limited Data Use is on, Meta identifies California residents and restricts the use of their data for CCPA compliance. Application Ids must be numeric. |
| Airship | Airship extras, entered as key-value pairs. |
| Microsoft Ads | Membership duration. If the destination doesn't have user consent, a banner appears in the panel. |
| Amazon S3 | Bucket and Data format. |
| Google Ads | EU Consent. |
| Google Cloud Storage | Data format. |
Name and file name preview
Each destination has a required Name field. To give each export a unique name, personalize the name with the current date or the request ID. To check the result, select the refresh icon in File Name Preview.
Column customization
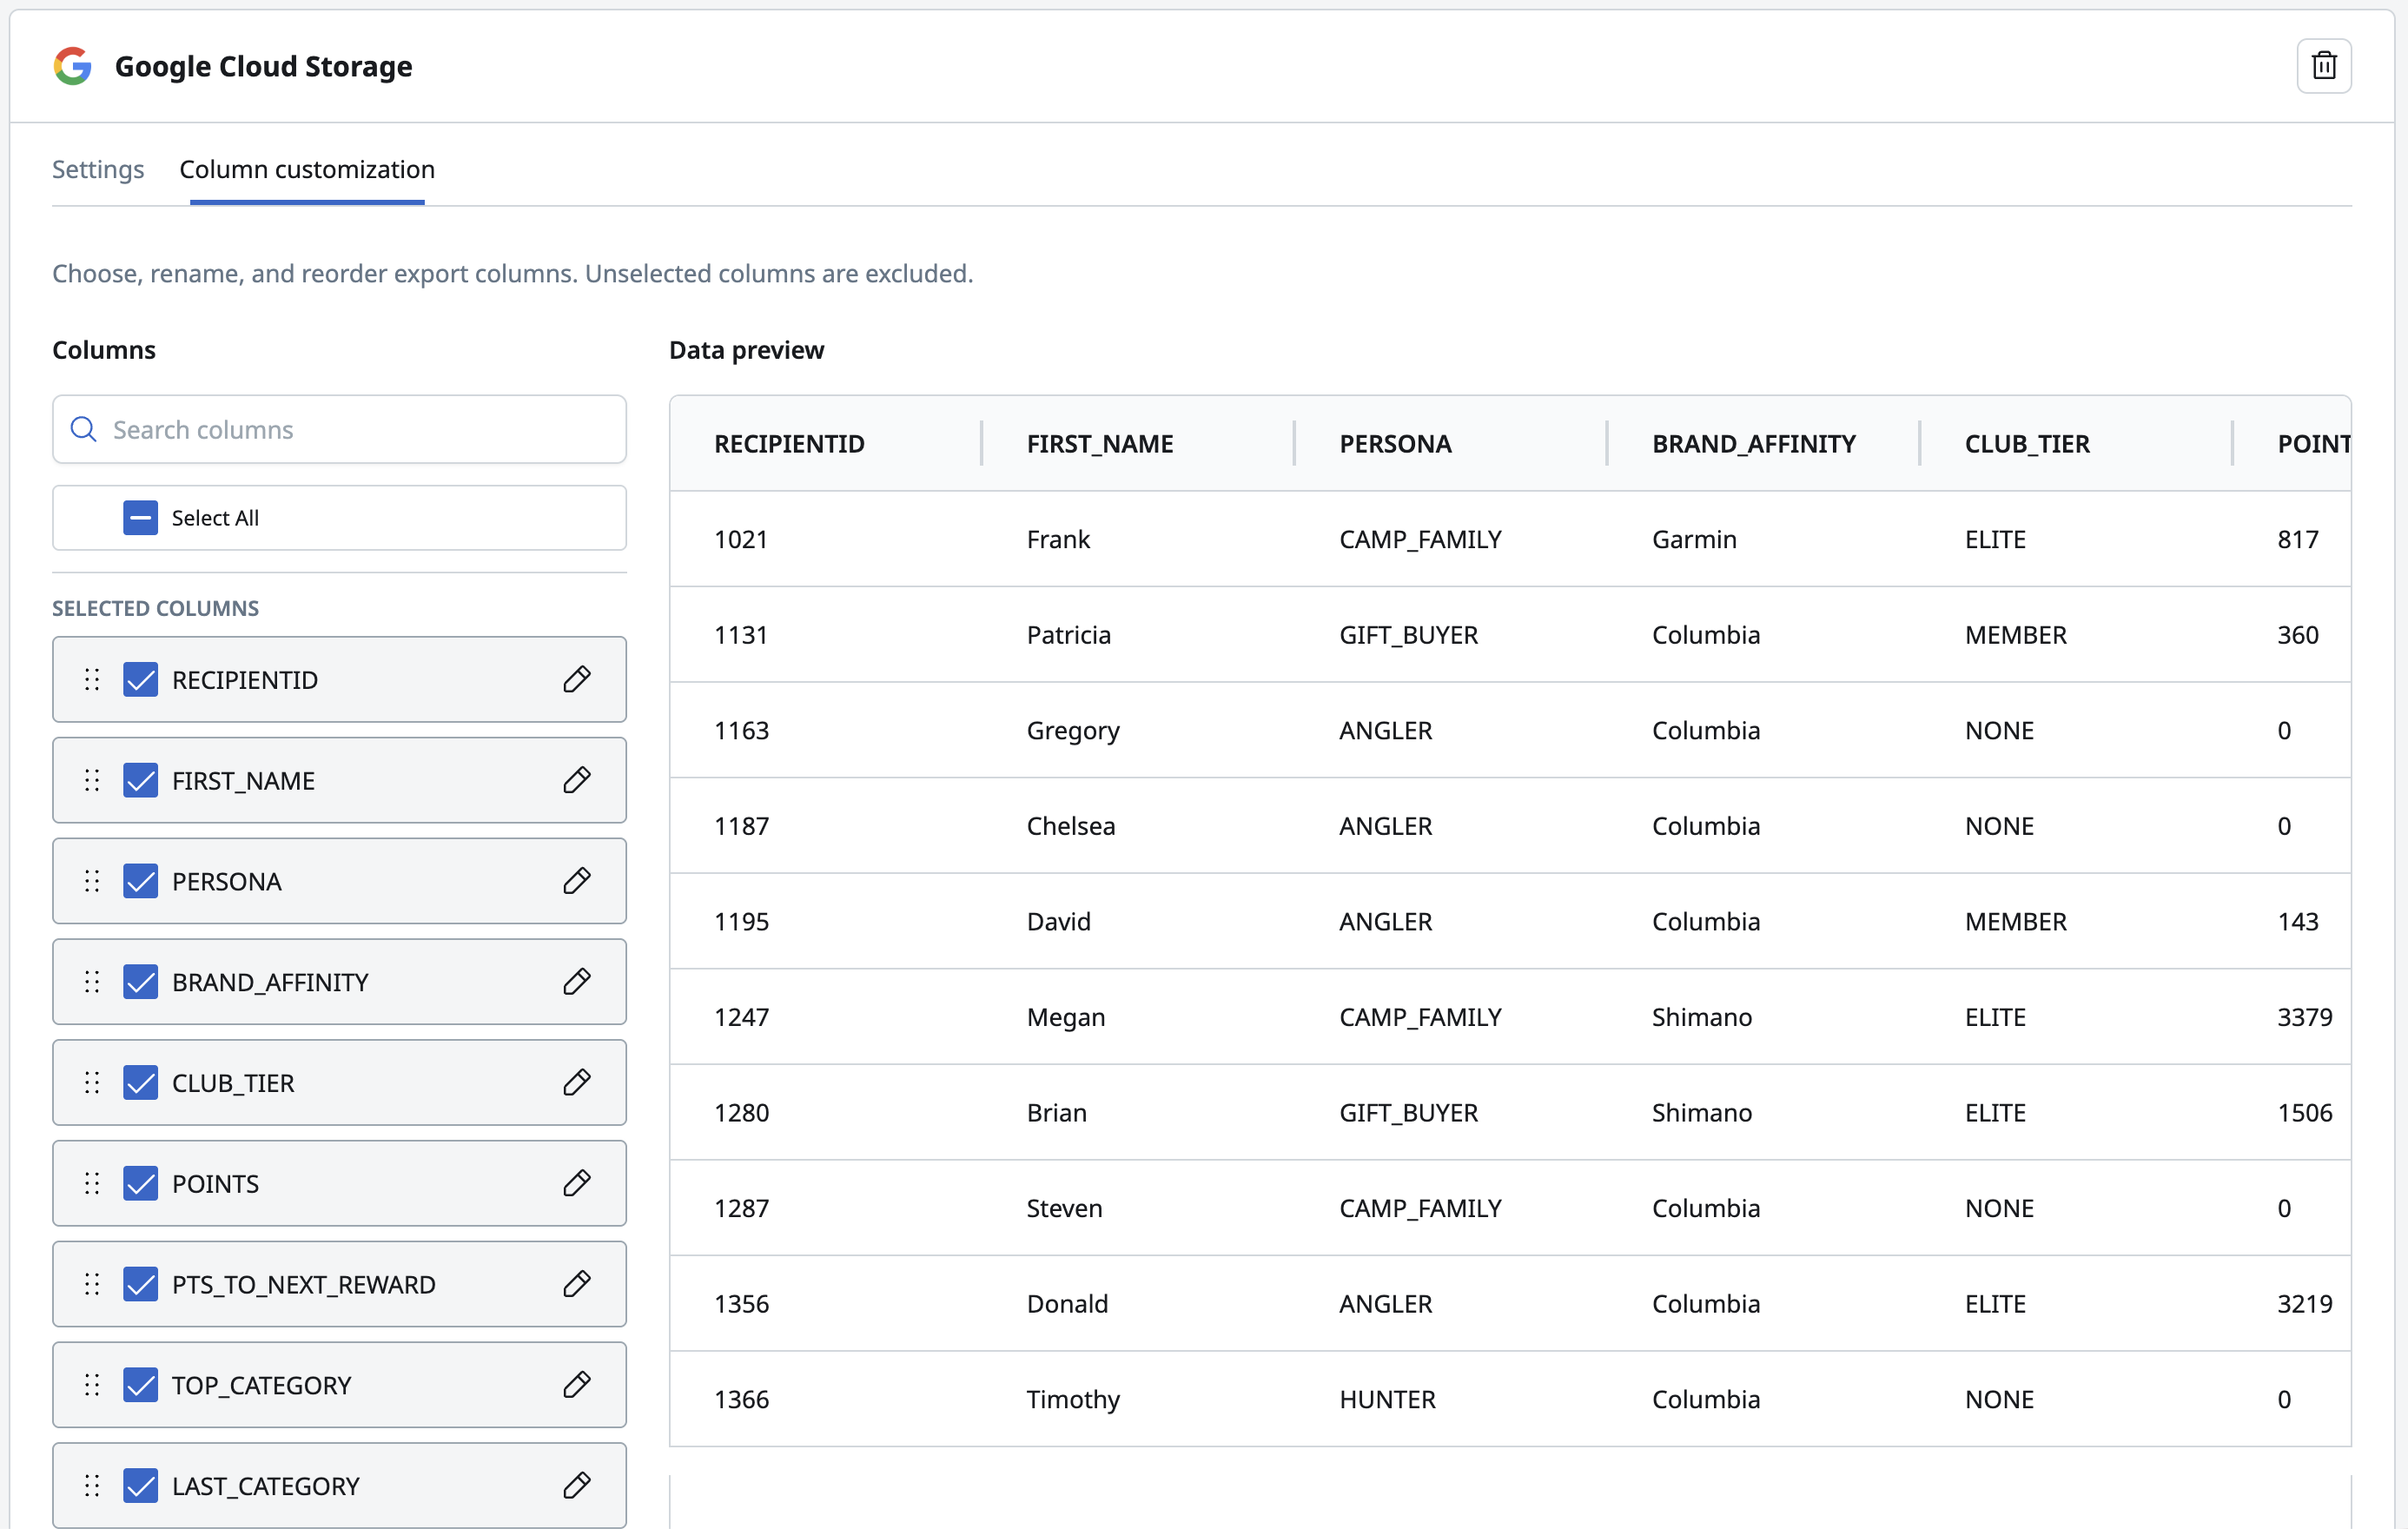
For Amazon S3, Google Cloud Storage, Google Drive, and Swrve Attributes destinations, the Column customization tab controls which user profile columns the export includes and what they're called. All columns are selected by default.
- Select columns - Select or clear each column, or use the select-all checkbox. At least one column must be selected.
- Reorder columns - Drag columns into the order you want. The exported file uses the same order.
- Rename columns - To rename a column in the export, select the edit icon and enter a new name. Names must be unique and can't be empty. To go back to the original name, select Reset.
Columns you clear are listed as excluded, and you can add them back at any time. To find a column, search by its original or new name. The data preview updates as you change columns and shows the custom names.
Changing the user profile
Destination settings depend on the entry tile's user profile. If you change the user profile after configuring a Destination tile, Accelerator asks you to confirm and then clears the field mappings on every Destination tile in the journey. Review each Destination tile before activating.
How users move through the tile
Every user who reaches a Destination tile continues to the next tile, whether or not they were exported. Users who are suppressed or flagged as do not share still move on, even though they aren't sent to the destination.
A journey can be activated with Destination tiles and no message tiles.
Validation and editing
Before you can activate the journey, every Destination tile must have a name and at least one valid destination. If a tile is incomplete, activation stops with the message The journey contains incomplete tiles.
After the journey is live, Destination tile settings are read-only. To change a Destination tile on a live journey, use a draft branch or pause the journey. For more information, see Edit a live journey with a draft branch.
Destination tile analytics
After the journey is live, each Destination tile shows an Entrants count on the canvas. This is the number of users who reached the tile across all of its destinations.
To see the status and size of each export, use the journey's Export History tab. For more information, see View journey analytics.
Time delay tile
Click a Time delay tile to open its configuration panel.
- In the Duration field, enter a number
- In the Unit field, select Minutes, Hours, or Days
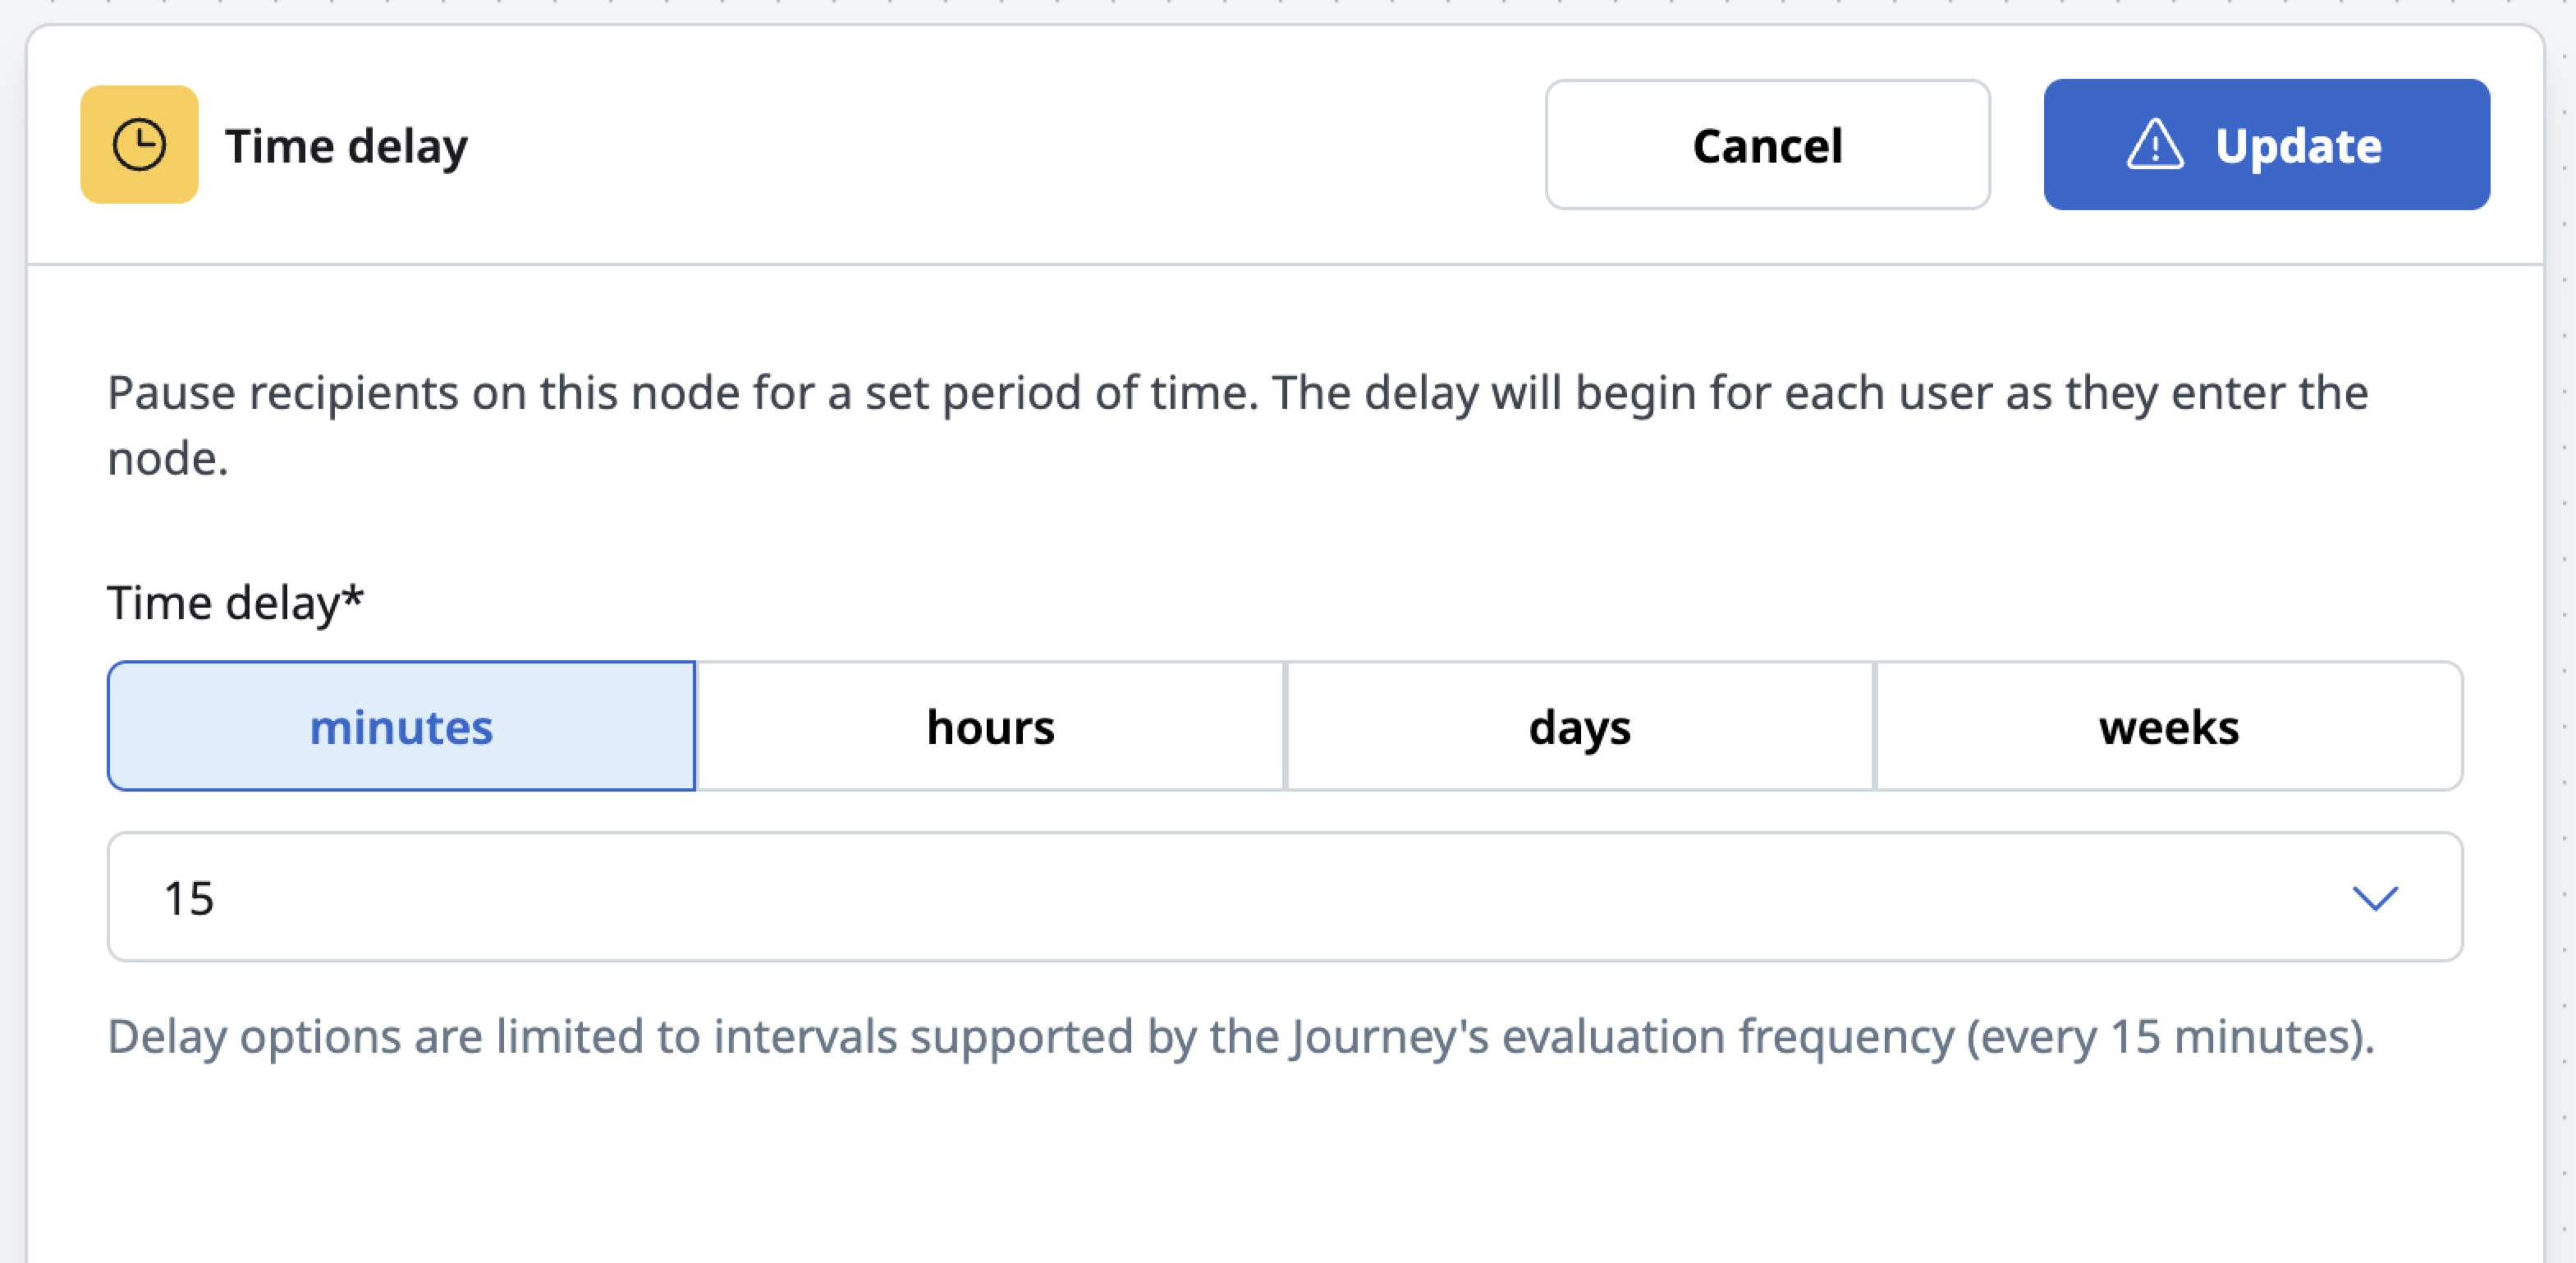
Users remain in the Delay tile until the configured duration has elapsed and the next evaluation cycle runs. If an evaluation cycle is missed while users are waiting in a Delay tile, the users are exited with reason Missed Scheduled Progression.
Segment split tile
Click a Segment split tile to open its configuration panel.
A Segment tile splits users into paths based on attribute rules. Evaluation runs top-to-bottom, left-to-right — the first branch whose rule a user matches is the branch they take. Users who do not match any rule take the Else branch, which is required and cannot be removed.
To add a split:
- Click Add split
- Enter a Split name — this name appears in the canvas and in path reporting
- Click Add rule to open the targeting rule drawer
- In the rule drawer, select an attribute from the user profile, select an operator, and enter a value
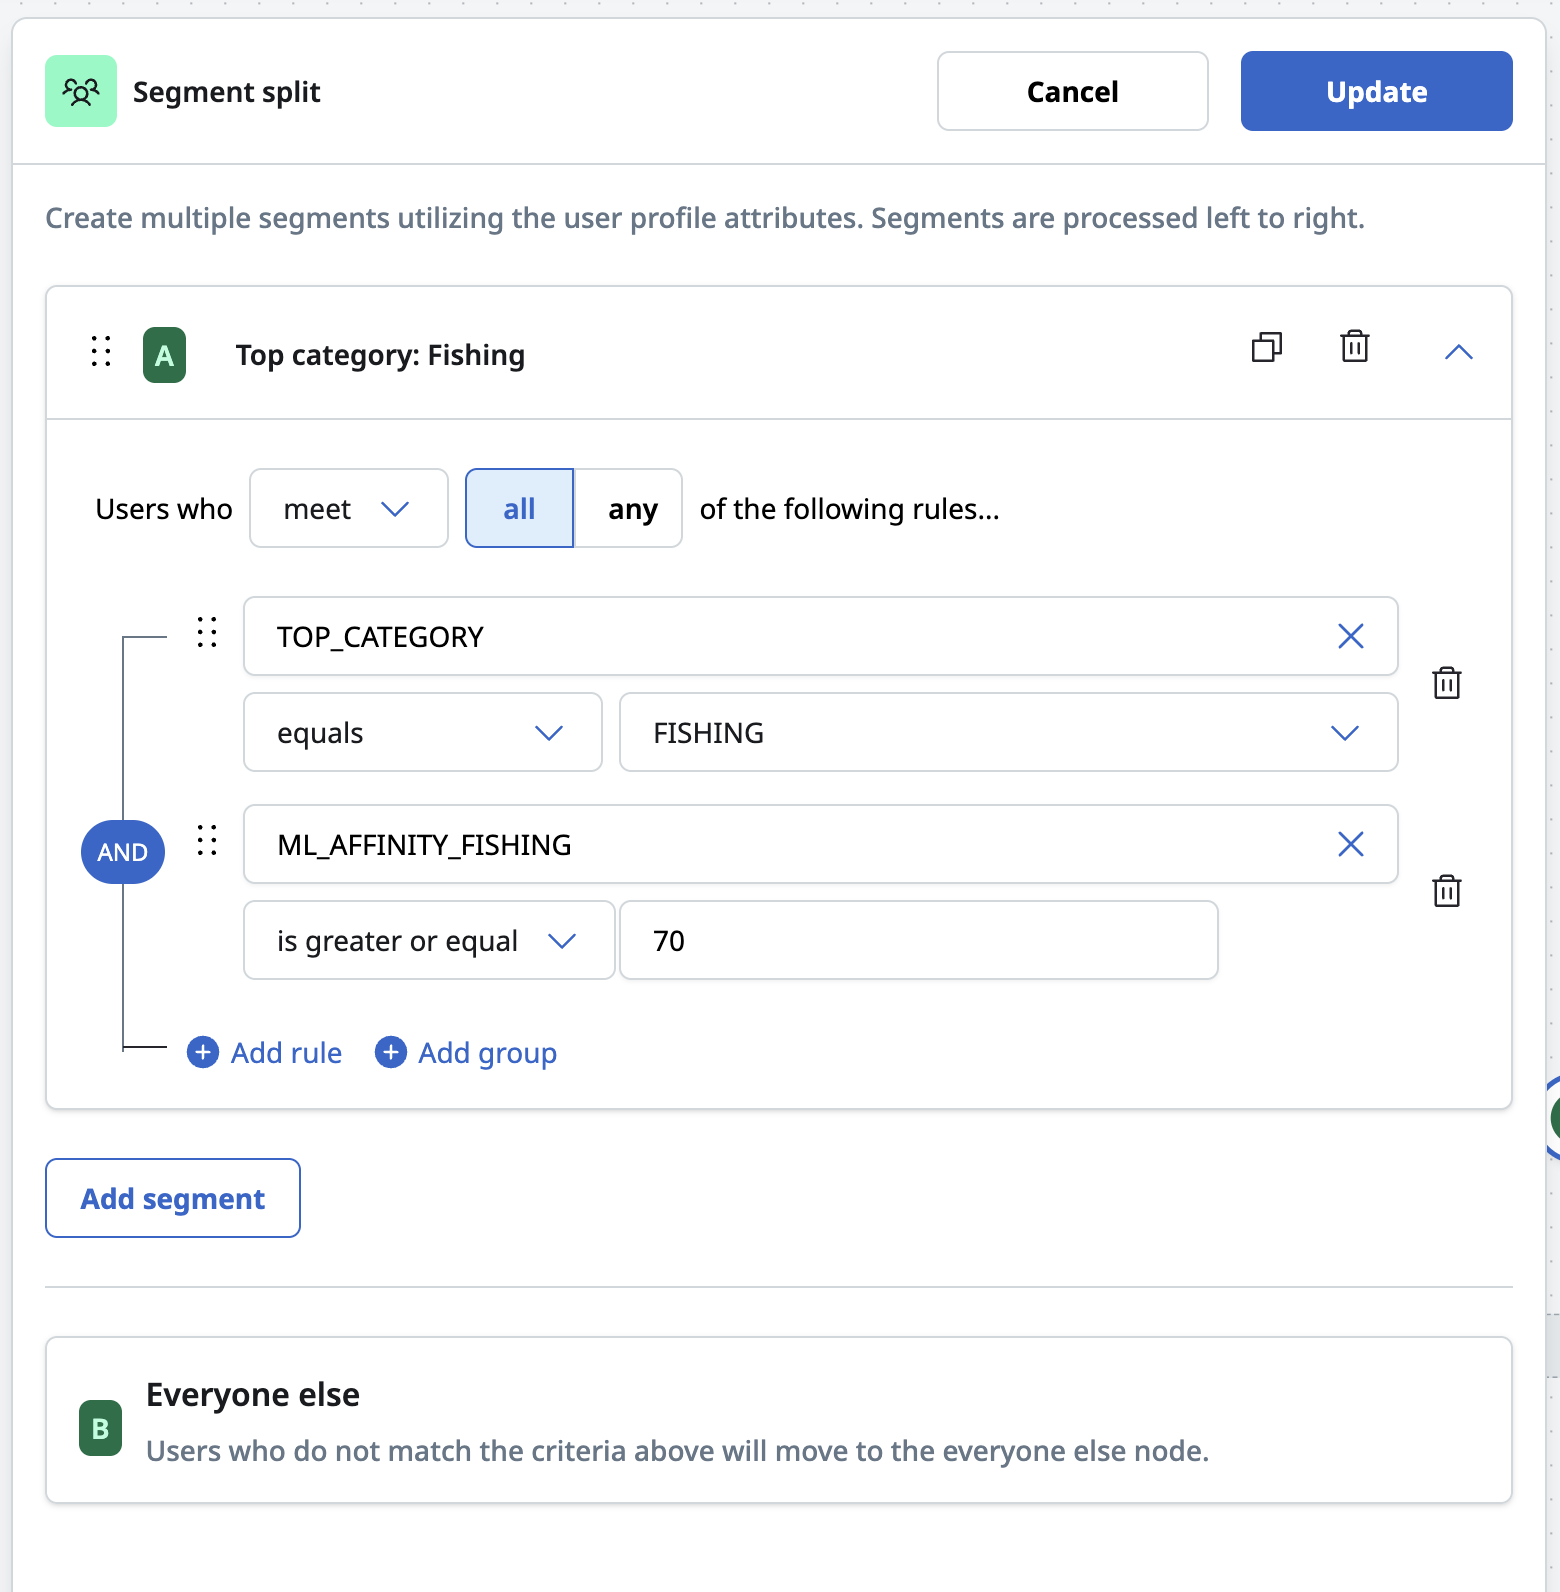
Supported operators depend on the data type of the attribute. Common operators include: is, is not, contains, does not contain, is greater than, is less than, is empty, is not empty.
If a user's profile row exists but an attribute value is null, the rule evaluates as a non-match. The user routes to the Else branch.
If a user's profile row cannot be found at segment evaluation time, the user exits the journey with reason Missing Profile Id.
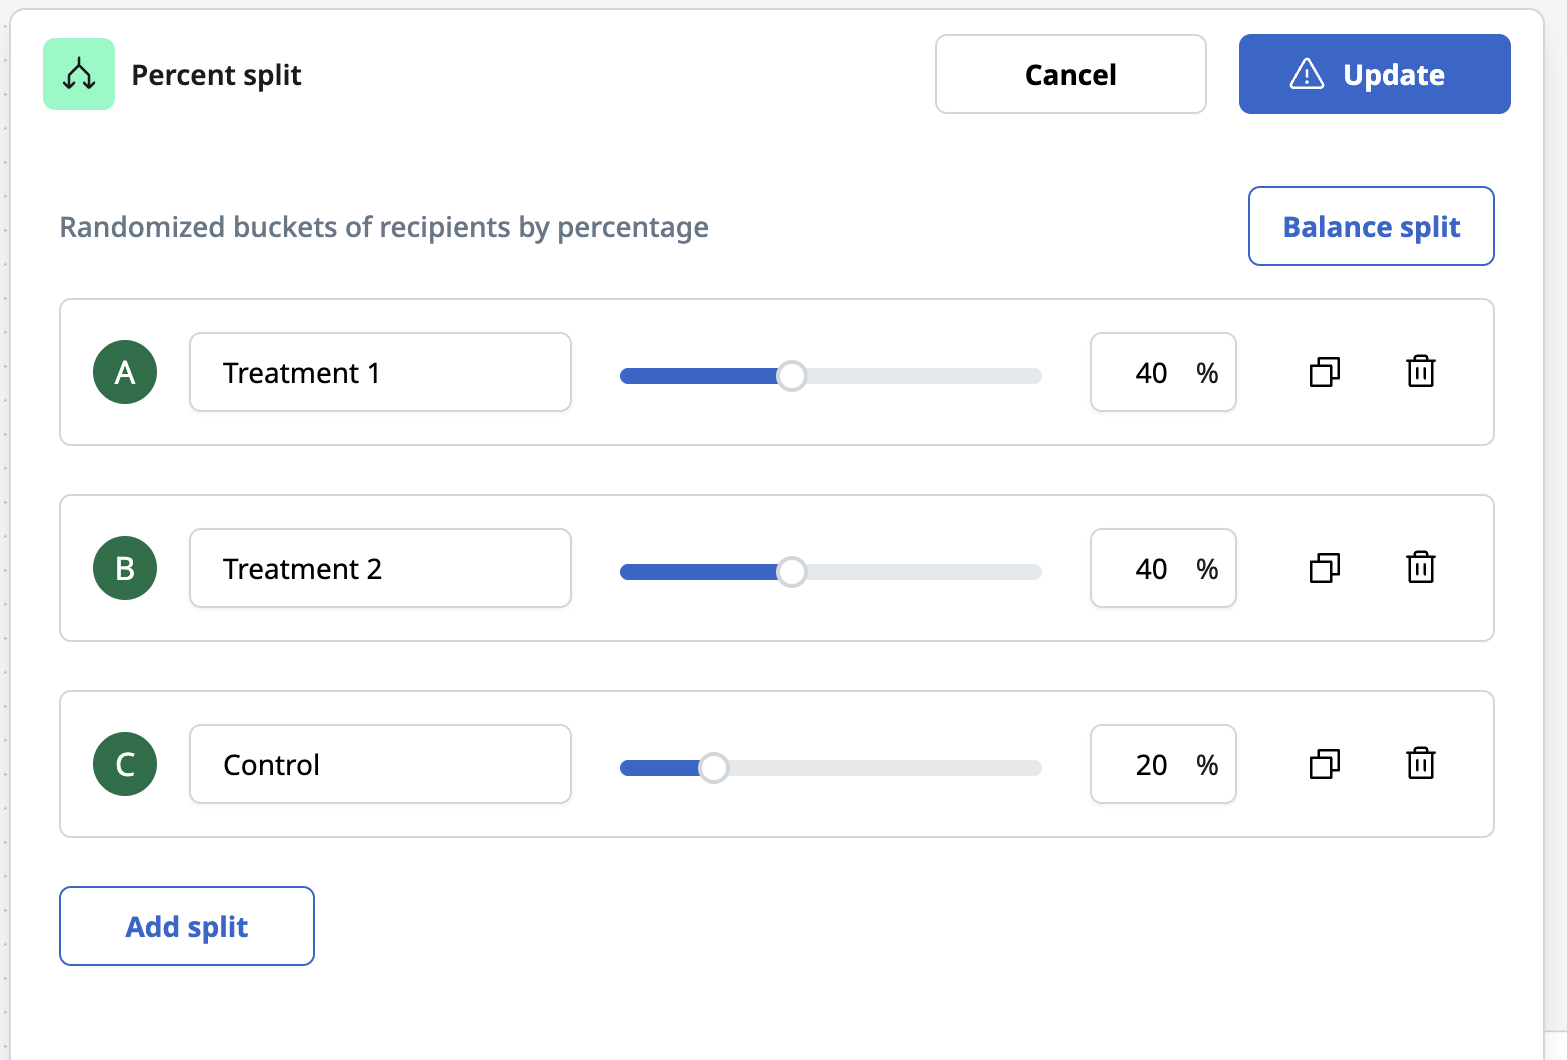
Percent split tile
Click a Percent split tile to open its configuration panel.
A Segment tile branches users into paths based on percentage randomization rules. The split values must sum to 100. Zero (0) percent is acceptable and can be used to deactivate a split branch without deleting it.
To add a split:
- Click Add split
- Enter a Split name — this name appears in the canvas and in path reporting
- Enter a whole number between 0 and 100.
Merge tile
A Merge tile rejoins multiple branches into a single downstream path. Connect the output of multiple branches to the input of a Merge tile to consolidate them before a shared downstream tile.