Accelerator 25.3.1 release notes
Initiatives Released
Embedded Campaigns
Create, customize, and embed tailored content directly into your app or website using MessageGear’s Embedded campaigns. This powerful channel enables your app developer to build personalized, native experiences that can be seamlessly embedded, all while leveraging MessageGears' advanced targeting and triggering capabilities. Use Embedded Experiences, to:
- Recommend content - Suggest new shows or products that align with the users' interests and behavior in a carousel format
- Announcements – Inform users about app updates, website maintenance, or expected downtime using a helpful banner
- Promotions – Display a list of product offers and promotions the user qualifies for in an inbox
- Tutorials - Drive awareness around new features, that may not be obvious on your app or website’s homepage
Goals
- Give Marketers the power to create native, unobtrusive experiences for their customers
- Introduce a new powerful channel for communicating with users through their website
Create an Embedded experience campaign
The Marketing campaign channel selector now includes an option to create an Embedded experience. As with the Push notification and In-app message channels, customers can set their campaigns' mobile app, account, and categories. After selecting the campaign’s mobile app, customers select what device types and platforms the Embedded experience should target.
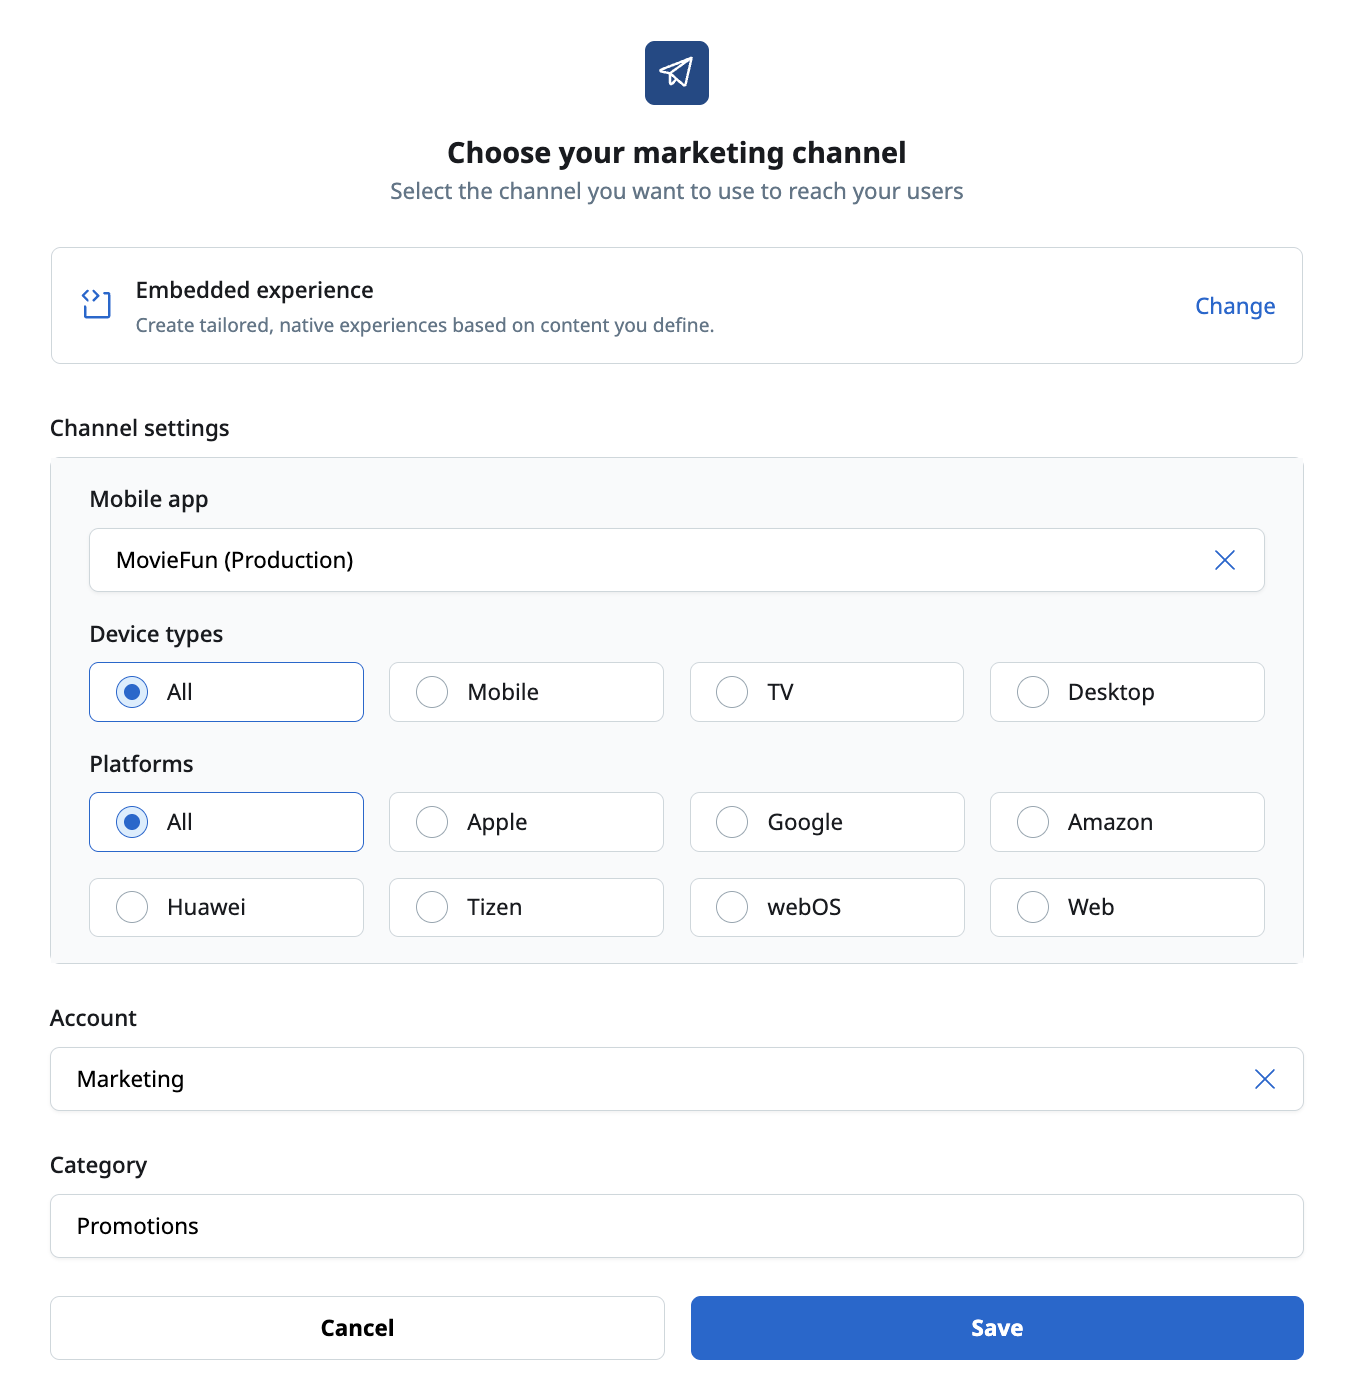
Set the mobile app, device type(s), and platform(s) to send your Embedded experience to
Campaign content
The What card shows all the information about the Embedded experience’s content. As with In-app message campaigns, the content is created as part of the campaign, not in advance through a template.
Format
Since the purpose of an embedded campaign is to provide the developer with data to update the app, the content of the campaign must consist of JSON or Other.
- If set to JSON, the editor validates the content and displays a warning if the content is not valid JSON. Hover over the warning icon to see error details.
- If set to Other, the editor does not perform validation.
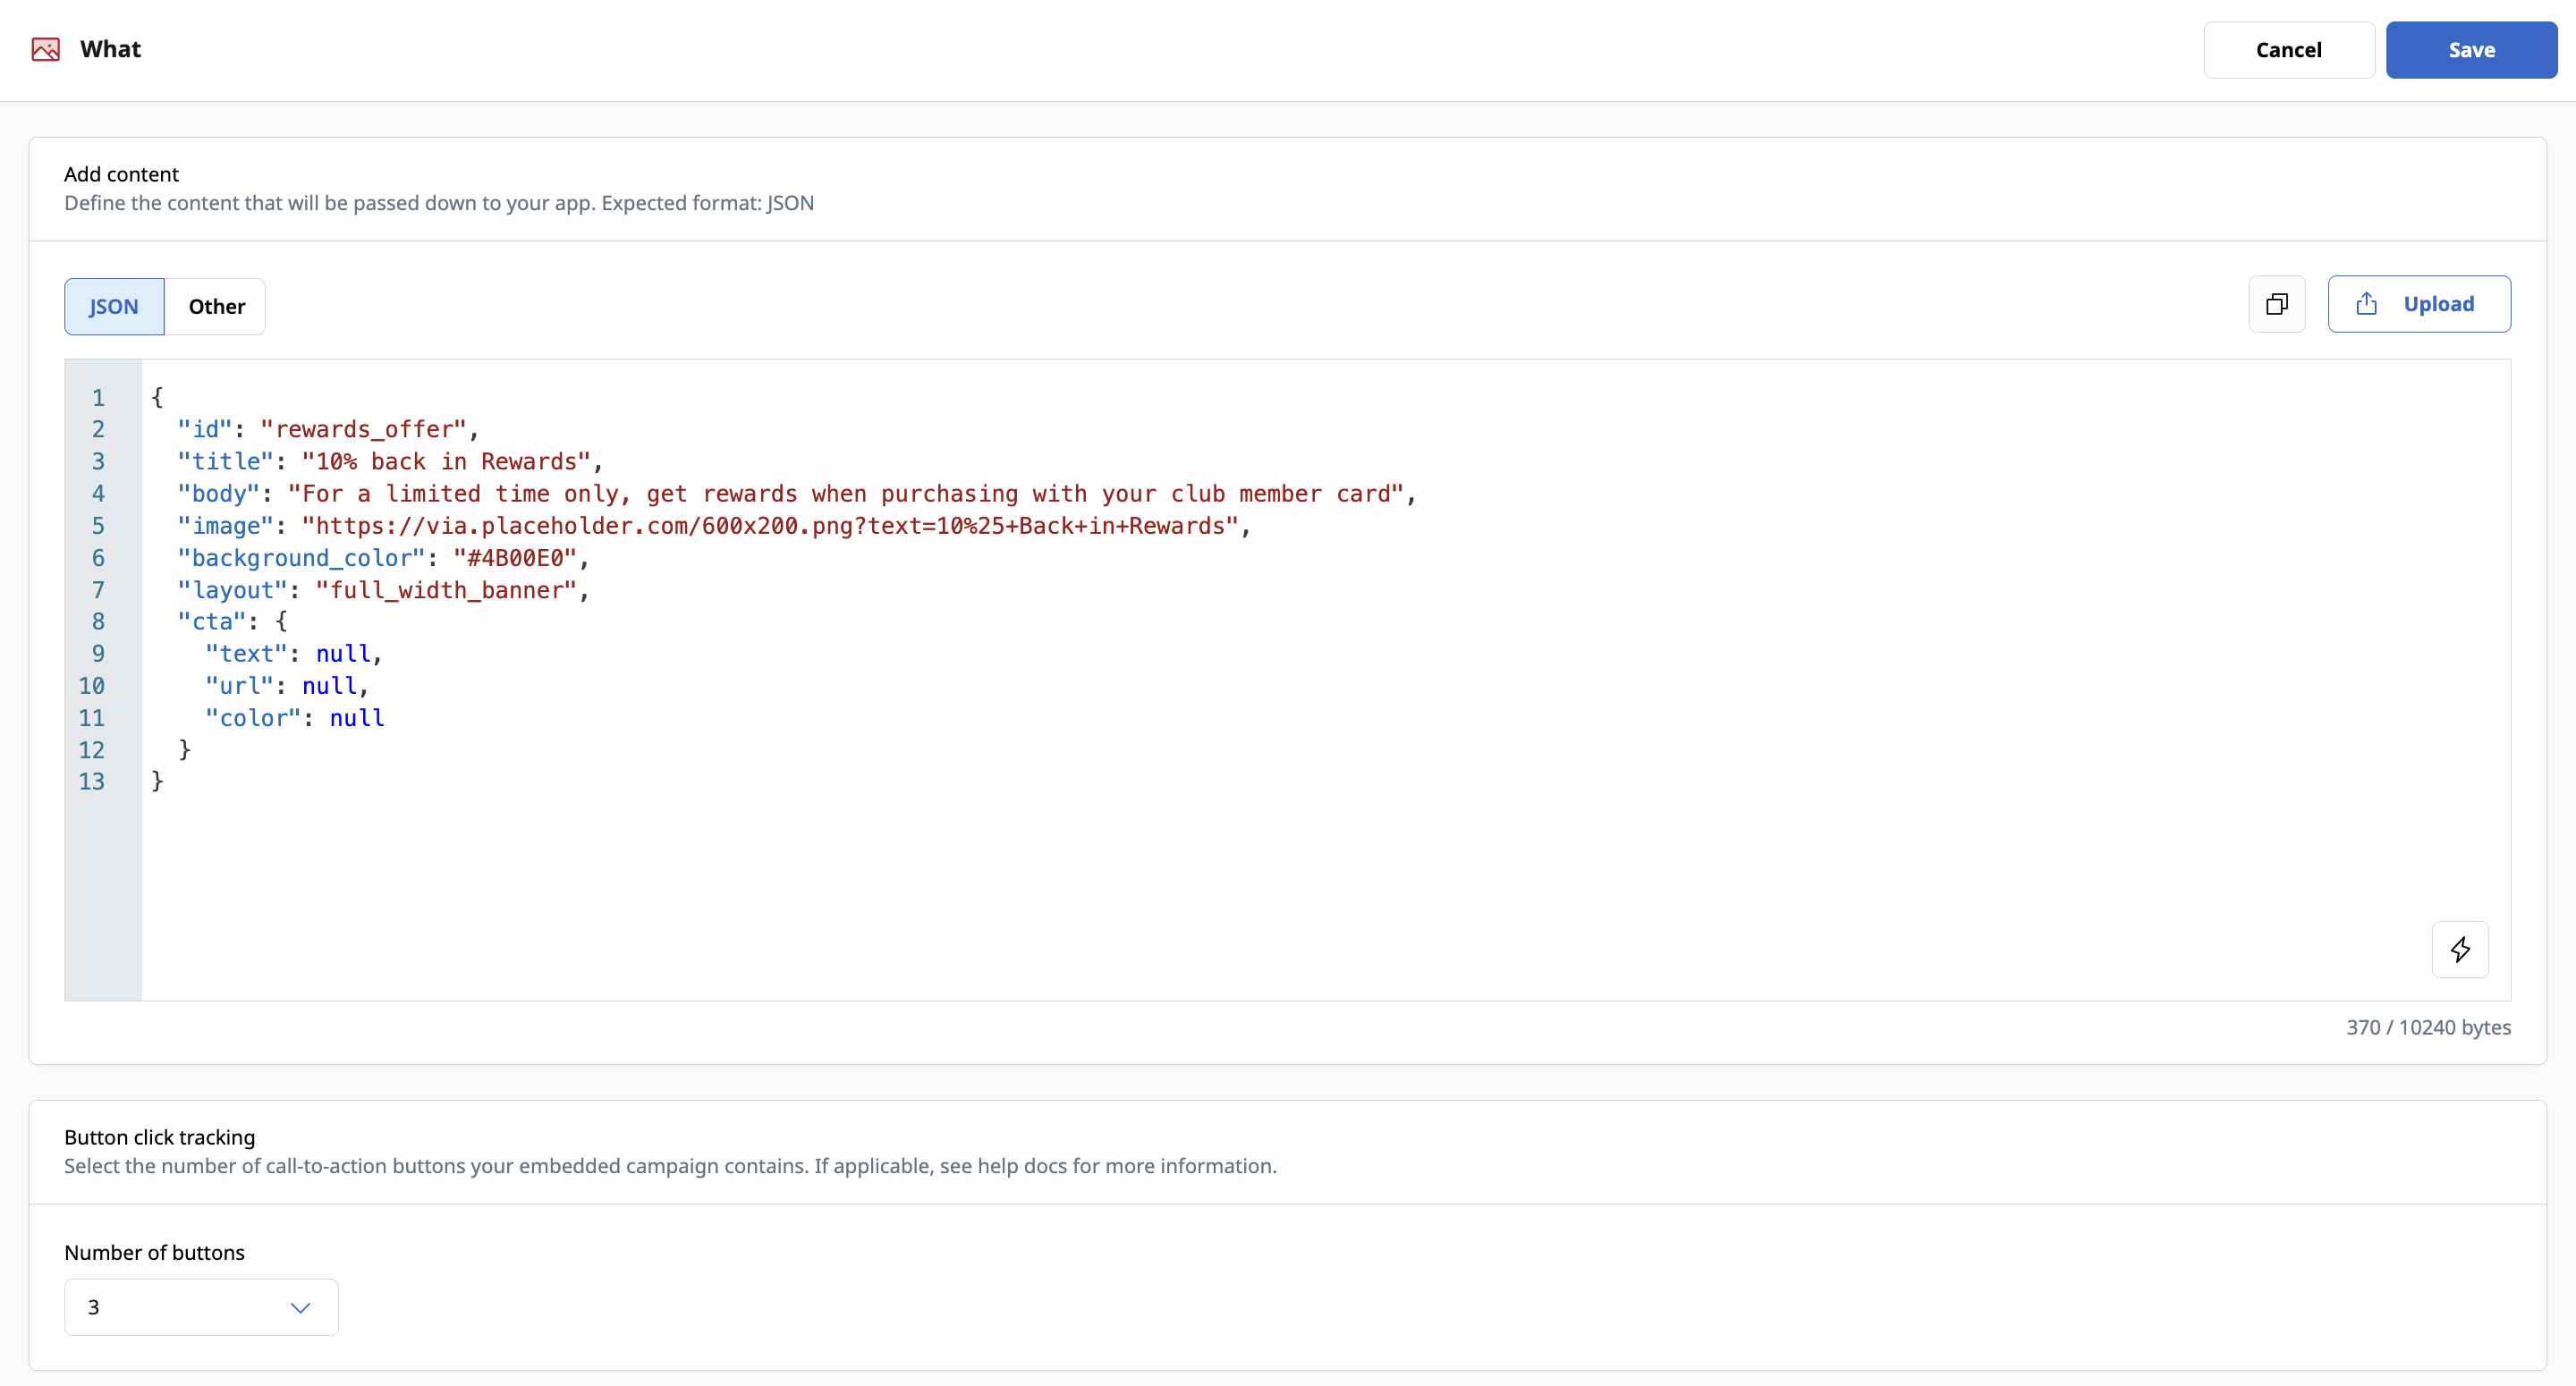
Build your Embedded campaign’s content using JSON or another format
Button Click Tracking
Depending on how your developer has configured your Embedded Experience, use Button click tracking to track users’ engagement with the campaign. If applicable, select the number of call-to-action buttons your campaign contains. If you don’t want to track interactions for your campaign, leave the number of buttons as zero.
The maximum content size for each variant is 10KB. If one or more variants contains over 10KB or 10,240 bytes worth of content, you won’t be able to save your campaign content. Accordingly, you can’t upload files larger than 10KB in size into the Content editor.
Personalization
Use the new personalization menu to inject user data directly into each text input field, without having to copy and paste. The menu also allows marketers to define the fallback behavior and text, if applicable.
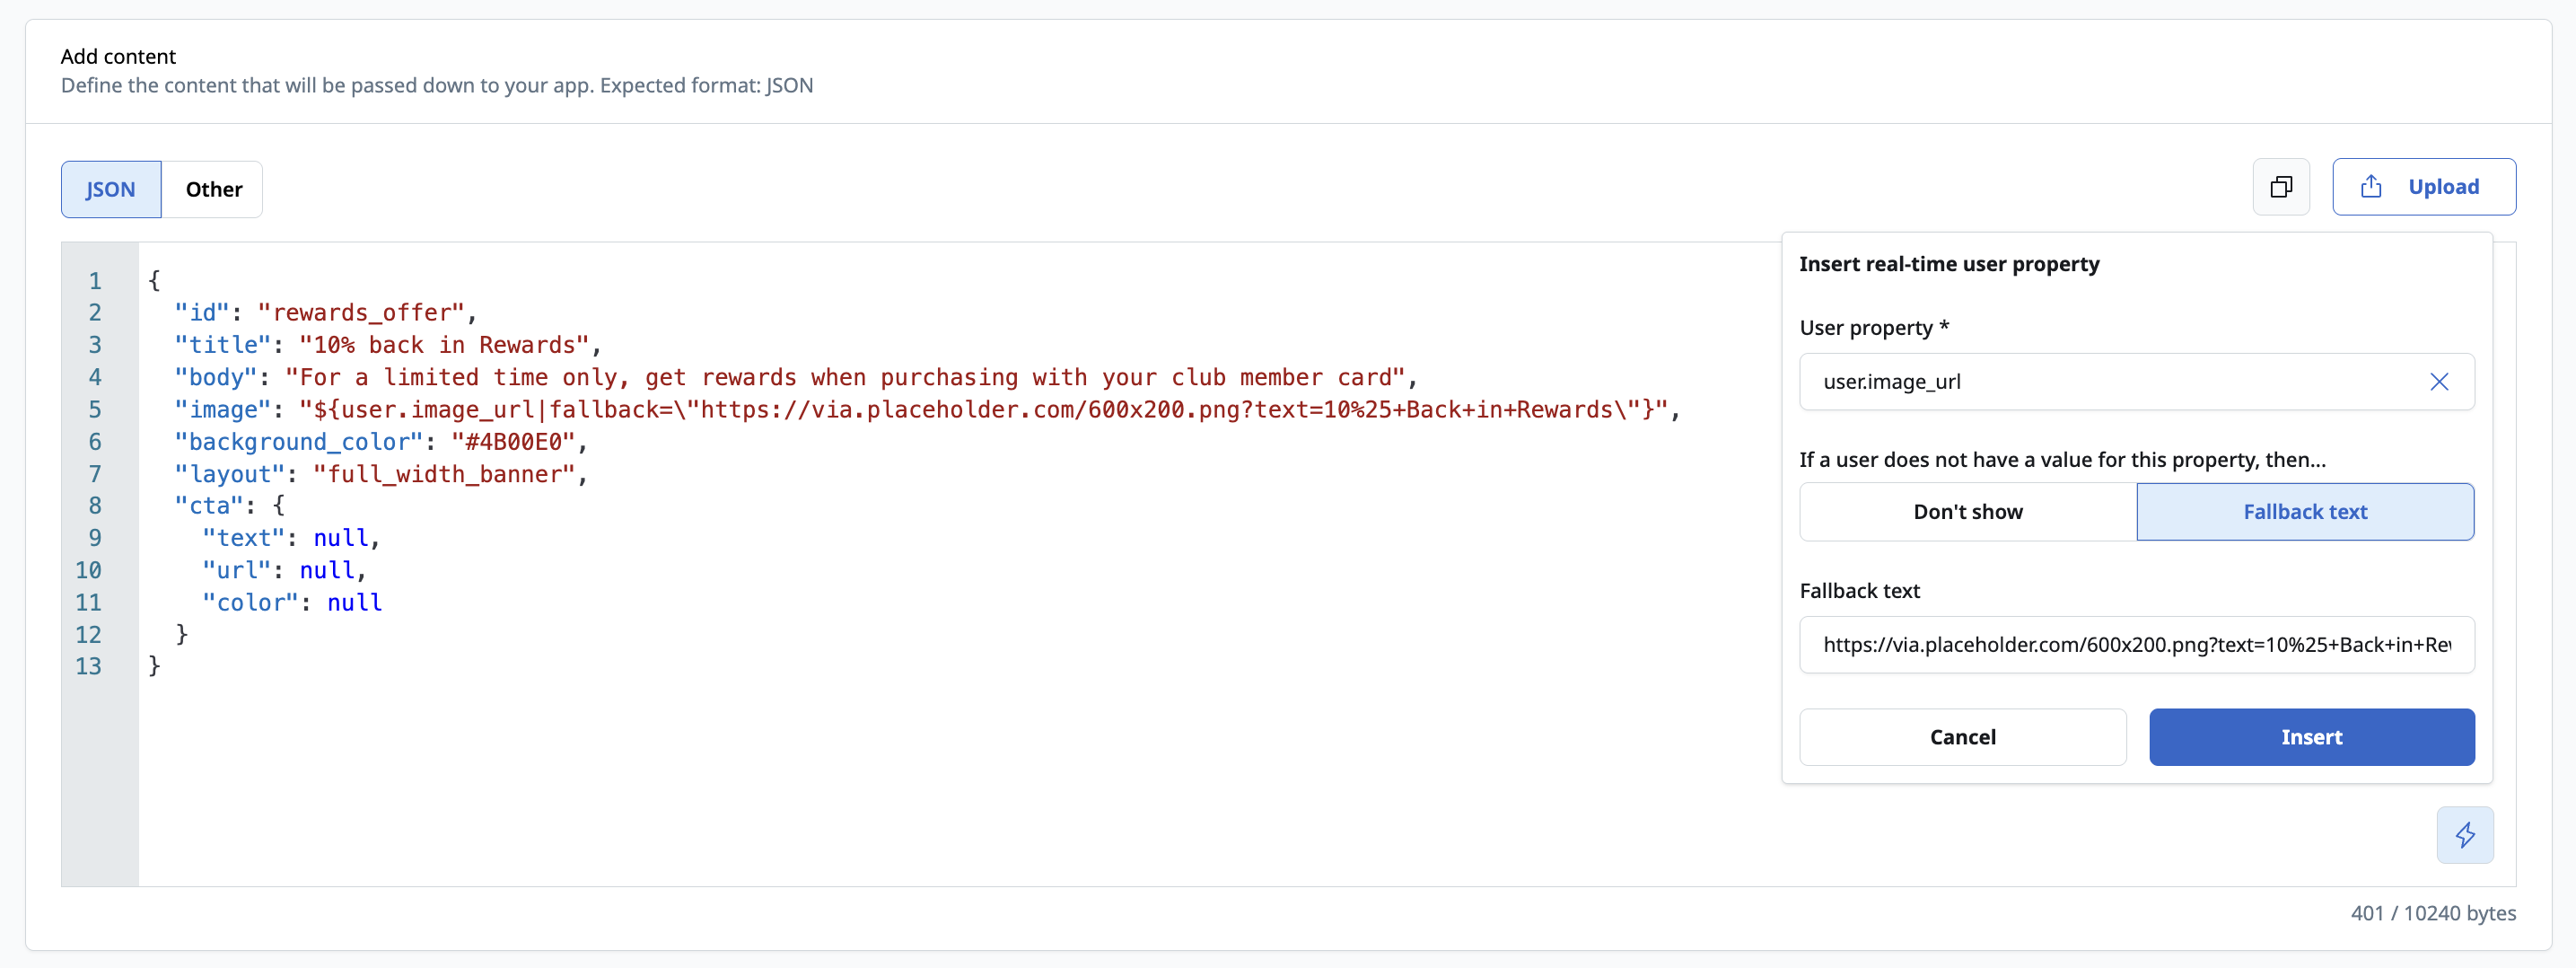
Personalize your Embedded content with user properties
Embedded campaigns are personalized with user properties specific to the campaign's mobile app. If you need any help setting up user properties, contact your CSM.
Campaign schedule & display triggers
The When section allows you to define the campaign’s start and end date, and where the message should be displayed in the app or website.
Schedule
The schedule allows customers to define when the campaign is active and served to targeted users. Campaigns can have a start and an end date, or be launched immediately and be left to run indefinitely and ended manually.
Display triggers
Customers can choose where and when the message should be displayed inside the app:
-
Triggered when user takes action(s)
- Opens app or website
- Triggers custom event (e.g. navigating to a webpage or app screen)
-
Display inside a message center (recommended for Embedded campaigns)
All custom events recored by the SDKs are listed in the Triggers dropdown field.
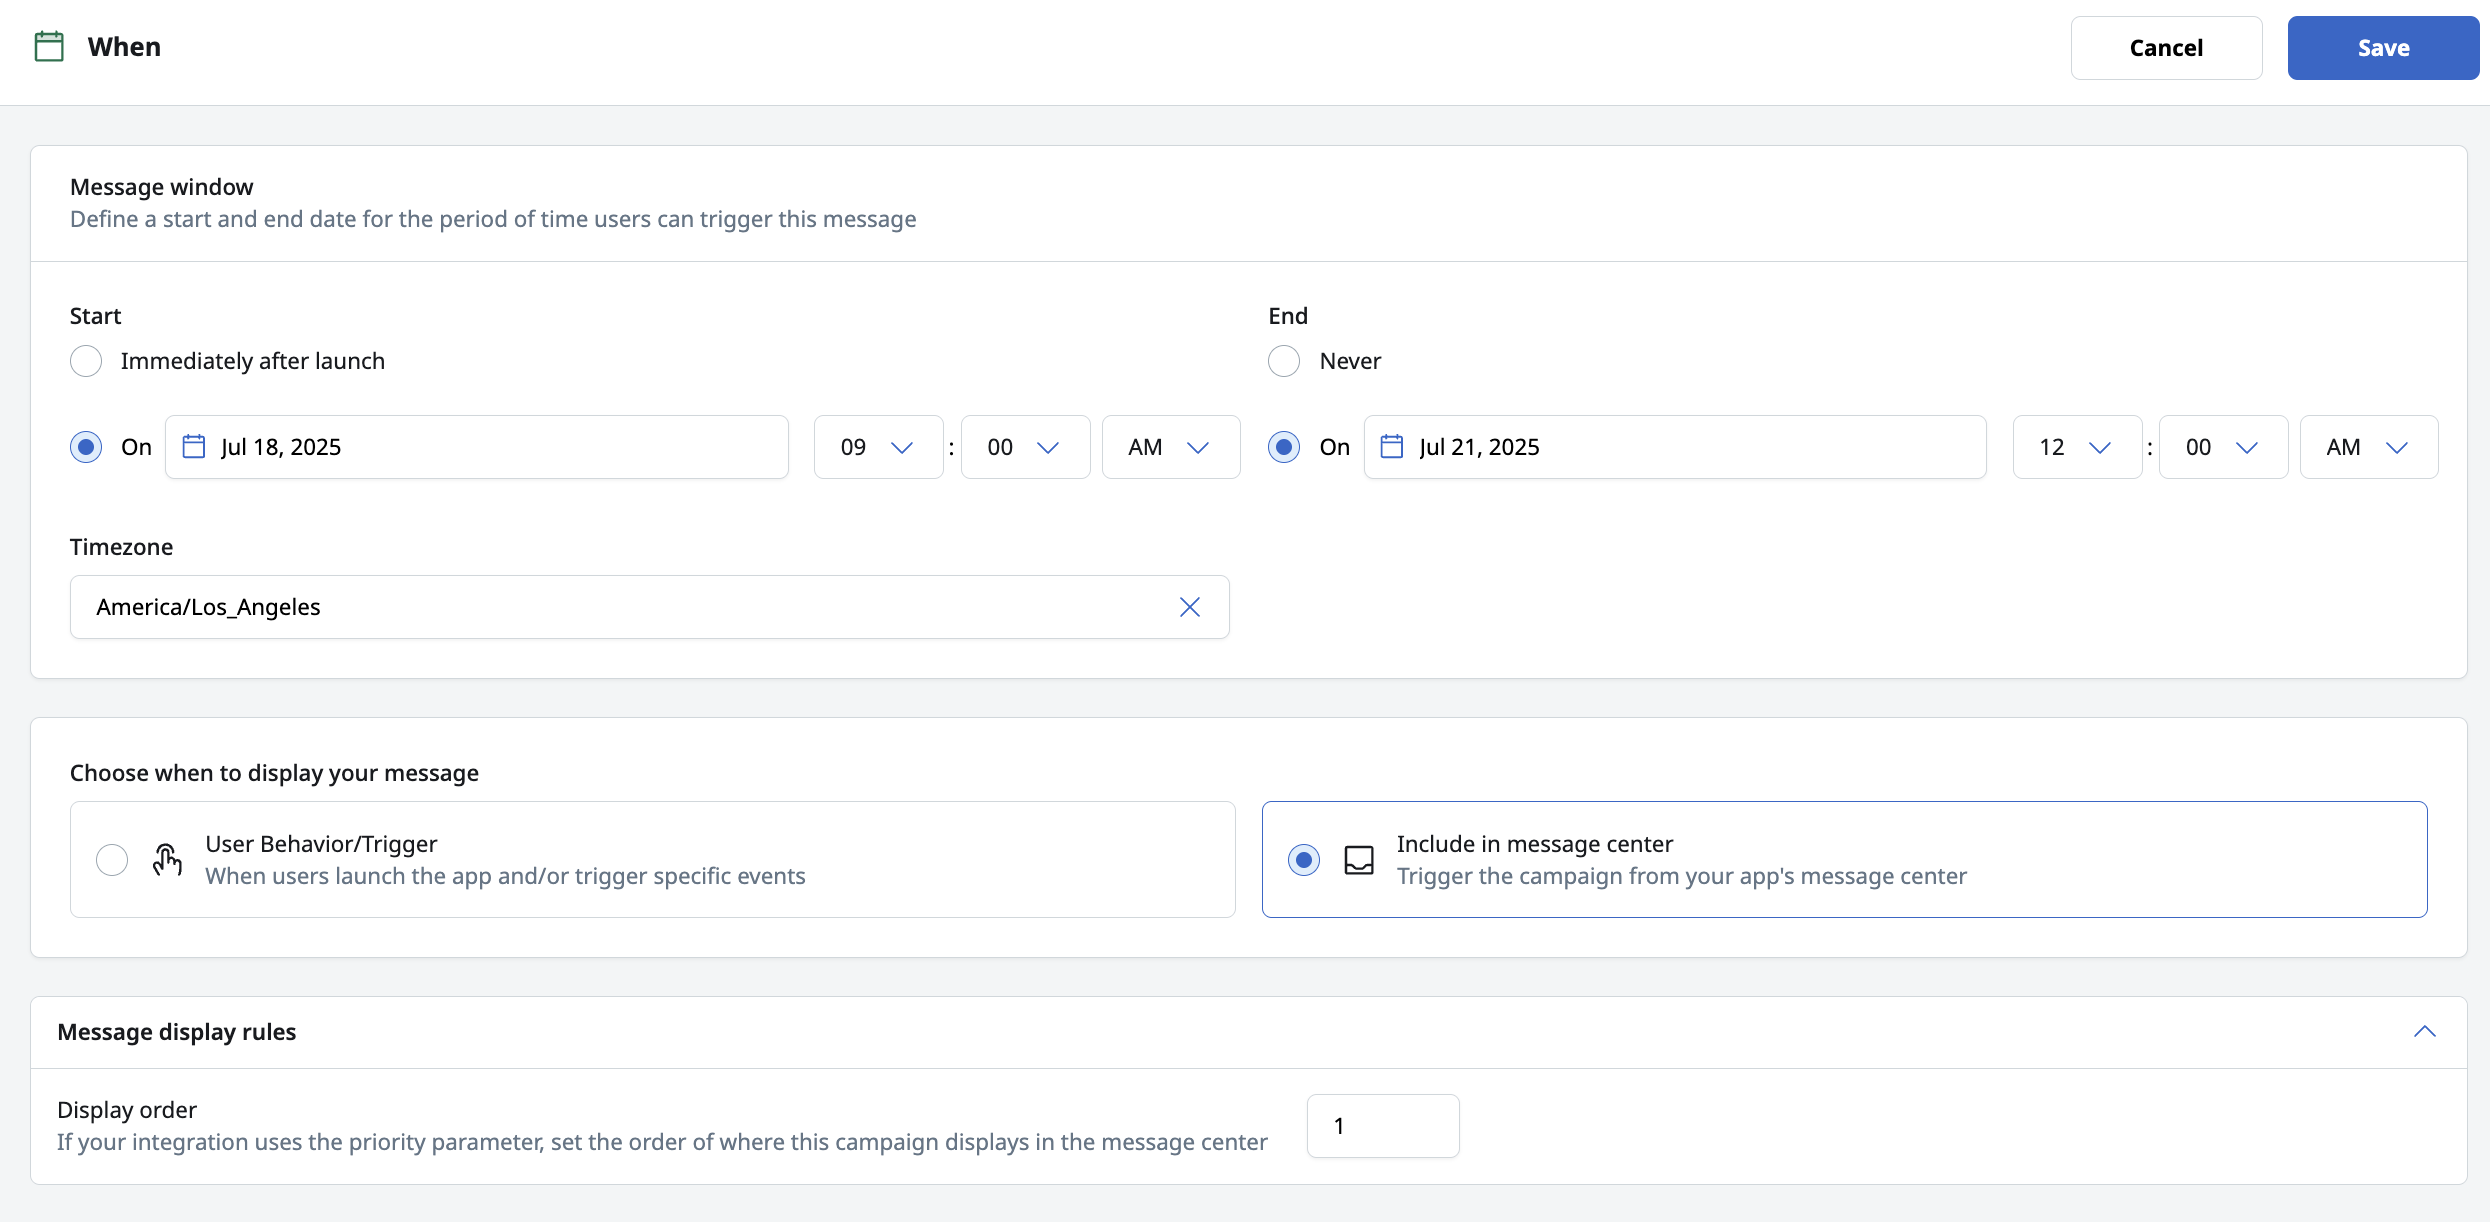
Define When and Where the Embedded Experience should be displayed
Prerequisites
To send Embedded content to your app or website, your development team must integrate the associated MessageGears SDK(s). For more details, see the relevant platform guide.
Template statuses
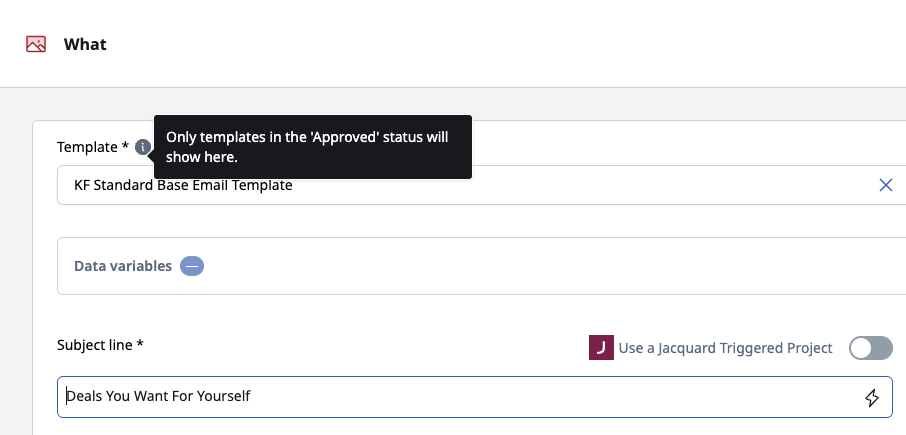
For teams that have a more intricate approval process for content, we’ve introduced an easy way to track Templates through their original creation to a production ready status. If using this feature, Templates that are not in the Approved status won’t be available for selection in Campaign Settings; meaning you’ll be able to prevent Templates still in progress from being added for use in Campaigns.
Goals
- Give Content Authors a way to declare that templates are not ready to be used in a live campaign yet
- Allow teams to leverage a status to alert other team members that Templates are ready for testing
- Allow users to filter Templates by status
This feature is optional, and can be enabled under the System Defaults page within System Configuration. Once enabled, Template Status will show up as a value for all Templates.
Be aware - anytime the Enable Template Statuses option is enabled, all existing Templates will be automatically given the Approved status. This is to prevent interruption of any ongoing tasks. Going forward, any new Templates will receive the normal Draft status on creation.
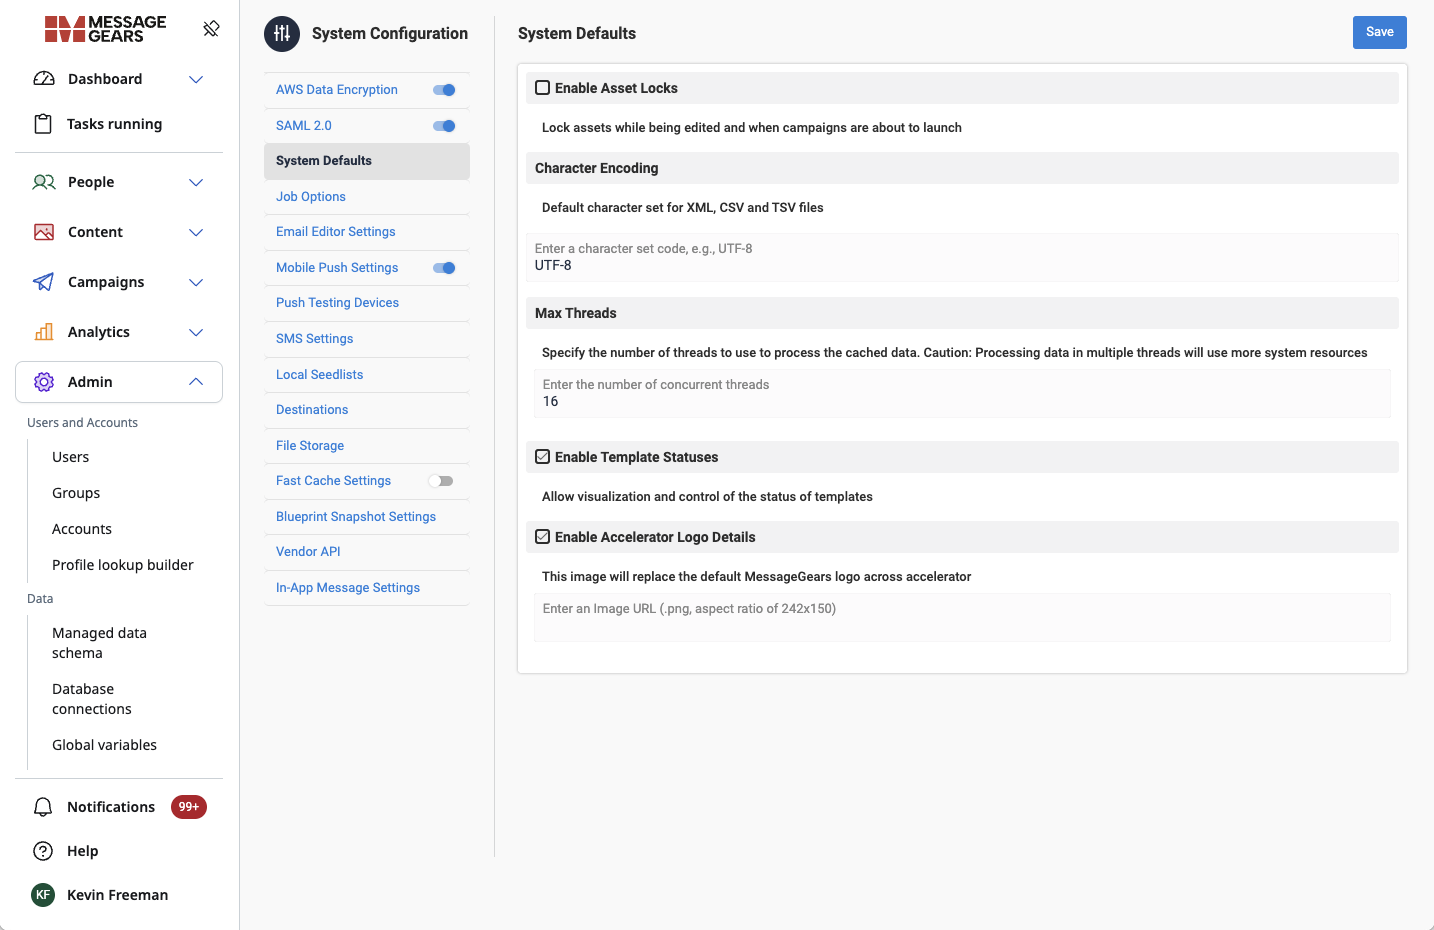
System Admins can enable this using Enable Template Statuses checkbox
Once enabled, you’ll see the new Status value on the Template Overview page. As long as the user has Edit rights on the Template, they’ll be able to update the value from the dropdown. The statuses are stock values of:
- Draft - will be the default value of any newly created Template
- Ready for approval - can be used in the team’s approval process to help filter Templates ready for testing
- Approved - is the value required for Templates to be visible to be added to any Campaigns (Marketing, Experiments, Transactional)
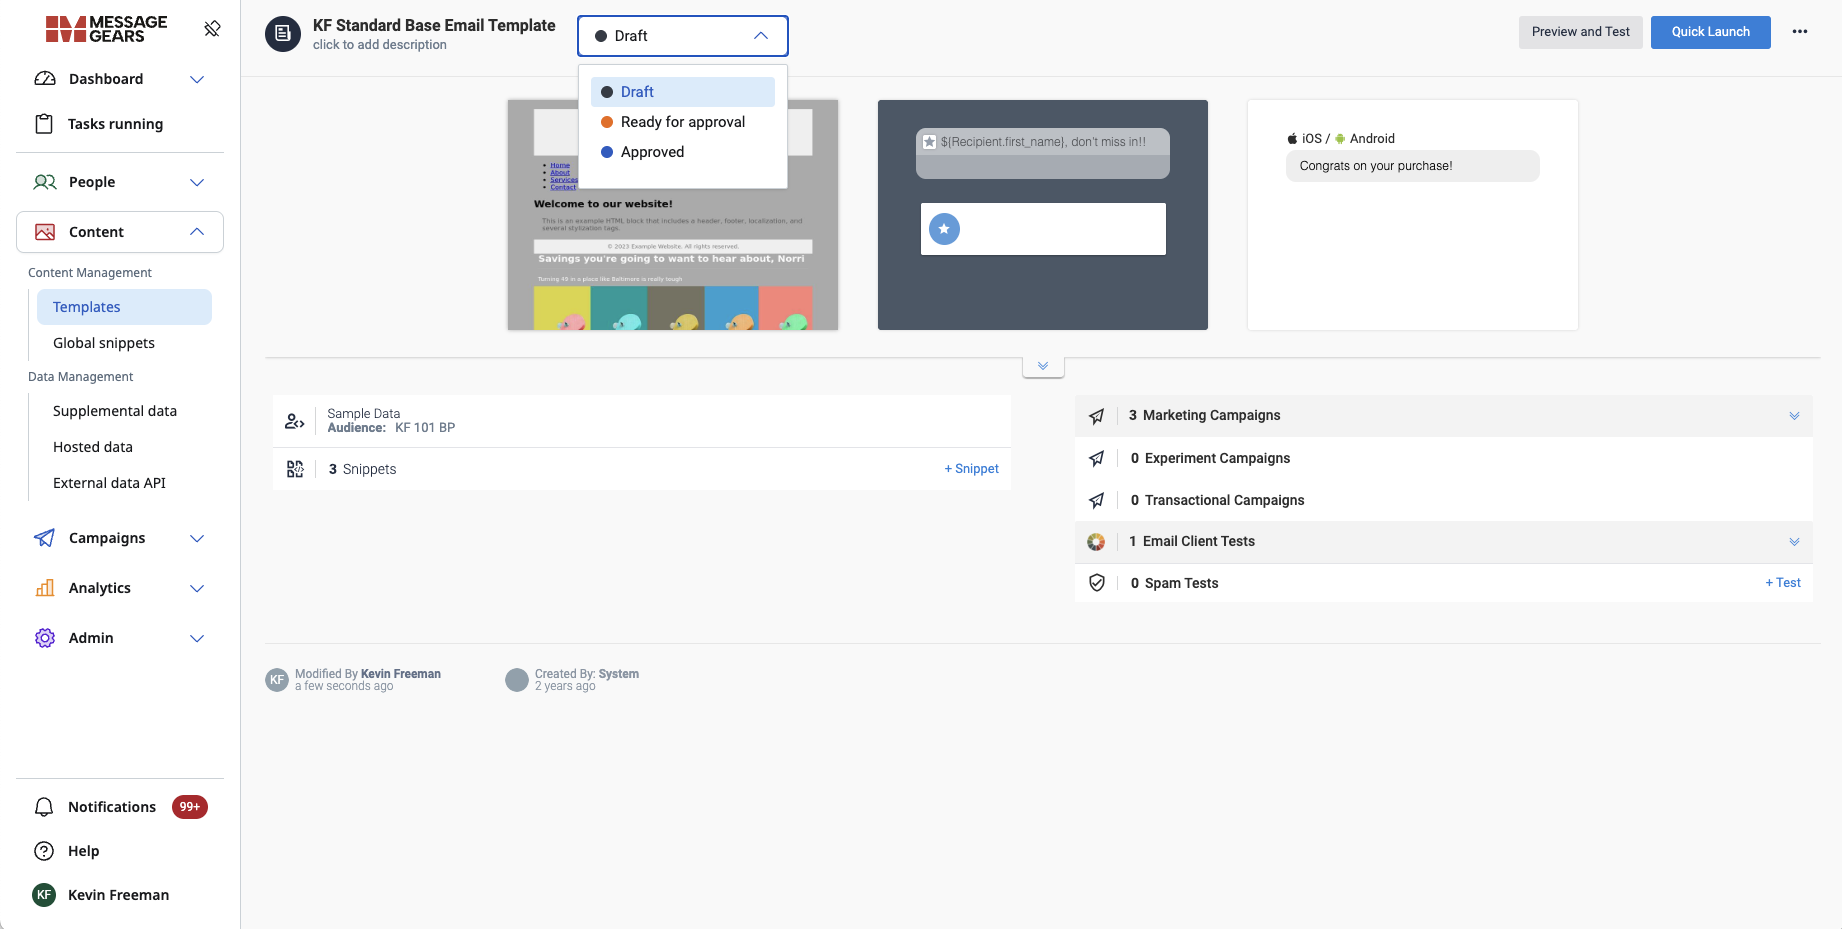
Status can be updated from the Template Overview page
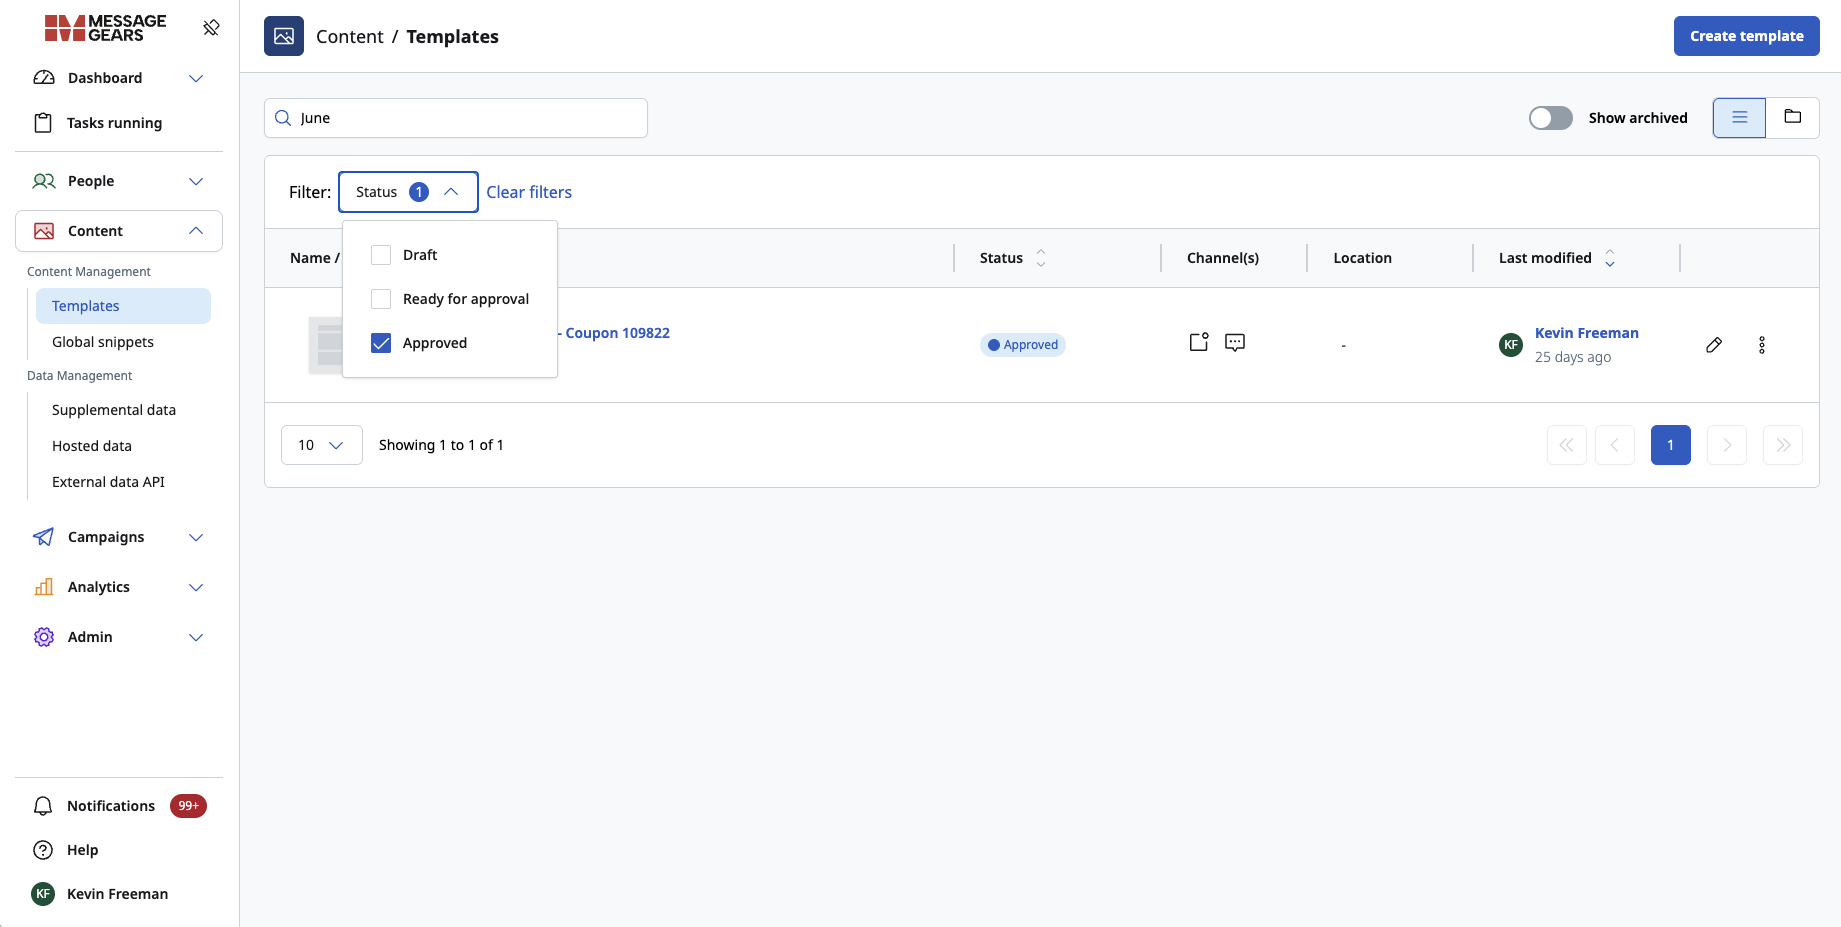
Accelerator instances using this feature will also see the statuses available for filter on the Template List page. It is also displayed next to the Template name in the folder view.
Most importantly, Templates in Draft and Ready for approval statuses will not show up as options to be added to Campaigns.
Downtime Recovery Setting
We've introduced a new setting that gives customers more control over how campaigns are rescheduled after restarting their Accelerator instance. By default, Accelerator still skips all missed schedules that occurred during downtime. Now, there's an optional setting to execute the last missed scheduled launch of a campaign.
Goals
- Allow customers to configure how campaigns behave following Accelerator restart
Within Admin > System Configuration > Job Options, find the Missed Campaign Launch Behavior field.
Select Execute the last missed schedule for a campaign to update the global behavior. If you prefer to maintain the existing behavior - skipping all scheduled sends that occurred during downtime - no action is required.
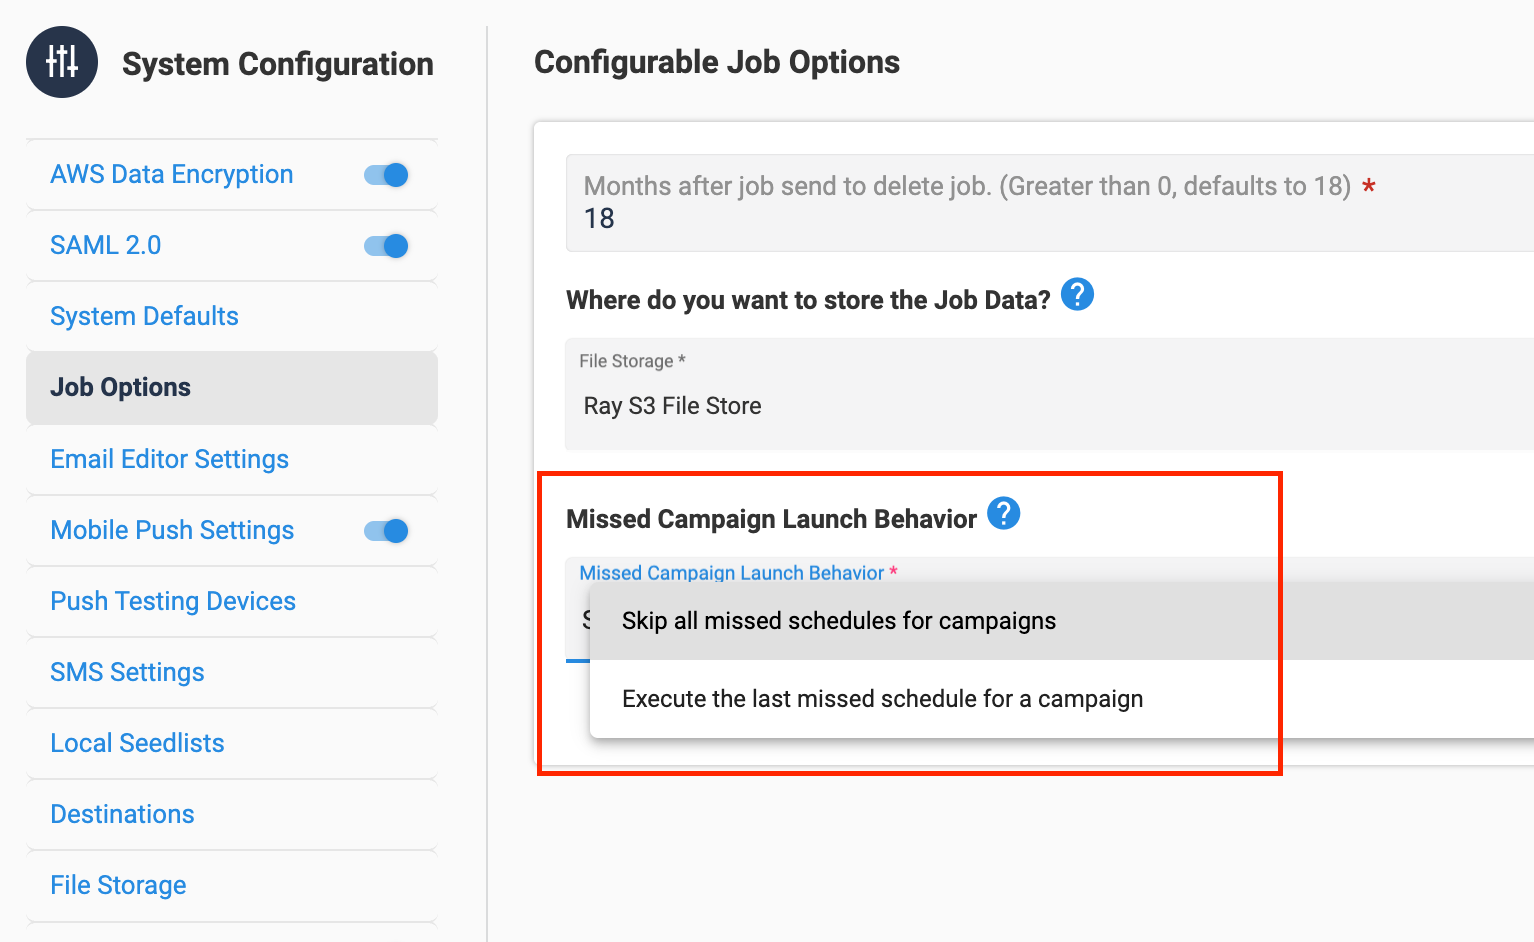
This setting applies to Marketing, Experiment, and External campaign types.
General changes
- Fixed an issue where recurring campaign schedules were not displaying in chronological order
- Fixed an issue where Quick Launch for scheduled campaigns was not respecting channel selection
- Fixed an issue where counts were not recognizing channel address fields due to case sensitivity
- Fixed an issue causing the Send Test Variant button to not work properly with local snippet references in subject lines
- Fixed an issue causing S3 bucket uploads to fail when below a certain size
- Fixed an issue which caused non-orchestrations to display as orchestrations in the folder view
- Fixed an issue where the Accelerator Logo was not scaling size properly causing issues with the left navigation bar
- Fixed an issue which resulted in the pin left navigation bar icon not being properly aligned
- Added Notification Email option to Advanced Settings as well as the Advanced card for Marketing Campaigns